
Main Courses
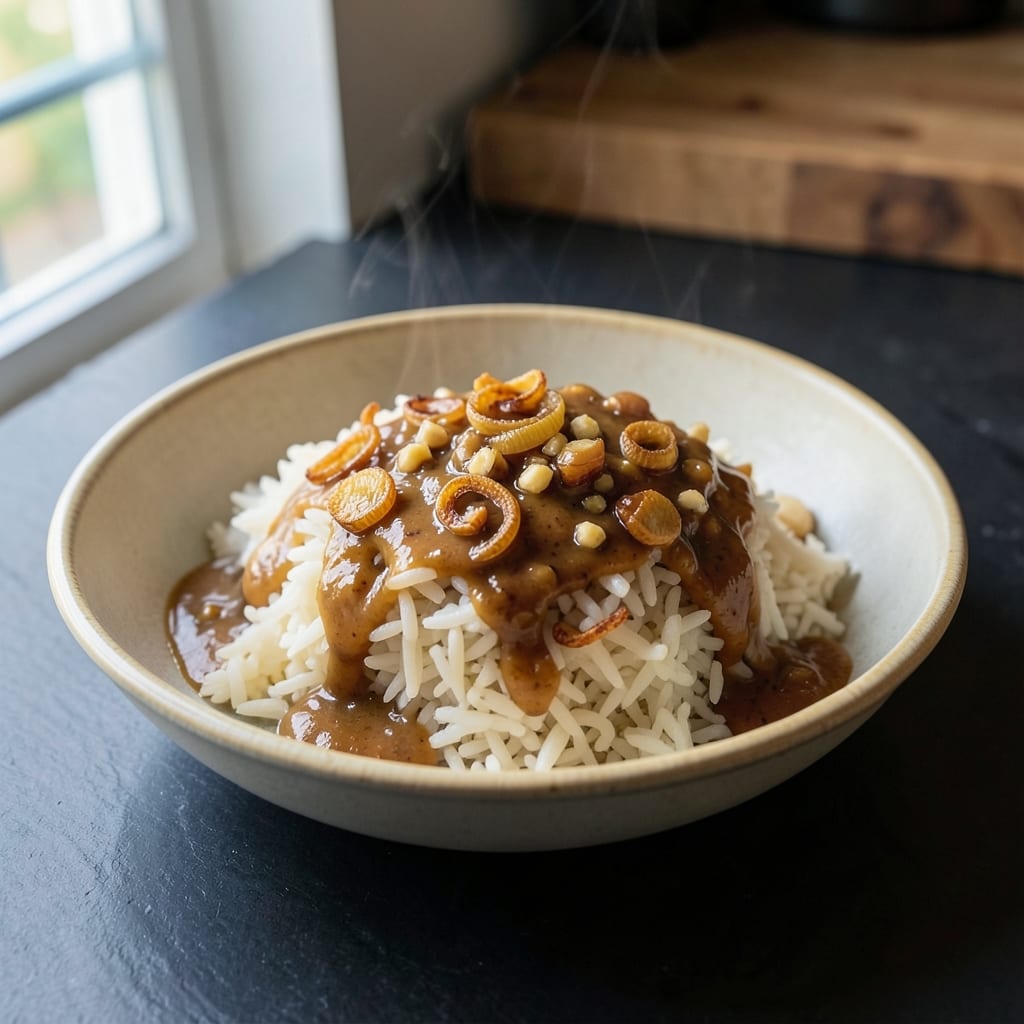
This one-pot golden crust magic transforms simple rice into a rich, aromatic side that steals every meal. 🔥 The secret lies in using one stick of butter—not just for flavor, but to create that signature crispy, caramelized crust that makes every bite irresistible. Perfect for weeknight dinners or holiday feasts, this method requires just 20 minutes and minimal effort, yet delivers restaurant-quality results. The key is choosing the right rice—jasmine or basmati work best—and cooking it in a single pot with butter, garlic, and a splash of broth. As the rice steams, the butter pools at the bottom, caramelizing into a fragrant, golden crust that adds depth to every flavor. This technique works with white rice, brown rice, or even cauliflower rice for a low-carb twist. What you’ll end up with is crispy-edged, tender rice infused with nutty butter flavor, ready to pair with grilled meats, roasted vegetables, or fresh salads. The aroma alone will have everyone at the table asking for seconds, and the best part? Only one pot to clean afterward. Whether you’re serving a crowd or prepping for meal prep, this recipe is your go-to for foolproof, flavorful rice every time. Let’s get started!
Ingredients for 1 stick butter rice
Simple ingredients, one pot, restaurant-quality butter rice in 20 minutes.
| Ingredient | Amount | Notes |
|---|---|---|
| Basmati Rice 🍚 | 1 cup | Uncooked, long-grain preferred |
| Unsalted Butter 🧈 | 1 stick | Cold, cut into 8 pieces |
| Shallot 🧅 | 1 whole | Minced, about 2 tbsp |
| Chicken Broth 💧 | 1 ½ cups | Low-sodium preferred |
| Garlic Cloves 🧄 | 3 cloves | Minced, about 1 tsp |
| Salt 🧂 | ½ tsp | Kosher or sea salt |
| Black Pepper 🌶️ | ¼ tsp | Freshly ground preferred |
| Fresh Parsley 🌿 | 2 tbsp | Chopped, for garnish |
| Lemon Zest 🍋 | 1 tsp | Optional, for brightness |
The butter is non-negotiable here—unsalted gives you the most control over seasoning. Grab a European-style butter like Plugrá or Land O'Lakes if you're unsure, but any good brand works. The basmati rice should be long-grain and uncooked—jasmine works too, but basmati toasts more beautifully. Shallots add depth without overpowering, and I always use fresh instead of powdered—it makes a difference. For the broth, low-sodium is key so you can adjust the salt to taste later.
No shallots? One small onion or 2 tbsp finely chopped yellow onion works in a pinch. Fresh garlic is ideal, but garlic powder at half the amount gets you close. Short on butter? Olive oil or ghee can substitute, though the flavor won't be identical. The parsley is purely for garnish, so dried parsley at one-third the amount is fine if you're in a bind. Lemon zest is optional but adds a bright finish—lemon juice at half the amount works if you don't have zest. Always taste the broth before adding rice—it should be seasoned like you want the final rice to taste.
This rice reheats beautifully—just add a splash of water and cover until steamed through. Keeps 3-4 days in the fridge, freezes for up to 3 months if portioned into airtight containers. For extra crispiness, spread a thin layer of butter on the bottom of the pot before toasting the rice. The golden crust is worth the extra minute of attention—it's what makes this dish special.
Why You'll Love This Recipe
- Five-Ingredient Magic: I swear by this—just rice, butter, shallots, broth, and garlic. That’s it. No fancy prep, no hidden pantry raids. The butter melts into the rice while you chop, and by the time you’re done, you’ve got something that tastes like it simmered for hours.
- Butter Kiss: One stick of butter transforms this from basic rice to ridiculously good. It coats every grain, making it creamy without being heavy. Honestly, the first time I skipped the butter, I regretted it immediately—don’t skip it.
- Lunchbox Hero: This keeps like a dream for days, so I make a big batch on Sundays. Pack it cold for work or reheat it for dinner—it’s the same great taste either way. My kids actually finish their lunches with this, and that’s saying something.
- Budget Flex: Chicken broth and butter stretch a long way here. It’s cheap, filling, and still feels special. Between us, this is how I feed my family well without breaking the bank—especially when the shallots are on sale.
Step-by-step instructions for one-pot golden crust magic
This simple method transforms humble basmati rice into a restaurant-worthy dish with crispy, buttery perfection.
🍳 Step 1: Sauté Shallots and Garlic in Butter Until Fragrant
Melt 1 stick unsalted butter in a heavy-bottomed pot over medium heat. Add the minced shallot and cook for 3-4 minutes until softened and translucent. You'll see it go from pale to slightly golden—this is your signal to move to the next step.
Add the minced garlic cloves and cook for another 30 seconds until fragrant. Be careful not to let it brown—garlic burns quickly and turns bitter. The butter should foam gently around the aromatics, creating a fragrant base for your rice. This step builds the flavor foundation that makes this dish so special.
👨🍳 Step 2: Toast the Rice Until Golden and Nutty
Add the 1 cup basmati rice to the pot and stir to coat it completely in the buttery shallot mixture. Cook for 2-3 minutes, stirring constantly, until the rice grains become translucent at the edges and develop a beautiful golden color. This toasting process, called "blooming," creates that coveted crispy crust we're after.
Here's the thing—don't walk away. You want the rice to develop a nice golden hue before adding liquid. If it sticks slightly, that's normal and actually good—it means the rice is absorbing all that flavorful butter. The rice should look like it's getting a nice tan, not burned. This step is what transforms ordinary rice into something extraordinary.
🥘 Step 3: Add Broth and Seasonings for Perfect Absorption
Pour in the 1.5 cups chicken broth and bring to a gentle boil. Add 0.5 tsp salt and 0.25 tsp black pepper, then stir once to distribute the seasonings. Reduce heat to low and cover the pot with a tight-fitting lid. Let it simmer for 15 minutes without peeking or stirring.
This is where the magic happens. The rice will absorb all the liquid and cook through evenly. The lid creates a steam chamber that prevents evaporation, ensuring each grain gets perfectly tender. I know it's tempting to check on it early, but resist the urge—disturbing the rice at this stage can prevent that golden crust from forming properly.
🔥 Step 4: Create the Golden Crust (The Moment That Matters!)
After 15 minutes, remove the lid and increase heat to medium-high. Let the rice cook uncovered for 2-3 minutes until the top develops a beautiful golden crust. You'll see it go from matte to glossy and crispy—this is what makes this dish so special. The edges should pull away slightly from the pot.
Don't be afraid of this step. The crust might look too dark at first, but it's exactly what you want. This crispy layer is packed with flavor from all that butter and shallot. If you're worried about burning, just keep an eye on it—it should crisp up nicely before anything burns. This is the moment that transforms good rice into something truly memorable.
⏰ Step 5: Rest and Finish with Fresh Herbs
Once the crust is golden, remove from heat and let the rice rest, covered, for 5 minutes. This resting period allows the steam to redistribute throughout the pot, ensuring every grain is perfectly tender. During this time, stir in the 1 tsp lemon zest (if using) and 2 tbsp chopped fresh parsley—this adds a bright, fresh finish that cuts through the richness.
Fluff the rice gently with a fork before serving. The crust should still be crispy on top while the rice underneath is perfectly tender. Serve immediately with the crust intact—it's the best part! This one-pot method delivers restaurant-quality rice with minimal effort, and the crispy top makes it feel like a special occasion dish every time.
Pro Tips For Making 1 Stick Butter Rice
- COOK RICE IN BROTH, NOT WATER: The butter and shallot flavor clings to the rice when you cook it in broth instead of water—don’t skimp on the 2 cups. If you’re short, use half broth and half water, but the texture won’t be as rich. (I’ve tried both, and the difference is noticeable.)
- MINCE SHALLOTS FINE: Chop those shallots smaller than you think you need—tiny dice, not thick slices. Big chunks burn before the rice is done, leaving you with bitter bits instead of silky flavor. (Yes, even if it looks like overkill.)
- DON’T STIR AFTER BUTTER MELTS: Once the butter’s fully melted and the shallots are soft, just let the rice toast in the pan for 2 minutes. Stirring now kicks up a cloud of flour that burns instantly—you’ll end up with a slightly bitter taste. (I learned this the hard way.)
- USE COLD BUTTER: Cut that stick of butter into small cubes and toss it in with the rice before adding broth. The cold butter coats each grain as it cooks, making the rice creamier than if you melted it first. (Sounds weird, but it works—trust me.)
Essential equipment for 1 stick butter rice
Heavy-Bottomed Pot
This is your secret weapon for even heat distribution and that perfect golden crust. I swear by a 10-inch stainless steel pot like the All-Clad Stainless or Calphalon Classic—they handle high heat beautifully without scorching. If you're on a budget, a Lodge enameled cast iron Dutch oven works wonders too. The key is avoiding thin, flimsy pots—they heat unevenly and can burn your butter before the rice is ready. 🔥
Wooden Spoon
A heat-resistant wooden spoon is essential for stirring the rice without scratching your pot. I use a siliconized bamboo spoon from OXO Good Grips—it's sturdy, non-scratch, and won't melt at high heat. Avoid metal spoons during the toasting phase, as they can conduct heat too aggressively and burn your garlic or shallots. The spoon should be long enough to reach all corners of your pot for even coating.
Fine-Mesh Strainer
For rinsing your rice before cooking, a fine-mesh strainer removes excess starch that can make your rice gummy. The OXO Good Grips Collapsible Strainer is my go-to—it's durable, easy to clean, and collapses for compact storage. Rinsing rice isn't mandatory, but it helps achieve that perfect separate-grain texture. If you skip this step, just be extra gentle when stirring the rice in the pot.
Kitchen Timer
Timing is everything with this recipe, especially that crucial 15-minute simmer. A digital kitchen timer with a loud alarm ensures you don't overcook or undercook your rice. I recommend the Westmark 4-Function Timer—it's affordable, reliable, and has a bright display. Set it before you start cooking so you can focus on the process without constantly checking your watch. This simple tool prevents the most common rice-cooking mistake: peeking too early! ⏰
Chef's Knife
A sharp 8-inch chef's knife is perfect for mincing shallots and garlic to the perfect consistency. The Wüsthof Classic or Shun Premier are excellent choices if you're investing in quality. For budget-friendly options, Mercer Culinary Genesis knives hold up well. The finer you mince your aromatics, the more evenly they'll distribute throughout the rice.
Lid with Handle
A tight-fitting lid with a handle is crucial for creating that steam chamber during the simmering phase. Most stainless steel lids that fit your pot will work, but I prefer one with a glass or silicone seal to prevent steam from escaping. If your pot doesn't have a lid, a parchment paper cover secured with a rubber band works in a pinch. The lid helps develop that signature crispy crust while keeping the rice perfectly tender underneath. 💫
Nutrition facts
Frequently asked questions
Can I use brown rice instead of basmati?
Yes, but you'll need to adjust the cooking time and liquid ratio. Brown rice takes about 45 minutes total (instead of 20 minutes for basmati) and requires 2 cups broth instead of 1.5 cups. Toast it for 2-3 minutes first, then simmer covered for 35 minutes before creating the crust. The texture will be chewier, but the buttery flavor works beautifully!
Why does my butter rice turn out mushy?
This usually happens from one of three things: peeking too early, using too much liquid, or not toasting the rice properly. The golden crust forms during the final 2-3 minutes of uncovered cooking—don't disturb it! For basmati, stick to the 1:1.5 rice-to-broth ratio and always toast the rice first to develop flavor and texture.
Can I make this with olive oil instead of butter?
Use 3 tablespoons olive oil (about the same amount as 1 stick butter) and add 1/2 teaspoon garlic powder to mimic the flavor. The crust won't be as rich, but it'll still be delicious. For extra depth, add 1/4 teaspoon smoked paprika when toasting the rice. The texture will be slightly different but still satisfying.
How do I prevent the rice from sticking to the pot?
First, make sure your pot is properly heated before adding butter. Stir the rice constantly during the 2-3 minute toasting phase to coat all grains. After adding broth, stir just once to distribute seasonings. For extra insurance, add 1/2 teaspoon salt to the butter before toasting—this helps prevent sticking by creating a better crust.
What's the best way to reheat this butter rice?
Sprinkle 1 tablespoon water over the rice in the pot, cover tightly, and heat on low-medium for 3-5 minutes. The steam will restore moisture without making it soggy. For microwave reheating, cover with a damp paper towel and heat in 30-second intervals, stirring between each. Never add liquid directly to cold rice—it can turn mushy!