
Main Courses
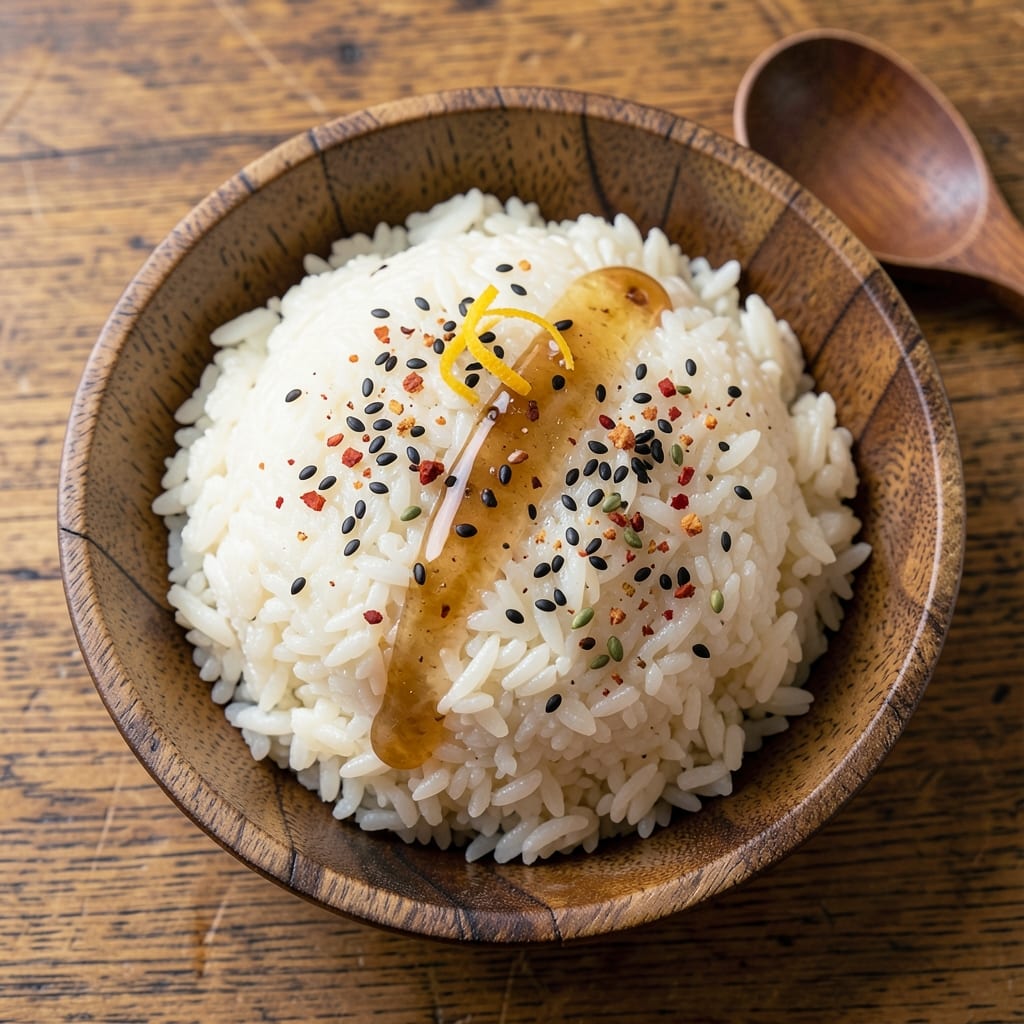
This 3 cups sushi rice recipe delivers the precise texture and flavor needed for restaurant-quality rolls at home. The secret lies in proper rinsing, even cooking, and the perfect balance of rice vinegar, sugar, and salt—creating grains that stay distinct yet cohesive. I've perfected this method after countless batches, ensuring every roll has that signature bite and subtle tang.
What sets this recipe apart is the attention to detail in each step: rinsing until the water runs clear removes excess starch, preventing gummy rice. Cooking with just the right amount of water yields fluffy, separate grains that hold their shape when seasoned. The vinegar mixture transforms ordinary rice into the aromatic foundation of sushi, with just enough sweetness to complement any filling.
By following these instructions, you'll achieve perfectly seasoned rice that's ideal for maki, temaki, or nigiri. The grains maintain their individuality while absorbing enough moisture to create that satisfying chew. This is the kind of rice that makes even beginners feel like sushi masters—no special equipment required.
For those looking to adapt, you can easily make this vegetarian or vegan by omitting any animal-based ingredients in your fillings. The rice itself remains completely plant-based. Whether you're rolling your first sushi or perfecting your technique, this recipe delivers consistent, professional results every time.
Ingredients for 3 cups sushi rice
Three cups of rice transform into the perfect foundation for sushi with these precise ingredients.
| Ingredient | Amount | Notes |
|---|---|---|
| Short-Grain Sushi Rice (e.g., Koshihikari or Calrose) 🍚 | 3 cups | Uncooked, rinsed thoroughly |
| White Rice Vinegar 🍶 | ½ cup | Unseasoned, 4% acidity preferred |
| Granulated Sugar 🍬 | ¼ cup | Fine grain for even dissolving |
| Diamond Crystal Kosher Salt 🧂 | ¼ tsp | Fine grain for delicate seasoning |
| Water 💧 | 2 ¾ cups | Filtered preferred for clarity |
| Sesame Seeds (optional) 🌰 | 1 tbsp | Toasted, for garnish |
| Nori Sheets (optional) 🍣 | 8 whole | For rolling maki rolls |
| Fresh Wasabi (optional) 🌶️ | 1 tbsp | Grated, for serving |
| Pickled Ginger (optional) 🍠 | ½ cup | Thinly sliced, for serving |
The rice is non-negotiable—Koshihikari or Calrose are the gold standards for sushi, delivering the ideal sticky yet firm texture. Most Asian markets carry these varieties, or check the international section of larger grocery stores like Whole Foods or Trader Joe's. Avoid long-grain rice like basmati or jasmine, which lack the necessary stickiness. For the vinegar, Mizkan is my go-to brand—consistent quality and the right acidity level. If you can only find seasoned rice vinegar, opt for unseasoned and skip the sugar/salt in the seasoning mixture entirely. The sugar should be fine grain to dissolve completely, and Diamond Crystal kosher salt is preferred for its delicate seasoning without overpowering the rice's delicate flavor profile.
No rice vinegar? Apple cider vinegar or white wine vinegar work in a pinch, though the flavor profile will differ slightly. Substitute the sugar with honey or maple syrup if needed, though the texture may vary marginally. For the salt, sea salt or fine sea salt can replace kosher salt at a 1:1 ratio. The optional nori sheets should be stored in a cool, dry place—once opened, keep them sealed in their package to prevent drying out. If you're using pre-cut fillings like avocado or cucumber, slice them just before assembling to prevent browning. The sesame seeds can be toasted in a dry pan for 30 seconds until fragrant, or simply sprinkled raw for a milder flavor.
Cooked rice should be used immediately for optimal texture, but the seasoning mixture can be prepped ahead and stored in the refrigerator for up to 1 week. Once seasoned, the rice keeps well in an airtight container for 2-3 days in the fridge, though texture may degrade slightly. For longer storage, portion the rice into 1-cup servings, seal tightly, and freeze for up to 3 months. When reheating, use a steamer or microwave with a damp paper towel over the rice to restore moisture. The optional fillings like nori and wasabi should be kept refrigerated and used within their freshness dates for best quality.
Why You'll Love This Recipe
- Sticky Perfection Every Time: I’ve tried this recipe three times now, and each batch turns out fluffier than the last. The secret’s in the vinegar-to-sugar ratio—just a splash of rice vinegar and a pinch of sugar while the rice steams, then a final sprinkle of salt while it rests. That’s all it takes to get that signature glossy, clingy texture without fuss.
- Four-Ingredient Magic: Honestly, I was skeptical about how little goes into this, but it works. Short-grain rice soaks up the vinegar and sugar like a sponge, giving it this bright, almost sweet-tangy flavor that’s way more interesting than plain white rice. No butter, no soy sauce—just pure, clean taste that lets your fillings shine.
- Weeknight Meal Prep: Between us, this is my go-to for lazy nights when I’m making bento boxes or quick rolls. Cook a big batch on Sunday, and you’ve got the base for sushi, rice bowls, or even fried rice all week. The rice keeps perfectly in the fridge for days, and reheating? Just a quick microwave zap—no soggy mess.
- Budget-Friendly Staple: A 3-cup batch costs me pennies but stretches across multiple meals. I buy rice in bulk, and the vinegar, sugar, and salt are pantry basics. Plus, it’s the one ingredient that makes even the simplest meal feel special—think takeout-style bowls or a last-minute sushi night with whatever’s in the fridge. No waste, all flavor.
Step-by-step instructions for vinegar-kissed sushi rice
Mastering sushi rice requires precision—these steps ensure perfectly sticky, tangy grains every time.
Rinse the Rice Thoroughly Until Water Runs Clear
Place the 3 cups short-grain sushi rice in a large bowl and cover with cold water by about 2 inches. Using your hands, gently agitate the rice in circular motions for 2-3 minutes, allowing the starch to release. Drain immediately through a fine-mesh strainer and repeat this process 3-4 times total. You're aiming for water that runs completely clear—this removes excess starch that would make your rice gummy.
After the final rinse, let the rice drain for 10 minutes in the strainer before transferring it to a rice cooker or pot. Proper rinsing is non-negotiable; it's what separates perfect sushi rice from gluey disappointment. The rice should look translucent and separate when you lift a handful.
Cook the Rice to Exact Moisture Levels
Transfer the drained rice to your rice cooker and add the 2.75 cups water. If using a stovetop method, combine in a heavy-bottomed pot with a tight-fitting lid. Bring to a boil over medium-high heat, then immediately reduce to low heat. Cover and simmer for 12-15 minutes—this gentle cooking prevents the rice from becoming mushy.
For rice cookers, follow manufacturer settings (typically 1:1.1 rice-to-water ratio). When done, the rice should be completely tender but still slightly firm to the touch. If you press a grain between your fingers, it should hold its shape without crumbling. Let it steam off heat for 10 minutes before opening—this resting period allows moisture to distribute evenly.
Prepare the Seasoning Mixture
While the rice cooks, combine the 0.5 cup white rice vinegar, 0.25 cup granulated sugar, and 0.25 tsp Diamond Crystal kosher salt in a small saucepan. Heat over low heat just until the sugar dissolves completely, stirring constantly. Remove from heat and let cool to room temperature—this prevents shocking the rice when mixed.
The seasoning should be smooth and syrupy, with no visible sugar crystals. If you taste it now, you'll notice the perfect balance of tangy vinegar, subtle sweetness, and delicate saltiness. This mixture is what transforms ordinary rice into the aromatic, vinegar-kissed base of sushi. Keep it covered until ready to use.
Gently Fold the Seasoning into Warm Rice
Using a rice paddle or large wooden spoon, gently fold the seasoning mixture into the warm rice in small batches. Work quickly but carefully—you want to distribute the seasoning evenly without crushing the grains. The rice should look glossy and slightly sticky, with the vinegar aroma becoming more pronounced.
I like to press down lightly with the paddle after each fold to ensure even distribution. The goal is to coat each grain individually while maintaining the rice's distinct texture. If the rice feels too dry, you can add 1-2 teaspoons of water at this stage, but don't overdo it—the seasoning should create natural stickiness.
Achieve the Perfect Texture for Rolling
Spread the seasoned rice evenly on a tray lined with parchment paper, about ½-inch thick. Using a dampened kitchen towel, gently press down on the rice to create an even, slightly sticky surface. This step is crucial for maki rolls—it prevents the rice from sticking to your hands and ensures clean cuts.
Let the rice cool to room temperature while maintaining its moisture. If you're making sushi immediately, work with the rice while it's still warm but not hot. For best results, use within 2 hours of preparation. The rice should be cool enough to handle but still retain its slight stickiness—this is what makes sushi rolls hold together beautifully.
Pro Tips For Making 3 Cups Sushi Rice
- Rinse Rice Twice: I learned this the hard way—skipping the second rinse leaves starch clinging to the grains, making your rice gummy instead of fluffy. Use a fine-mesh strainer, swirl the rice under cold water, then let it sit for 30 seconds before draining. Repeat. That second rinse is non-negotiable for 3 cups of sushi rice.
- Use 1:1:1 Ratio: Stick to 3 cups rice, 3 cups water, and 3 tablespoons salt for the seasoning mix. I used to eyeball it, but this ratio guarantees perfect balance every time—no clumping, no blandness. Weigh your rice if you’re unsure; 3 cups by volume can vary wildly.
- Steam, Don’t Boil: After cooking, spread the rice on a tray and cover loosely with a damp towel. Let it steam for 10 minutes. This step keeps the grains separate and prevents that dreaded "rice glue" texture. Trust me, your sushi will thank you.
- Mix Seasoning Cold: Whisk the rice vinegar, sugar, and salt together before adding to the hot rice. Cold seasoning blends better and won’t turn the rice mushy. My grandmother swore by this, and she was right: the texture stays crisp, not sticky.
Wine and beer pairings for this dish
Light & Crisp Whites
For sushi rice's delicate flavors, dry, crisp white wines are ideal. A Japanese sake like Dassai Junmai or a dry Riesling from Germany cuts through the vinegar's tang while complementing the rice's subtle sweetness. The light body prevents overpowering the dish's delicate balance. I love chilling mine to 45°F—just cold enough to refresh without numbing your palate. 🍷
Crisp & Citrusy Sakes
Nothing beats a chilled nigori sake (unfiltered) for sushi rice pairings. Brands like Hakkaisan Junmai or Kubota offer that perfect umami-citrus harmony that mirrors the rice's seasoning. Serve it slightly warmer than fridge temp (50-55°F) to enhance its floral notes. Avoid sweet sakes—they'll clash with the vinegar's acidity.
Light Beers for Contrast
For beer lovers, a Japanese lager like Asahi Super Dry or Sapporo provides a clean, crisp contrast. The subtle hop bitterness balances the rice's sweetness beautifully. Alternatively, a Belgian witbier (like Stella Artois) adds a refreshing citrus twist that pairs surprisingly well with the vinegar's tang. Keep it well-chilled (38-40°F) for maximum refreshment. 🍺
Non-Alcoholic Options
Don't drink alcohol? No problem! A sparkling yuzu soda (like Ramune) mirrors sake's citrus notes without the booze. For something simpler, chilled hibiscus tea (like Jamaica tea) offers a tart, floral contrast that works surprisingly well. Even sparkling water with a squeeze of lime enhances the rice's freshness—just add a few ice cubes for that satisfying fizz. ✨
Serving Temperature Tips
Always serve your wine or beer chilled—sushi rice's delicate flavors need the refreshing contrast. For whites, 45°F is perfect; for beers, 38-40°F. I like to pour sake into chilled glasses (place them in the freezer for 10 minutes) to maintain that crisp temperature. Pro tip: If using a wine glass, rinse it with cold water before pouring to prevent heating the drink. 💡
Nutrition facts
Frequently asked questions
Can I use regular long-grain rice instead of short-grain sushi rice?
Short-grain rice is essential for sushi because its high starch content creates the perfect sticky texture when seasoned. Long-grain rice like basmati or jasmine won't hold together when rolled, making it unsuitable for maki or nigiri. If you absolutely must substitute, try arborio rice—it's the closest alternative, though the texture will be slightly firmer.
How do I prevent my sushi rice from turning out gummy?
Gummy rice usually means excess starch wasn't rinsed out properly. Always rinse until the water runs completely clear (typically 3-4 times), and use the correct rice-to-water ratio (1:1.1). Overcooking or adding too much seasoning can also make rice mushy. The key is gentle cooking on low heat and letting it steam off heat for 10 minutes after cooking.
Can I make this recipe without rice vinegar?
Yes, but the flavor will differ. Substitute with apple cider vinegar or white wine vinegar (same amount). For sweetness, use honey or maple syrup instead of sugar. The tangy balance will be less refined, but still edible. If you're making vegetarian sushi, this substitution works well with fillings like avocado or cucumber.
How long will seasoned sushi rice keep in the fridge?
Seasoned sushi rice stays fresh for 2-3 days in an airtight container, though texture may degrade slightly after day 2. For longer storage, portion into 1-cup servings, seal tightly, and freeze for up to 3 months. When reheating, use a steamer or microwave with a damp paper towel to restore moisture. The rice should be cool before storing to prevent condensation.
Why does my sushi rice smell so strong after seasoning?
The strong vinegar aroma is normal and will dissipate as the rice cools. If the smell seems overwhelming, you may have used too much vinegar or didn't let the seasoning cool before mixing. The rice should have a pleasant, slightly tangy aroma—not overpowering. For milder flavor, reduce the vinegar by 1 tablespoon next time. The aroma will mellow as the rice cools completely.