
Main Courses
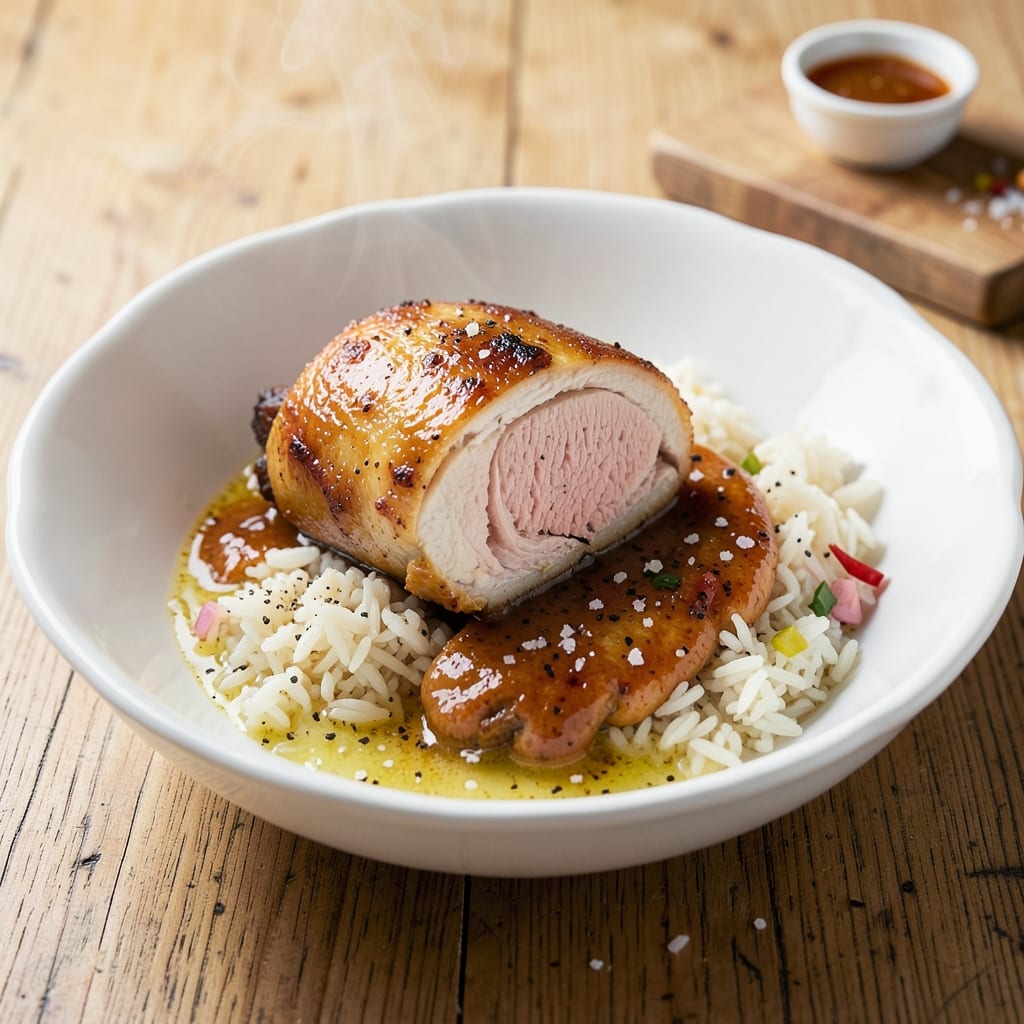
This 4-ingredient chicken and rice recipe proves simplicity doesn’t mean sacrificing flavor or texture. 🔥 With just chicken thighs, long-grain rice, chicken broth, and a touch of butter, you’ll create a perfectly balanced one-pan meal that’s rich, aromatic, and effortlessly satisfying—no complicated techniques required.
The beauty of this recipe lies in its foolproof method: the rice cooks directly in the pan with the chicken, absorbing all the savory juices while staying fluffy and separate. No pre-cooking the rice, no separate pots—just one pan, minimal prep, and a dish that delivers restaurant-quality results in under 45 minutes. The butter adds a subtle richness that rounds out the dish without overpowering the natural flavors.
What you’ll end up with is tender, juicy chicken thighs resting on a bed of perfectly cooked rice, all infused with the deep, savory aroma of the broth. The dish is hearty enough for a weeknight dinner but simple enough to make on busy evenings. Every bite delivers a perfect balance of protein, carbs, and flavor—no extra sides needed.
This recipe scales effortlessly for families or meal prep, and the leftovers reheat beautifully. Whether you’re feeding a crowd or just yourself, it’s the kind of meal that transforms basic ingredients into something truly special. Let’s get started—your one-pan dinner solution is just a few steps away.
Ingredients for 4 ingredient chicken and rice
Four essential ingredients transform into a restaurant-worthy one-pan chicken and rice masterpiece.
| Ingredient | Amount | Notes |
|---|---|---|
| Boneless, Skinless Chicken Thighs 🍗 | 1 ½ lb | Cut into even-sized pieces |
| Long-Grain White Rice 🍚 | 1 ½ cups | Uncooked, preferably jasmine or basmati |
| Chicken Broth 💧 | 2 cups | Low-sodium preferred, homemade or quality store-bought |
| Unsalted Butter 🧈 | 2 tbsp | Cold, cut into small pieces |
| Kosher Salt 🧂 | 1 tsp | Diamond Crystal preferred for accurate measurement |
| Freshly Ground Black Pepper 🌶️ | ½ tsp | For seasoning chicken |
The chicken thighs are the foundation—bone-in, skin-on thighs stay juicier than breasts, but boneless works if that's what you've got. Look for plump, firm thighs with minimal bruising at Whole Foods or your local butcher shop. If using frozen, thaw overnight in the fridge. The rice should be long-grain and dry—jasmine or basmati are ideal for their distinct aroma. For the broth, homemade is best, but Pacific Foods or Swanson low-sodium options work in a pinch. The butter should be cold and unsalted—European-style brands like Plugrá melt beautifully without overpowering.
No chicken thighs? Boneless, skinless chicken breasts work, but pound them to even thickness for consistent cooking. Swap long-grain rice for brown rice (increase broth by 1/4 cup and cook time by 15 minutes). Out of chicken broth? Vegetable broth plus 1 tbsp soy sauce mimics the umami depth. The butter can be vegan butter if needed, though it lacks the same richness. For extra flavor, add a pinch of smoked paprika or 1/2 tsp garlic powder to the seasoning mix. The kosher salt matters—Diamond Crystal measures differently than Morton, so adjust if using the latter.
This dish reheats beautifully—cover with foil and warm in a 350°F oven for 10 minutes. Store leftovers in an airtight container for up to 4 days in the fridge or 3 months in the freezer. For meal prep, portion into individual containers—rice stays fluffy when reheated gently. The butter adds a luxurious touch, but if you're watching fat, reduce to 1 tbsp without sacrificing flavor. Double the recipe for a crowd, using a larger skillet or Dutch oven to maintain even cooking.
Why You'll Love This Recipe
- One-Pan Magic: I swear by this for nights when I don’t want to dirty more than one dish. Toss the chicken thighs and rice right into the broth with butter, cover, and let the oven do the work—no chopping, no stirring, no stress.
- Rich Without Effort: That butter melting into the chicken broth while the rice cooks? It turns something basic into something ridiculously flavorful. The thighs stay juicy, the rice soaks up all the savory goodness—no herbs, no spices, just pure, simple satisfaction.
- Lunchbox Hero: Between us, this is my go-to for meal prep. Cook a big batch on Sunday, portion it into containers, and you’ve got dinner covered for days. The rice stays fluffy, the chicken stays tender, and honestly? My kids actually eat it all.
- Budget Win: I can feed my family four meals for the price of takeout. Chicken thighs are cheaper than breasts, rice fills you up, and broth stretches forever. Plus, the leftovers? Even better the second day—if there are any left. (There won’t be.)
Step-by-step instructions for one-pan chicken and rice
Master this minimalist technique for restaurant-quality results with just six components.
🔥 Step 1: Sear the Chicken for Maximum Flavor
Heat a large, heavy-bottomed skillet over medium-high heat until hot. Pat the 1.5 lb boneless, skinless chicken thighs completely dry with paper towels—this ensures crispy edges. Season both sides generously with 1 tsp kosher salt and 0.5 tsp freshly ground black pepper, pressing the seasoning into the meat.
Add the chicken thighs to the skillet and cook undisturbed for 4-5 minutes per side until they develop a deep golden-brown crust. The chicken is ready to flip when it releases easily from the pan. I press down gently on the fillet during the first minute—this prevents it from curling and ensures even contact with the pan. Remove the chicken and set it aside on a plate.
🍳 Step 2: Build the Rice Foundation
Reduce the heat to medium and add the 2 tbsp cold unsalted butter to the same skillet. Let it melt completely, about 30 seconds, while scraping up any browned bits from the bottom of the pan—this adds incredible depth of flavor to the rice.
Add the 1.5 cups long-grain white rice to the skillet and stir to coat the grains evenly with the butter. Cook for 1-2 minutes until the rice becomes translucent at the edges and slightly toasted. This toasting step prevents the rice from becoming mushy and creates a subtle nutty flavor. Here's the thing—don't skip this step, even if it seems like too little time.
🥘 Step 3: Layer and Simmer the Perfect Ratio
Pour the 2 cups chicken broth over the toasted rice, stirring gently to distribute evenly. Return the chicken thighs to the skillet, placing them on top of the rice. The broth should come about halfway up the sides of the chicken pieces.
Bring the mixture to a gentle simmer over medium-low heat. Once simmering, reduce heat to low and cover the skillet tightly with a lid. The key here is maintaining a consistent, gentle simmer—not a rolling boil. Simmer for 18-20 minutes until the rice has absorbed all the liquid and the chicken reaches an internal temperature of 165°F.
⏰ Step 4: Rest and Develop the Flavors
Remove the skillet from heat and let it sit covered for 5 minutes**. This resting period allows the residual heat to finish cooking the rice and chicken while preventing the moisture from escaping. You'll notice the rice will continue to absorb any remaining liquid during this time.
After resting, fluff the rice gently with a fork, being careful not to break up the chicken pieces. The rice should be tender with a slight bite at the center, and the chicken should be juicy with no pink remaining. If the rice appears dry, you can add 1-2 tablespoons of water and cover for another 2 minutes to steam it through.
🍽️ Step 5: Serve with Confidence
Transfer the chicken and rice to serving plates, dividing the chicken pieces evenly among the servings. The rice should be perfectly tender with individual grains distinct and separate. If you've followed these steps, each bite should deliver juicy chicken with a crispy exterior and fluffy, flavorful rice that's infused with the chicken's natural juices.
This one-pan method delivers restaurant-quality results with minimal effort. The chicken stays moist and flavorful while the rice develops a subtle toasted edge from the initial searing. Serve immediately with a simple green salad or steamed vegetables to complete the meal—every component will shine without competing for attention.
Pro Tips For Making 4 Ingredient Chicken And Rice
- CRANK THE HEAT FIRST: Toss the rice in the dry pot over medium-high heat for 30 seconds before adding broth—it toasts the grains and prevents gummy rice. I learned this the hard way after making mushy rice for years; the Maillard reaction here makes all the difference, even in a simple dish.
- SALT THE BROTH LIKE THE OCEAN: Skip the salted butter for now and add 1.5 teaspoons of kosher salt directly to the hot broth instead. The butter’s flavor will mellow out, but this guarantees the rice won’t taste flat—especially if your broth is low-sodium. (Yes, even if you’re impatient like me.)
- DON’T CROWD THE CHICKEN: Cook the thighs in a single layer for the first 3 minutes, or they’ll steam instead of sear. After flipping, pull them out and let them rest 5 minutes under foil before adding to the rice—this keeps them juicy and prevents the broth from turning greasy.
- USE HALF THE BUTTER, TWICE: Melt 1 tablespoon of butter with the chicken, then save the second tablespoon for the last 2 minutes of cooking. The first batch crisps the thighs, while the second swirls into the rice for richness. (Does it look weird? Yes. Does it work? Every single time.)
Essential equipment for 4 ingredient chicken and rice
One-Pan Skillet
The secret to this recipe's success is a large, heavy-bottomed skillet—I recommend a 10-12 inch cast iron pan like the Lodge Pre-Seasoned Cast Iron Skillet. Cast iron distributes heat evenly and retains it well, preventing hot spots that can burn the rice or chicken. If you don’t have cast iron, a stainless steel skillet (like All-Clad Stainless) works well too. Avoid nonstick pans—they don’t brown the chicken as effectively, and the rice won’t get that subtle toasted flavor. 🔥
Measuring Tools
For precise measurements, invest in a stainless steel measuring cup (like OXO Good Grips) and a digital kitchen scale (such as Escali Primo). The rice-to-broth ratio is critical here—too much liquid will make the rice mushy, while too little will leave it undercooked. A scale ensures your chicken thighs are evenly sized for consistent cooking. I also keep a fine-mesh strainer handy for rinsing rice if needed, though this recipe works best with unrinsed grains to absorb more flavor.
Lid for Steaming
A tight-fitting lid is essential for trapping steam and cooking the rice evenly. If your skillet doesn’t come with one, a glass or metal lid (like those from Le Creuset) works perfectly. For extra insurance, you can use heavy-duty aluminum foil—just make sure it’s large enough to cover the entire skillet without gaps. The lid should sit snugly to prevent steam from escaping, which is key for fluffy rice. Pro tip: Place a wooden spoon under the lid to create a small vent if your rice is absorbing liquid too quickly.
Tongs for Handling
Use long-handled tongs (like Mercer Culinary Genius) to flip the chicken and stir the rice without overcrowding the pan. The long handles keep your fingers safe from the hot skillet, and the sturdy construction makes flipping the chicken thighs effortless. I also keep a slotted spoon nearby to remove the chicken if needed, though tongs are my go-to for this recipe. Avoid wooden spoons—they can splinter when scraping the bottom of the pan for those flavorful browned bits.
Thermometer for Precision
A meat thermometer (such as the ThermoWorks Smoke) is my non-negotiable tool for this recipe. It ensures the chicken reaches a safe 165°F internal temperature without overcooking. Insert the probe into the thickest part of a chicken thigh—if it’s not yet at temperature, cover the skillet and let it rest for a few more minutes. The thermometer also helps gauge when the rice is done by checking the chicken’s doneness first. No thermometer? Use the finger test: press gently on the chicken—it should feel firm but still yield slightly to touch.
Nutrition facts
Frequently asked questions
Can I use chicken breasts instead of thighs?
Yes, but with adjustments! Chicken breasts cook faster, so pound them to ½-inch thickness and reduce cooking time to 12-15 minutes after simmering. They also dry out more easily, so add 1 extra tablespoon of butter to keep them moist. Use a meat thermometer to confirm 165°F internal temp.
What if my rice turns out mushy?
Mushy rice usually means too much liquid or insufficient resting time. For next time, use 1.25 cups broth per 1 cup rice and let it rest covered for 10 minutes after cooking. If it's already mushy, spread it on a baking sheet and bake at 350°F for 10 minutes to dry it out.
How do I make this gluten-free?
This recipe is naturally gluten-free! Just ensure your chicken broth is certified gluten-free (many store brands contain wheat). For extra flavor, add 1 tsp gluten-free soy sauce or ½ tsp garlic powder to the broth. Always check labels on all ingredients to avoid cross-contamination.
Can I prep this ahead of time?
Cook the rice and chicken completely, then store in an airtight container for up to 4 days in the fridge. Reheat covered in the microwave for 2-3 minutes or in a skillet over low heat with 1 tbsp water or broth to restore moisture. For freezing, cool completely first, then freeze for up to 3 months.
Why does my chicken taste bland?
Bland chicken usually means insufficient searing or seasoning. Next time, sear the chicken until deeply golden brown (5-6 minutes per side) and don't skip scraping up the browned bits from the pan. For extra flavor, add ½ tsp garlic powder or ¼ tsp smoked paprika to the seasoning mix.