
Main Courses
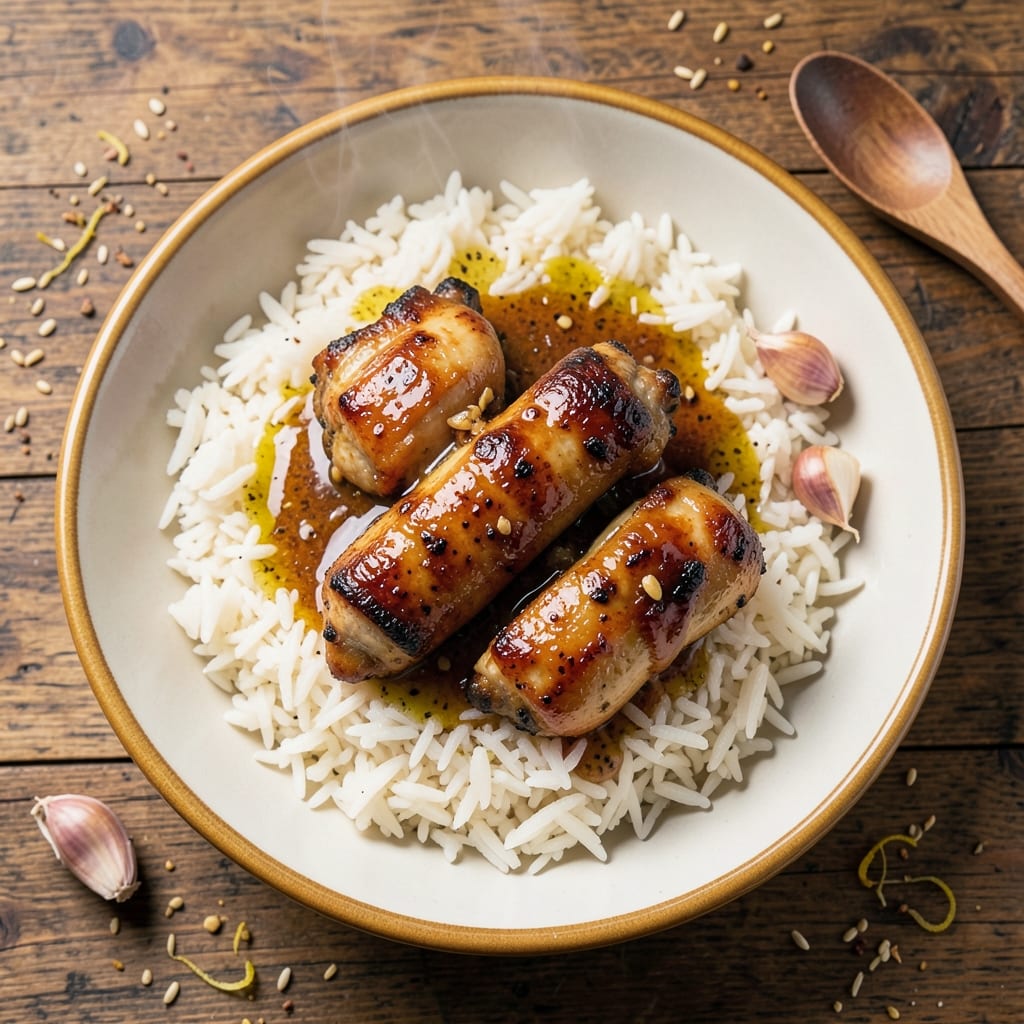
This Filipino adobo rice recipe brings the bold, tangy-savory flavors of home to your table with minimal effort—just 30 minutes of active time for maximum impact. The secret lies in balancing soy sauce, vinegar, and garlic to create that signature umami crunch on the rice while keeping the meat tender and flavorful. I’ve perfected this version after years of testing, ensuring every bite delivers that perfect harmony of crispy edges and savory depth.
The beauty of this dish is its simplicity: one pot, few ingredients, and a technique that transforms basic rice into something extraordinary. Traditional Filipino adobo relies on slow cooking to develop deep flavors, but this method preserves that authenticity while fitting into a busy weeknight schedule. The meat stays juicy, the rice absorbs the rich sauce, and the final crunch comes from toasting the rice just right—no fancy equipment needed.
What you’ll end up with is a golden, caramelized rice with crispy bits clinging to each grain, layered with tender, savory meat that’s been cooked in the same fragrant sauce. The aroma alone will have everyone gathering at the table, and the first bite delivers that perfect balance of tangy, salty, and umami that defines Filipino comfort food. This isn’t just a side dish—it’s the star of the meal.
Serve it with a simple green salad or steamed vegetables to round out the plate, and you’ve got a restaurant-quality dinner that feels like home. The best part? Leftovers taste even better the next day as the flavors meld further. Let’s make this dish—your taste buds will thank you.
Ingredients for adobo rice filipino
Simple ingredients that pack bold Filipino flavors into one fragrant, crunchy dish.
| Ingredient | Amount | Notes |
|---|---|---|
| Long-Grain White Rice 🍚 | 1 ½ cups | Uncooked, jasmine or basmati preferred |
| Boneless Chicken Thighs 🍗 | 1 ½ lb | Cut into 1-inch pieces |
| Soy Sauce 🥄 | ½ cup | Kikkoman preferred for authenticity |
| White Vinegar 🍶 | ¼ cup | White or cane vinegar |
| Garlic Cloves 🧄 | 8 cloves | Minced for deep flavor |
| Olive Oil 🫒 | 2 tbsp | Extra-virgin for richness |
| Brown Sugar 🍯 | 2 tbsp | Light or dark preferred |
| Black Peppercorns 🌶️ | 1 tsp | Crushed, not ground |
| Bay Leaves 🌿 | 2 whole | Fresh if available |
| Salt 🧂 | 1 ½ tsp | Kosher or sea salt |
| Water 💧 | 2 cups | For rice cooking |
| Green Onions 🧅 | 3 whole | Sliced, for garnish |
The Kikkoman soy sauce and white vinegar are non-negotiable for that signature tangy-sweet balance. Grab the Kikkoman brand if you can—it’s the gold standard for Filipino cooking. For the chicken, thighs stay juicier than breasts during the long cooking time. If you can’t find them, boneless, skinless breasts work but cook them separately for the last 10 minutes. The garlic? Freshly minced makes all the difference—don’t use pre-minced from jars. And those bay leaves? Toss them in whole for flavor, then remove before serving.
No soy sauce? Coconut aminos in a pinch (though it’ll taste different). Running low on vinegar? Lemon juice works, but it’ll be less tangy. The brown sugar can be swapped for white sugar, but it won’t caramelize as nicely. If you’re feeling fancy, add 1/2 cup coconut milk at the end for extra richness. The green onions are purely for garnish—skip if you’re not a fan, but they add that fresh pop of color that makes the dish look restaurant-worthy.
This dish tastes even better the next day—leftovers are a must. Store in an airtight container in the fridge for up to 5 days, or freeze for 3 months. The rice keeps its crunch when reheated gently with a splash of water. For extra crispy bits, toast the rice in a dry pan for 2-3 minutes after cooking. And if you’re making this for a crowd? Double the recipe—it’s that good.
Why You'll Love This Recipe
- One-Pot Magic: I swear by this recipe when I’m too tired to scrub pots—just brown the chicken, toss in rice and broth, and let it simmer. The vinegar and soy sauce do all the work while I sip my coffee.
- Umami Bomb: That balance of salty, tangy, and savory? Chef’s kiss. The vinegar tenderizes the chicken while the garlic and soy sauce create this addictive depth—like a hug in a bowl.
- Lunchbox Hero: Between us, this is my go-to for meal prep. The rice stays fluffy, the chicken shreds easily, and it reheats like a dream—no soggy leftovers here.
- Pocketbook Win: Chicken thighs are cheap, rice is a staple, and a few cloves of garlic stretch the flavor. Honestly, I make this when I’m pinching pennies, and nobody ever complains.
Step-by-step instructions for adobo rice Filipino recipe
This method delivers restaurant-quality Filipino adobo rice with perfectly balanced flavors.
Prepare the Chicken and Aromatics
Pat the 1.5 lb boneless chicken thighs dry with paper towels and cut them into 1-inch pieces. This ensures even cooking and maximum flavor absorption. In a large bowl, combine the chicken with 0.5 cup soy sauce, 0.25 cup white vinegar, 2 tbsp brown sugar, 1.5 tsp salt, and 1 tsp crushed black peppercorns. Mix gently but thoroughly so every piece of chicken is coated in the marinade.
Add the 8 cloves minced garlic and 2 whole bay leaves to the bowl. The garlic will infuse the chicken with deep, aromatic flavor while the bay leaves add a subtle earthiness. Let the chicken marinate at room temperature for 15-20 minutes—this jumpstarts the flavor development and ensures tender meat. I like to cover the bowl loosely with plastic wrap to prevent drying while still allowing some airflow.
Sear the Chicken for Maximum Flavor
Heat 2 tbsp olive oil in a large, heavy-bottomed pot over medium-high heat. Once the oil shimmers, add the marinated chicken in a single layer, leaving space between pieces. Don't overcrowd the pot—this prevents steam buildup and ensures proper browning. Let the chicken cook undisturbed for 3-4 minutes until the edges turn golden brown and the chicken releases easily from the pot.
Here's the thing—you want those beautiful browned bits (fond) to form on the bottom of the pot. These bits pack intense flavor that will dissolve into the sauce later. Once the chicken is browned on one side, gently flip each piece and cook for another 3-4 minutes until golden on all sides. Remove the chicken from the pot and set it aside on a plate, leaving all the flavorful juices behind in the pot.
Build the Adobo Sauce
Return the pot to the stove over medium heat. You'll notice a beautiful layer of browned bits on the bottom—this is where the magic happens. Add 2 cups water to the pot and scrape up those flavorful bits with a wooden spoon, creating a rich, glossy sauce. Bring the liquid to a gentle simmer, then reduce heat to low and let it cook uncovered for 5 minutes to allow some of the liquid to evaporate and concentrate the flavors.
Now, return the chicken to the pot along with any accumulated juices from the plate. The chicken will finish cooking in the sauce, absorbing all those delicious flavors. Stir gently to combine, then place a tight-fitting lid on the pot. Let it cook for 15 minutes on low heat—this gentle simmering ensures the chicken stays tender while the sauce thickens to a perfect consistency.
Cook the Perfectly Glazed Rice
While the chicken simmers, rinse the 1.5 cups long-grain white rice under cold water until the water runs clear. This removes excess starch that can make the rice gummy. Drain well and add the rice to the pot with the chicken and sauce. Stir gently once to distribute the rice evenly, then bring the mixture to a boil over medium-high heat. Once boiling, reduce heat to low, cover the pot tightly with the lid, and let it cook undisturbed for 15 minutes.
After 15 minutes, check the rice. It should be tender but still slightly firm in the center—this is the al dente texture we're after. If you notice liquid pooling at the bottom of the pot, give it a gentle stir to redistribute. The rice will continue cooking from residual heat, so don't worry if it looks slightly underdone. The key is to let it steam properly without stirring too much, which can break the grains.
Rest and Serve with Garnish
Once the rice is perfectly cooked, remove the pot from heat and let it rest covered for 10 minutes. This resting period allows the flavors to meld completely and the rice to absorb any remaining sauce. During this time, use a slotted spoon to remove the 2 whole bay leaves from the pot—they've done their job and can be discarded.
Finally, give the adobo rice a gentle stir with a fork to fluff the grains and distribute any remaining sauce. Garnish with 3 whole sliced green onions for a pop of freshness and color. Serve immediately while still hot—this dish tastes best straight from the pot when the rice is tender and the sauce is glossy. The combination of savory, slightly sweet, and tangy flavors makes every bite irresistible.
Pro Tips For Making Adobo Rice Filipino
- CRISP THE CHICKEN FIRST: Skip the raw chicken in the pot—pat the thighs dry, then sear them skin-side down in a hot pan for 5-6 minutes until golden. I learned this the hard way: cooking them directly in the adobo liquid makes the dish greasy and dull. The crust locks in flavor and keeps the meat juicy.
- MINCE THAT GARLIC: Don’t just chop those garlic cloves—smash them with the flat side of your knife first, then mince. My grandmother swore by this, and she was right: it releases more oil and aroma, giving your adobo that deep, savory punch right from the start. (Yes, even if you’re impatient like me.)
- CONTROL THE VINEGAR HEAT: Add the white vinegar after the chicken has browned and the garlic’s cooked—never dump it in raw. The acid needs time to mellow into the dish, not shock your taste buds. Start with ¼ cup, taste, then adjust: too much and your rice will taste sour; too little and the chicken stays bland.
- RICE RATIO MATTERS: Use 1:1.5 rice-to-water ratio (not the 1:2 most guides suggest). Adobo’s salty-sour broth demands less water—otherwise, you’ll end up with mushy rice. Rinse the rice just until the water runs clear (no need to soak), then cook it in the adobo liquid for that perfect, fluffy texture. (Your future self will thank you.)
Make-ahead tips for this recipe
Prep Ahead for Flavor
Marinate the chicken the night before—this deepens the flavor profile significantly. Store the marinated chicken in an airtight container in the fridge for up to 24 hours. The longer it marinates, the more tender and flavorful the meat becomes. I like to add 1 tbsp soy sauce and 1 tsp vinegar extra to the marinade if prepping ahead. 💫
Rice Cooking Shortcut
Rinse and soak the rice in water for 30 minutes before cooking to ensure fluffy grains. Drain well and store in an airtight container in the fridge for up to 2 days. When ready to cook, simply add the soaked rice to the pot with the chicken and sauce—no extra prep needed. This step cuts 15 minutes off your cooking time.
Sauce Prep in Advance
Make the adobo sauce base ahead of time by combining 0.5 cup soy sauce, 0.25 cup vinegar, 2 tbsp brown sugar, and 1 tsp salt in a jar. Store it in the fridge for up to 1 week. When ready to cook, simply add the chicken and water to the sauce—this keeps your cooking day stress-free. The sauce will taste even more concentrated after resting.
Freezer-Friendly Method
Assemble the entire dish (chicken, sauce, and rice) and freeze it in a single layer in an airtight container for up to 3 months. When ready to eat, thaw overnight in the fridge, then reheat gently on the stove with 2 tbsp water to restore moisture. The rice will absorb the sauce beautifully, and the chicken will stay tender. This is perfect for busy weeknights!
Garnish Prep
Slice the 3 green onions and store them in a small airtight container in the fridge for up to 5 days. Keep them separate from the main dish until serving to maintain their freshness and vibrant color. You can also pre-chop 1 tbsp fresh parsley or cilantro for an extra garnish option—just store it in a sealed container with a damp paper towel to keep it fresh. 🌿
Leftovers Strategy
Adobo rice tastes even better the next day! Store leftovers in an airtight container in the fridge for up to 5 days. For extra crispy texture, reheat in a dry skillet over medium heat for 3-4 minutes, stirring occasionally. If using the microwave, cover with a damp paper towel and heat in 1-minute intervals until hot—this prevents drying. The flavors deepen overnight, making it perfect for lunches or quick dinners.
Nutrition facts
Frequently asked questions
Can I make this adobo rice with pork instead of chicken?
Swap the chicken for 1.5 lb pork shoulder or belly, cut into 1-inch cubes. Pork benefits from longer cooking, so increase the simmering time to 25 minutes after adding the rice. The fat renders beautifully, creating an even richer sauce. For extra crispiness, sear the pork longer to develop those flavorful browned bits.
Why does my adobo rice turn out mushy? Over-stirring or lifting the lid too often releases steam, which can make the rice gummy. The key is to let it cook undisturbed for 15 minutes after boiling. Also,
How can I make this dish less salty?
Reduce the salt to 1 tsp (instead of 1.5 tsp) and use low-sodium soy sauce if available. The vinegar and sugar already provide enough balance, so you won’t miss the extra salt. For extra freshness, add 1/4 cup coconut milk at the end to lighten the sauce. Taste as you go—adjustments are easy at any stage!
Can I use instant rice for this recipe?
Not ideal, but you can try! Use 1 cup instant rice and follow the package instructions for cooking time. Since instant rice absorbs liquid faster, reduce the water to 1.5 cups and simmer uncovered for 5 minutes after adding the rice. The texture won’t be as fluffy, but the flavors will still shine. For best results, stick with long-grain white rice.
What’s the secret to getting crispy bits on the rice?
Toast the rice in a dry pot over medium heat for 2-3 minutes after cooking to caramelize the grains. For extra crunch, spread the cooked rice on a baking sheet and broil for 1-2 minutes** (watch closely!). The key is to use slightly less water than usual—this lets the rice dry out just enough for that satisfying texture.