
Side Dishes
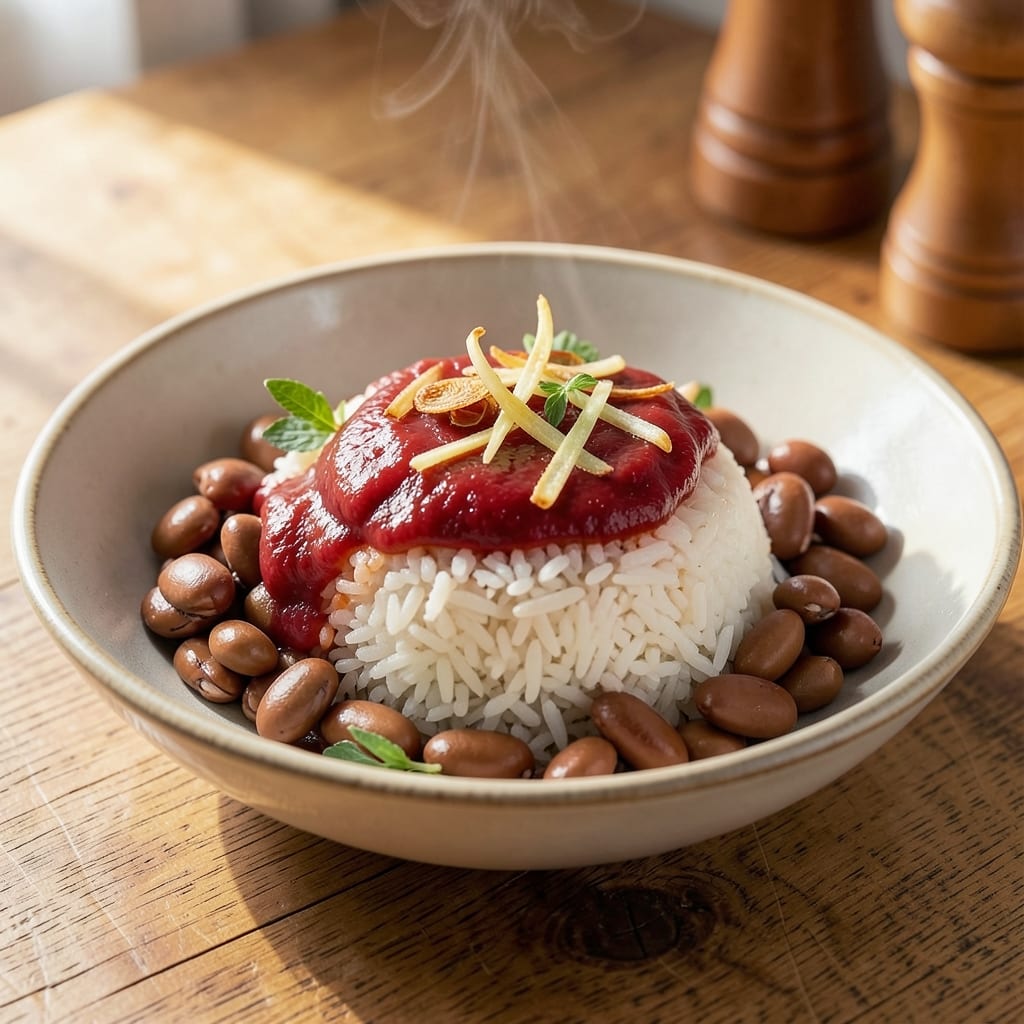
This adzuki beans and rice recipe delivers a perfect balance of sweet, savory, and umami that transforms simple ingredients into a satisfying vegetarian meal. 💛 The secret lies in slow-cooked adzuki beans—naturally sweet and tender—paired with fluffy rice and a rich, aromatic broth. Whether you're serving it as a main dish or a hearty side, this bowl is packed with protein and flavor without any meat.
The beauty of this recipe is its versatility. Inspired by Japanese anko (sweet bean paste) traditions but adapted for a savory twist, it works equally well as a comforting weeknight dinner or a showstopper for guests. The adzuki beans soften beautifully when simmered, absorbing the flavors of soy sauce, garlic, and ginger, while the rice stays light and fluffy. Optional garnishes like toasted sesame seeds or a drizzle of honey elevate it further.
What you’ll end up with is a bowl that’s creamy from the beans, fragrant from the broth, and perfectly balanced in sweetness and saltiness. The texture is a mix of tender rice, velvety beans, and subtle crunch from garnishes—each bite is a harmony of flavors. This dish is not only nourishing but also deeply satisfying, proving that vegetarian meals can be just as rich and complex as their meat-based counterparts.
Ready in about 45 minutes, this recipe is simple yet impressive, with minimal prep and maximum flavor. Whether you're meal prepping for the week or cooking for a special occasion, this adzuki beans and rice bowl is a go-to for anyone craving comfort food with a refined touch. Let’s get started!
Ingredients for adzuki beans and rice
Simple ingredients meet Japanese-inspired flavors in this creamy, protein-packed vegetarian bowl.
| Ingredient | Amount | Notes |
|---|---|---|
| Adzuki Beans (Dried) 🌱 | 1 cup | Rinsed and soaked overnight |
| White Rice (Jasmine or Short-Grain) 🍚 | 1 ½ cups | Uncooked, rinsed well |
| Water 💧 | 3 cups | For cooking rice |
| Vegetable Broth 🍲 | 2 cups | Low-sodium preferred |
| Soy Sauce (Light) 🍶 | 2 tbsp | For umami depth |
| Fresh Ginger 🧄 | 1 tbsp | Grated, aromatic |
| Garlic Cloves 🧄 | 3 cloves | Minced finely |
| Sesame Oil 🫒 | 1 tbsp | Toasted for aroma |
| Honey (or Maple Syrup) 🍯 | 1 tbsp | Balances flavors |
| Toasted Sesame Seeds 🌾 | 1 tbsp | For garnish |
| Green Onions 🧅 | 2 whole | Sliced thinly |
| Salt 🧂 | ½ tsp | Kosher or sea salt |
| Black Pepper 🌶️ | ¼ tsp | Freshly ground |
Adzuki beans are the heart of this dish—dried beans develop the most complex flavor when soaked overnight. Trader Joe's and Asian markets carry them pre-packaged, but bulk bins at natural grocery stores often have fresher stock. Look for plump, firm beans without cracks. For the rice, jasmine or short-grain is ideal—it stays sticky enough to hold the beans. If you're short on time, pre-cooked adzuki beans (canned) work in a pinch, but they lack the tender texture of slow-cooked ones.
No sesame oil? Toasted sesame seeds plus a pinch of neutral oil gives similar depth. Swap honey for maple syrup if you prefer vegan. The ginger and garlic can be pre-minced from jars, but freshly grated ginger adds a brighter punch. For extra umami, add a splash of mirin or a dash of fish-free Worcestershire sauce. The green onions are optional but add a fresh contrast—skip if you prefer a more rustic look. Vegetable broth can be homemade or store-bought, just avoid high-sodium versions.
Cooked rice keeps 3-4 days in the fridge, but the beans reheat best when fresh. Portion the dish in containers with parchment paper between layers to prevent sogginess. For meal prep, store components separately—reheat beans and rice separately, then assemble. Garnishes like sesame seeds and green onions can be added fresh after reheating. The dish freezes beautifully for up to 3 months, though texture may change slightly.
Why You'll Love This Recipe
- I’ll be real: this recipe costs me about $3 for a full meal. Dried beans, rice, broth—stuff I already have. No specialty ingredients, no last-minute grocery runs. And the leftovers? They taste just as good cold the next day, which means less cooking and more time for actual living.
- No-Soaking Needed: I’ll admit, I used to dread the 12-hour soak for dried adzuki beans—until I realized you can just simmer them in broth until tender. That’s it. No fancy prep, no waiting around. The beans absorb the soy and broth until they’re so tender they practically melt, and the rice gets that sticky, flavorful hug from the same pot.
- Savory-Sweet Magic: Here’s what sold me—the way the soy sauce caramelizes just a little at the end, giving those beans this deep, umami-rich sweetness. It’s not heavy, not salty, just right. And the jasmine rice? It soaks up the broth like a sponge, turning every bite into a little flavor bomb.
- Lunchbox Hero: Between us, this is my go-to for meal prep. I make a big batch on Sundays, and by Wednesday, I’m still pulling out containers of warm rice and beans—no reheating drama, no sad leftovers. Kids (and my husband) grab it straight from the fridge, and honestly? It’s the only thing that keeps them from begging for takeout.
Step-by-step instructions for adzuki beans and rice
Here's how to create a perfectly balanced sweet-savory bowl with tender beans and fluffy rice.
🍳 Step 1: Cook the Adzuki Beans Until Tender
Drain the soaked adzuki beans and transfer them to a medium saucepan. Add the 3 cups of water and bring to a boil over medium-high heat. Once boiling, reduce heat to medium-low and simmer uncovered for 60-75 minutes until the beans are fork-tender with no bite remaining.
I like to check the beans at the 60-minute mark—they should be soft but still hold their shape. If they're not quite tender, add ½ cup more water and continue cooking. The beans should absorb most of the water, leaving about ¼ cup liquid remaining. Drain any excess liquid and set the beans aside.
🍳 Step 2: Prepare the Sweet-Savory Sauce
In a small saucepan, combine the 2 cups of vegetable broth, 2 tablespoons of soy sauce, 1 tablespoon of grated ginger, and 3 minced garlic cloves. Bring to a gentle simmer over medium heat for 5 minutes until the aromatics are fragrant and the broth has reduced slightly.
Remove from heat and stir in the 1 tablespoon of sesame oil and 1 tablespoon of honey. The sauce should have a glossy sheen and balanced sweet-savory flavors. Taste and adjust seasoning with additional soy sauce if needed—this is your flavor base that will infuse both the rice and beans.
🍳 Step 3: Cook the Jasmine Rice to Perfection
Rinse the 1.5 cups of jasmine rice under cold water until the water runs clear. In a medium saucepan, combine the rice with the prepared sweet-savory sauce. Add 1 cup of water (in addition to the sauce) and bring to a boil over medium-high heat.
Once boiling, reduce heat to low, cover with a tight-fitting lid, and simmer for 15 minutes without lifting the lid. After 15 minutes, turn off the heat and let the rice steam for an additional 10 minutes. Fluff with a fork—you should have perfectly fluffy, separate grains.
🥘 Step 4: Combine and Finish the Bowl
In a large serving bowl, combine the cooked adzuki beans and jasmine rice. Drizzle with any remaining sauce from the rice pan and gently toss to distribute evenly. The beans should be coated with that sweet-savory glaze while maintaining their texture.
Garnish with the sliced green onions and sprinkle with the 1 tablespoon of toasted sesame seeds. Finish with a pinch of 0.5 teaspoon salt and 0.25 teaspoon black pepper to enhance all the flavors. Serve immediately while everything is warm and aromatic.
Pro Tips For Making Adzuki Beans And Rice
- SOAK BEANS 4 HOURS MINIMUM: I learned this the hard way—rushing the soak leaves adzuki beans tough and mealy. Use 3 cups water per cup beans, cover, and let them sit at room temp. No need to boil them after soaking; just drain and rinse before cooking.
- USE 1:1 BEAN-TO-RICE RATIO: This isn’t the prettiest method, but it’s the tastiest. For every cup of rice, add a full cup of drained adzuki beans—don’t skimp. The beans soften as rice cooks, so starting equal parts guarantees perfect texture.
- SIMMER BEANS LOW AND SLOW: High heat turns adzuki beans mushy and splits their skins. After initial boiling, reduce to a gentle simmer—just small bubbles breaking the surface—and cover. I know, I know, but trust the process: 45 minutes at low heat keeps them firm and flavorful.
- ADD SOY SAUCE LATE: My grandmother swore by this, and she was right: stir in soy sauce only in the last 5 minutes of cooking. Early addition makes rice salty and dulls the beans’ natural sweetness. A splash of vegetable broth here helps balance the flavor without overpowering.
Creative variations of this recipe
Japanese Anko Twist
Transform this into a sweet red bean rice by simmering the cooked adzuki beans with ½ cup sugar and 1 cup water until thickened into a paste. Stir in 1 tsp vanilla extract and ½ tsp cinnamon for depth. Serve over warm rice with a sprinkle of matcha powder or kinako (roasted soybean flour) for a traditional Japanese dessert bowl. 🌸
Korean Patjuk Style
For a savory-sweet Korean patjuk variation, add 1 tbsp gochujang (Korean chili paste) and 1 tbsp brown sugar to the bean cooking water. After draining, mix the beans with 1 tbsp toasted sesame oil and 1 tbsp toasted sesame seeds. Serve over rice with a fried egg on top and kimchi on the side for a hearty meal. 🌶️
Mexican-Inspired Fusion
Give it a Mexican flair by sautéing 1 diced bell pepper and ½ onion in 1 tbsp olive oil until soft. Add the cooked beans, 1 tsp cumin, ½ tsp smoked paprika, and ½ cup corn kernels. Serve over rice with avocado slices, cilantro, and a squeeze of lime. The adzuki beans add a natural sweetness that pairs perfectly with the spices. 🌮
Spicy Thai Curry
Infuse the rice with Thai flavors by adding 1 tbsp red curry paste to the sweet-savory sauce. Stir in ½ cup coconut milk and 1 tsp fish sauce (or soy sauce for vegetarian). Top with thinly sliced Thai basil and crushed peanuts for texture. The adzuki beans soak up the rich, spicy-sweet curry beautifully. 🌶️
Protein-Packed Breakfast
Turn this into a savory breakfast bowl by mixing the cooked beans with scrambled tofu or soft-boiled eggs. Top with sriracha, sesame seeds, and scallions. The adzuki beans add a satisfying texture and natural sweetness that balances the heat. Serve with a side of pickled vegetables for extra crunch. 🍳
Sweet & Salty Snack
For a no-cook variation, mix cooled adzuki beans with 1 tbsp soy sauce, 1 tbsp honey, and 1 tsp rice vinegar. Chill for 30 minutes, then roll in crushed peanuts or toasted coconut flakes. These sweet-salty bean bites make a great snack or appetizer—perfect for parties! 🍡
Nutrition facts
Frequently asked questions
Why do adzuki beans need to be soaked overnight?
Soaking overnight reduces cooking time and prevents the beans from staying hard or splitting during cooking. The long soak also helps remove natural sugars that can make the beans bitter. For a shortcut, you can soak them for just 4-6 hours, but overnight (8+ hours) yields the best texture.
Can I use canned adzuki beans instead of dried?
Yes, but the texture and flavor won't be identical. Canned beans are pre-cooked and softer, so they'll absorb flavors differently. If using canned, drain and rinse them well, then simmer in the sweet-savory sauce for 10-15 minutes to let them soak up the flavors. For best results, dried beans are ideal.
How do I adjust this recipe for a sweeter or spicier version?
For extra sweetness, add 1 more tablespoon of honey or ½ teaspoon vanilla extract to the sauce. For heat, stir in ½ teaspoon chili flakes or 1 teaspoon gochujang when combining the beans and rice. Balance is key—start with small amounts and adjust to taste.
What's the best way to reheat leftovers?
Reheat in a pot with 2 tablespoons of water or broth over low heat for 3-5 minutes, stirring occasionally. Avoid microwaving—it can make the rice rubbery. For best texture, store components separately (beans and rice) and reheat them together just before serving.
Can I make this dish gluten-free?
Use tamari or coconut aminos instead of soy sauce, and check that your vegetable broth is gluten-free. The rest of the recipe remains unchanged. This version works perfectly for gluten-sensitive diets while keeping all the umami flavor.