
Main Courses
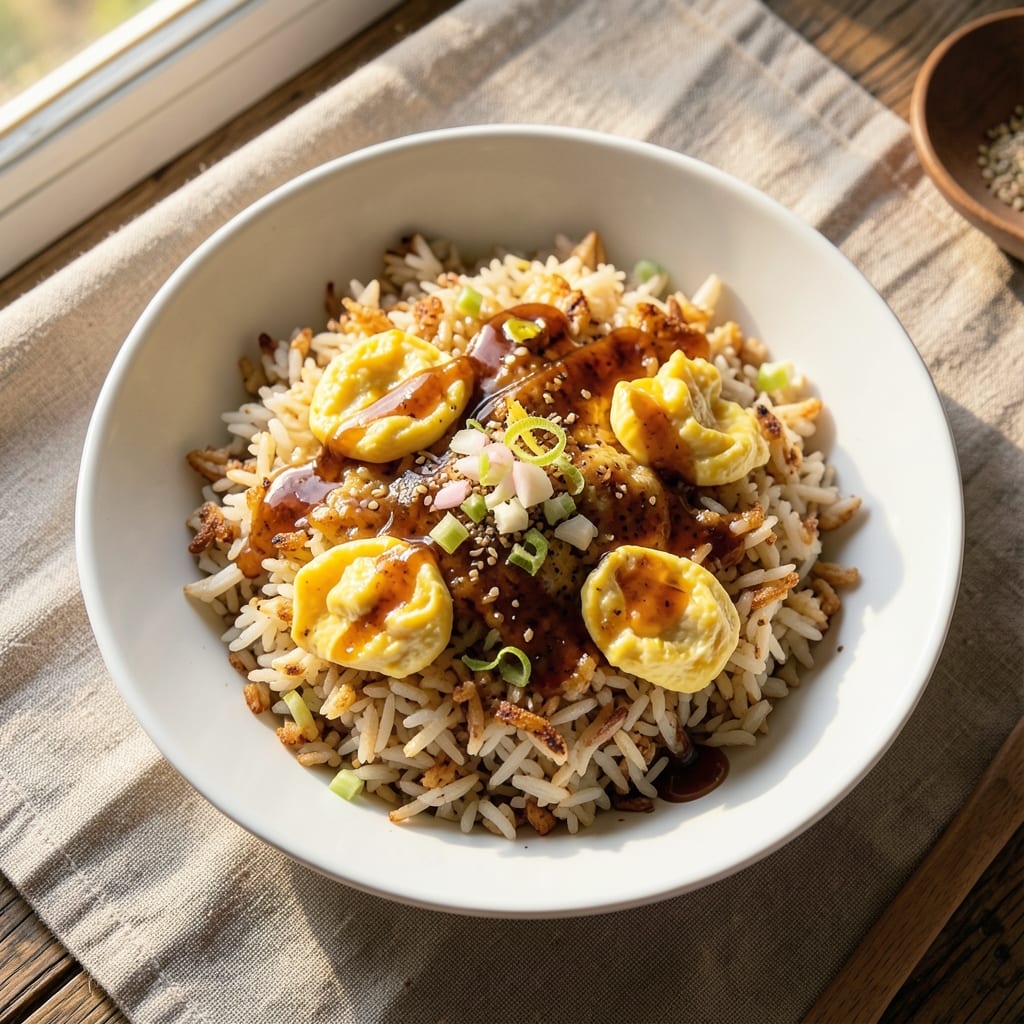
This air fryer egg fried rice recipe transforms a classic comfort dish into a crispy-edged, fluffy masterpiece—all in just 15 minutes. The air fryer’s magic lies in its ability to crisp the rice and eggs perfectly without drying them out, a challenge traditional stovetop methods often struggle with. I developed this recipe after years of experimenting with fried rice, and the air fryer finally delivered the texture I’d been chasing: golden, caramelized edges with tender, fluffy centers.
The secret starts with cold, day-old rice—it’s the key to achieving that ideal texture. We’ll toss it with a simple seasoning blend of soy sauce, garlic, and ginger before giving it a quick air fry to lock in the flavors and create those coveted crispy bits. Then, we’ll scramble the eggs separately in the air fryer basket for an even, custardy texture that won’t turn rubbery. This method ensures every bite delivers the perfect balance of crispy, chewy, and creamy.
What sets this recipe apart is how it leverages the air fryer’s precision. Most fried rice recipes rely on high-heat woks, which can be tricky to master, but the air fryer’s gentle circulation creates consistent results without the risk of burning. The eggs cook evenly, and the rice develops a satisfying crunch that disappears with the first bite. It’s the kind of dish that feels indulgent yet light—ideal for a quick weeknight dinner or meal prep.
Serve it with a drizzle of sesame oil and fresh green onions for extra brightness, or pack it in bento boxes for a satisfying lunch. The beauty of this method is its versatility—swap in your favorite veggies like peas, carrots, or bell peppers to customize it further. Let’s get cooking!
Ingredients for air fryer egg fried rice
Cold rice, fresh eggs, and a quick air fryer session—this vegetarian fried rice comes together faster than takeout.
| Ingredient | Amount | Notes |
|---|---|---|
| Day-Old Cooked White Rice 🍚 | 3 cups | Cold, spread out for crispiness |
| Large Eggs 🥚 | 4 whole | Room temperature for even cooking |
| Soy Sauce 🍶 | 3 tbsp | Low-sodium preferred |
| Minced Garlic Cloves 🧄 | 3 cloves | Freshly minced for bold flavor |
| Fresh Ginger 🌿 | 1 tbsp | Finely grated, or 1 tsp ground |
| Sesame Oil 🫒 | 1 tbsp | For finishing, not cooking |
| Vegetable Oil Spray 🫒 | 1 tbsp | Light spray for air fryer |
| Green Onions 🧅 | 3 whole | Sliced, for garnish |
| Carrots 🥕 | ½ cup | Diced small, optional veggie |
| Frozen Peas 🌽 | ½ cup | Thawed, optional mix-in |
| Salt 🧂 | ½ tsp | Adjust to taste |
| Black Pepper 🌶️ | ¼ tsp | Freshly cracked |
The rice is non-negotiable—day-old, cold rice gets crispy edges while staying fluffy inside. Leftover rice works perfectly, but if you're starting fresh, cook extra and refrigerate overnight. For the eggs, room temperature is key—they scramble more evenly. I grab my soy sauce from Trader Joe's (their low-sodium version), but any good-quality soy sauce works. Fresh ginger and garlic make all the difference—pre-minced jarred ginger is fine in a pinch, but fresh has more punch. The carrots and peas are optional but add color and crunch—frozen peas are perfect since they're already prepped.
No sesame oil? Toasted sesame seeds work too (just skip the oil). Short on carrots? Bell peppers or corn add great texture. The soy sauce can be swapped for coconut aminos if you're avoiding sodium. For extra protein, toss in tofu or edamame. The air fryer basket needs a light spray of oil—avocado oil spray works best for high heat. If your rice is too moist, spread it on a tray first and let it sit uncovered for 10 minutes to dry out slightly before air frying.
This keeps beautifully for 3 days in the fridge—great for meal prep. Portion into containers with a little sesame oil drizzled on top to keep it fresh. Freezes for 2 months too, though texture gets slightly softer after thawing. For best results, reheat in the air fryer at 350°F for 3-4 minutes—it crisps up again like magic. Store the soy sauce and sesame oil in dark glass bottles to preserve their flavor longer.
Why You'll Love This Recipe
- No Cold Leftovers: I swear by this trick—using day-old rice means no gummy texture, just fluffy grains every time. The air fryer’s dry heat toasts it perfectly while keeping the eggs tender and the garlic actually crispy (not soggy like in a pan).
- Umami Bomb: That soy sauce and ginger combo? It’s like a flavor shortcut. I add a splash of rice vinegar too—trust me, the balance of salty, tangy, and fresh hits different. The eggs get that perfect runny-yolk center when you crack them in right.
- Lunchbox Hero: Between us, this is my go-to for packed lunches—it reheats beautifully and tastes fresh. I’ll even toss in some frozen peas or leftover chicken to switch it up. (Yes, even on a Tuesday night when I’m out of ideas.)
- Pocket-Friendly Magic: Five bucks’ worth of ingredients feeds four people. The air fryer uses half the oil of a wok, and the eggs stretch further than you’d think. Honestly, it’s the kind of meal that makes me feel like I’m winning at adulthood.
Step-by-step instructions for air fryer egg fried rice
Here's how to get that perfect crispy-tender texture without a crowded stovetop.
Prep the Rice for Maximum Crispiness
Spread the 3 cups of day-old cooked white rice on a baking sheet and let it sit at room temperature for 10 minutes. This helps dry out the surface slightly, which is key for getting those crispy edges in the air fryer. While the rice warms up, crack the 4 whole large eggs into a bowl and whisk them vigorously until the yolks and whites are fully combined. Room temperature eggs cook more evenly, so take them out of the fridge about 10 minutes before you start.
In a small bowl, mix together the 3 tablespoons of soy sauce, 0.5 teaspoon of salt, and 0.25 teaspoon of black pepper. This seasoning blend will infuse the entire dish with savory depth. Set it aside until you're ready to combine everything. The rice should be slightly cooler than room temperature by now—this prevents steaming when it hits the air fryer.
Cook the Eggs and Veggies Separately
Lightly spray a small air fryer basket with the 1 tablespoon of vegetable oil spray (just a light mist). Add the whisked eggs and cook at 350°F for 3-4 minutes, shaking the basket gently every minute. You're looking for softly set eggs that are still slightly runny in the center—they'll finish cooking when mixed with the hot rice. Remove the eggs and set them aside.
In the same air fryer basket (after wiping it clean with a paper towel), add the 0.5 cup of diced carrots, 0.5 cup of thawed frozen peas, 3 cloves of minced garlic, and 1 tablespoon of finely grated fresh ginger. Spray lightly with more vegetable oil spray and cook at 375°F for 4-5 minutes, shaking once halfway through. The vegetables should be tender-crisp with the garlic and ginger lightly browned—this builds the flavor base for your fried rice.
Air Fry the Rice to Crispy Perfection
Spread the 3 cups of day-old rice evenly in the air fryer basket, breaking up any large clumps with your hands. Lightly spray with vegetable oil spray (just enough to coat the surface). Cook at 390°F for 6-8 minutes, shaking the basket every 2 minutes. You want the rice to develop crispy edges while staying tender inside—this is where the air fryer really shines over stovetop methods.
Watch carefully after 6 minutes. The rice is done when it's heated through and the edges are golden brown. If it's not quite crispy enough, give it another minute at the same temperature. The high heat of the air fryer creates that wok-like texture without requiring constant stirring.
Combine Everything for Ultimate Flavor
Quickly add the cooked eggs and vegetable mixture to the hot rice in the air fryer basket. Drizzle with the 1 tablespoon of sesame oil and toss everything together gently but thoroughly. The residual heat will finish cooking the eggs and blend all the flavors. Cook for another 1-2 minutes at 390°F just to ensure everything is heated through and the sesame oil is evenly distributed.
Transfer the fried rice to a serving dish and garnish with the sliced green onions. Serve immediately while it's hot and crispy—this dish tastes best straight from the air fryer. The texture contrast of crispy edges and fluffy rice, combined with the perfectly set eggs and tender vegetables, makes every bite satisfying. Leftovers? Just reheat in the air fryer for 3-4 minutes to restore that crispy texture.
Pro Tips For Making Air Fryer Egg Fried Rice
- CRANK HEAT TO 390°F: The air fryer’s magic happens at high heat—don’t be shy. Cold rice and eggs need that initial shock to crisp up properly. I used to run mine at 375°F and wondered why my rice stayed damp; bumping it 15 degrees changed everything.
- CHOP GINGER SMALLER THAN YOU THINK: Tiny dice, not julienne strips. Fresh ginger burns easily in the air fryer’s direct heat, and big pieces turn to mush instead of releasing flavor. My grandmother swore by this, and she was right: you want it to melt into the rice, not sit as chewy chunks.
- DON’T OVERFILL THE BASKET: Halfway is the sweet spot. Egg fried rice needs room to breathe—crowd it, and you’ll end up with soggy rice and a greasy mess. I learned this the hard way after my first batch turned into a gluey disaster. One layer, spread thin, every time.
- SCRAMBLE EGGS FIRST, THEN RICE: Cook the eggs separately in the air fryer for 3-4 minutes at 375°F until just set. Then toss them in with the rice at the end. This keeps the eggs tender (not rubbery) and lets you control their doneness—no more dry, overcooked egg clumps ruining the dish.
Common mistakes when making perfect results
Overcooking the Eggs
The biggest mistake I see is overcooking the eggs in the air fryer. They should be softly set with a slight runniness in the center—this ensures they finish cooking perfectly when mixed with the hot rice. I’ve ruined a batch by cooking them at 375°F for 5+ minutes, resulting in dry, rubbery eggs. Keep the temperature at 350°F and check them at 3 minutes. The eggs should still jiggle slightly when shaken. 🥚
Skipping the Rice Drying Step
Many people underestimate how crucial it is to dry out the rice slightly before air frying. Freshly cooked rice is too moist and will steam instead of crisp up. Spread your 3 cups of day-old rice on a baking sheet for 10 minutes to let surface moisture evaporate. I learned this the hard way—my first attempt yielded soggy rice because I skipped this step. The air fryer can’t create crispy edges if the rice is damp.
Uneven Rice Distribution
Piling all the rice in one spot leads to uneven cooking—some pieces burn while others stay cold. Spread the rice in a single even layer across the air fryer basket, breaking up any clumps. I use my hands to gently separate grains before spraying with oil. This ensures every piece gets that perfect golden-brown crust. Shake the basket every 2 minutes during cooking to promote even browning. 🍚
Overcrowding the Basket
Stuffing the air fryer basket too full blocks airflow, which prevents proper crisping. The rice needs room to develop those coveted crispy edges. For a 6-quart air fryer, 3 cups of rice is about right—don’t exceed 4 cups. If you’re using a smaller basket, reduce the amount or cook in batches. I’ve had to start over twice because I ignored this rule, ending up with mushy rice instead of crispy perfection.
Ignoring the Air Fryer’s Heat Zones
Air fryers have hot spots, and the bottom layer often gets crispier than the top. To fix this, I flip the rice halfway through cooking by shaking the basket vigorously. This ensures even browning throughout. For extra insurance, I rotate the basket 90 degrees after 4 minutes of cooking. This simple trick makes all the difference in texture consistency. 🔥
Adding Wet Ingredients Late
Tossing in raw vegetables or wet ingredients (like uncooked eggs) at the end can turn your crispy rice into a soggy mess. Always cook proteins and veggies separately first, then combine them with the rice in the final 1-2 minutes of air frying. This keeps the texture intact. I once added raw peas directly to the rice basket—big mistake! The rice absorbed all the moisture and lost its crispiness.
Nutrition facts
Frequently asked questions
Why do I need day-old rice for this recipe?
Day-old rice is essential because freshly cooked rice contains too much moisture, which prevents crispy edges in the air fryer. The rice absorbs excess water overnight, giving it the perfect texture for crisping up while staying fluffy inside. If you're short on time, cook extra rice and refrigerate it overnight for best results.
Can I make this recipe without an air fryer?
Yes, but the texture will be different. Use a non-stick skillet on medium-high heat with 1 tablespoon oil. Cook the rice in batches, stirring constantly for 5-6 minutes until crispy. The eggs should be scrambled separately in a smaller pan. The air fryer's even heat distribution is what creates those perfect crispy edges without burning.
How do I prevent the rice from sticking to the air fryer basket? Lightly spray the basket with vegetable oil spray before adding the rice, and
What can I add to make this more filling?
For extra protein, stir in ½ cup cooked tofu or ½ cup edamame with the vegetables. You could also add ½ cup shredded rotisserie chicken (if not keeping it vegetarian) or ½ cup black beans. For more volume, double the vegetable portion with bell peppers, corn, or snap peas. Just
How do I reheat leftovers without losing crispiness?
Reheat in the air fryer at 350°F for 3-4 minutes to restore that perfect crispy texture. If you don't have an air fryer, use a dry skillet on medium heat for 2-3 minutes, stirring constantly. Avoid microwaving as it makes the rice soggy. The key is high, dry heat to crisp up the edges again.