
Main Courses
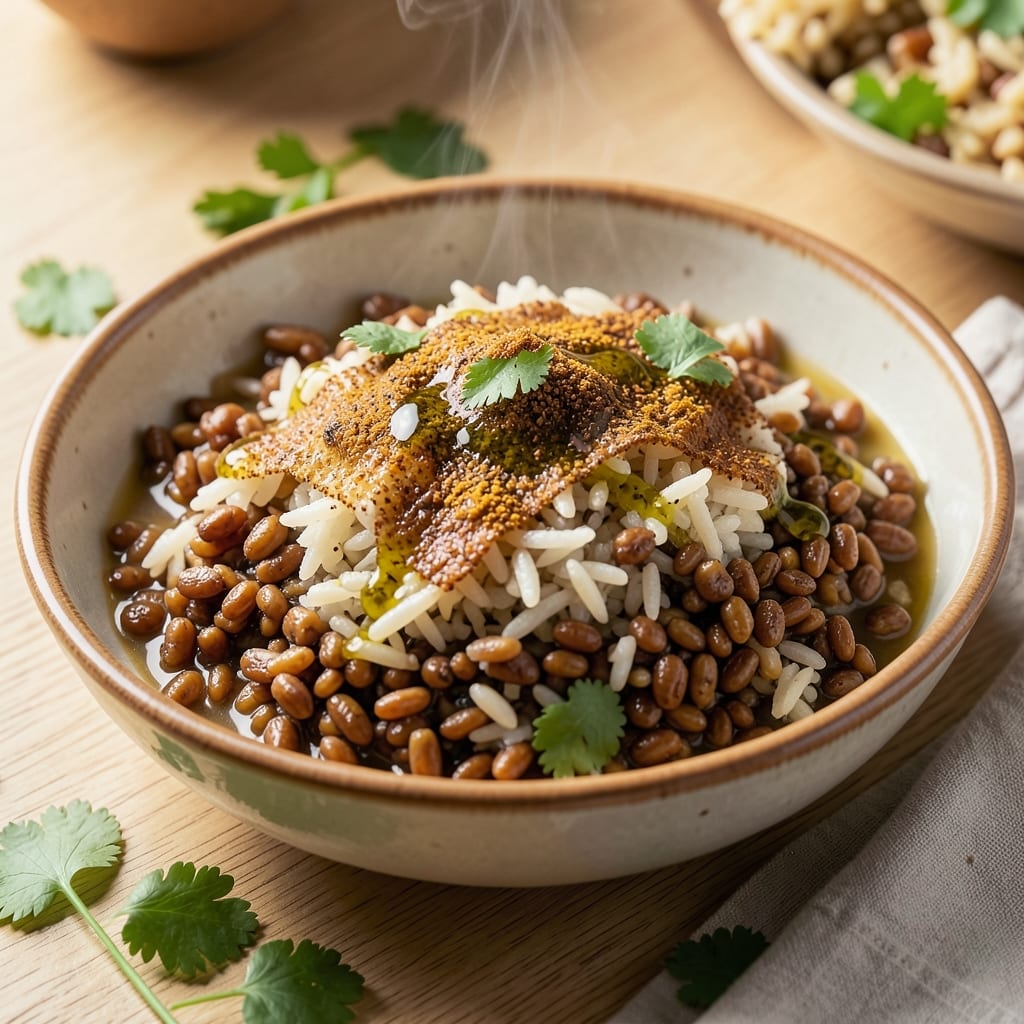
This one-pot amaranth and rice recipe transforms two powerhouse grains into a nutrient-dense, flavorful dish that’s as easy as it is impressive. The combination of toasted amaranth and aromatic rice creates a textured, protein-rich base that absorbs spices beautifully while staying light and satisfying—perfect for busy weeknights or meal prep. What sets this apart is the balance of earthy amaranth and fluffy rice, which together deliver a complete protein profile without any animal products.
The secret to this recipe lies in toasting the amaranth first—this step unlocks its nutty depth and prevents a mushy texture. We’ll build flavor with warm spices like cumin and turmeric, then let the grains simmer in a fragrant broth until tender. The result? A dish that’s hearty enough for a main course but versatile enough to adapt to savory or lightly sweet variations with herbs, citrus, or roasted vegetables.
By the time you’re done, you’ll have a one-pot meal that’s packed with fiber, plant-based protein, and complex flavors—no chopping, no fuss. The grains stay distinct yet cohesive, so each bite delivers a satisfying contrast of textures. Serve it as-is for a neutral canvas, or elevate it with fresh cilantro, toasted nuts, or a squeeze of lime for brightness.
This recipe is designed to work with whatever you have on hand, making it ideal for both beginners and seasoned cooks. Whether you’re meal prepping for the week or whipping up dinner in under 45 minutes, the simplicity of this one-pot method ensures minimal cleanup and maximum impact. Let’s get started!
Ingredients for amaranth rice
Two grains, one pot, endless flavor—this vegan powerhouse needs just 14 ingredients.
| Ingredient | Amount | Notes |
|---|---|---|
| Amaranth Grains 🌾 | 1 cup | Rinsed before toasting |
| Long-Grain White Rice 🍚 | 1 cup | Jasmine or basmati preferred |
| Vegetable Broth 💧 | 2 ½ cups | Low-sodium preferred |
| Extra-Virgin Olive Oil 🫒 | 2 tbsp | For toasting amaranth |
| Ground Cumin 🌿 | 1 tsp | Toasted for depth |
| Turmeric Powder 🌶️ | ½ tsp | Freshly ground preferred |
| Garlic Cloves 🧄 | 3 cloves | Minced for aroma |
| Fresh Cilantro 🌿 | ¼ cup | Chopped for garnish |
| Lemon Juice 🍋 | 1 tbsp | Freshly squeezed |
| Salt 🧂 | ½ tsp | Sea salt preferred |
| Black Pepper 🌶️ | ¼ tsp | Freshly ground |
| Toasted Almonds 🥜 | ¼ cup | Sliced for crunch |
| Fresh Lime 🍈 | 1 whole | Zested for brightness |
| Avocado Oil 🫒 | 1 tbsp | For cooking rice |
Amaranth is the star here, so buy it in bulk from stores like Whole Foods or Trader Joe's—it’s pricier but worth it for that nutty depth. The grains should be plump and uniform, not shriveled. If you can’t find amaranth, quinoa works in a pinch (use same ratio). For rice, jasmine or basmati stays fluffy—basmati’s got that fragrant kick. Toasting the amaranth first unlocks its flavor, so don’t skip that step. I usually grab mine from the bulk section at Sprouts—cheaper than pre-packaged and fresher too.
No cumin? Smoked paprika at half the amount gives a similar vibe. Fresh turmeric? Grate it yourself—it’s way more potent than powder. The garlic can be pre-minced (those little jars at Trader Joe's are perfect), but fresh is better if you’ve got it. Cilantro hater? Swap for parsley or basil. The toasted almonds add crunch—if you’ve got walnuts or pecans, they work too. And if you’re short on time, skip the garnish entirely—this dish still tastes amazing plain. The lemon juice is key for brightness, so don’t use bottled ‘lemonade’ concentrate—it’s just sad.
This keeps beautifully for 5 days in the fridge, sealed tight in an airtight container. Freeze portions for up to 3 months if you’re prepping ahead. I like to portion it into glass containers—looks great and reheats perfectly. The grains stay separate but cohesive, so no mushy texture. For extra flavor, add a splash of broth when reheating. And if you’ve got leftovers, toss them into a wrap with avocado or use as a base for a grain bowl—game changer.
Why You'll Love This Recipe
- I swear by the 1: 2 amaranth-to-rice mix—no measuring stress, just eyeball it. The grains toast in minutes with the cumin, releasing that warm, earthy aroma that makes the whole kitchen smell like a cozy meal is happening.
- Foolproof Ratio: I swear by the 1:2 amaranth-to-rice mix—no measuring stress, just eyeball it. The grains toast in minutes with the cumin, releasing that warm, earthy aroma that makes the whole kitchen smell like a cozy meal is happening.
- Earthy Umami Bomb: That first bite? The amaranth’s nutty crunch against the rice’s fluffiness, all wrapped in brothy richness—honestly, it’s the kind of flavor that lingers. A splash of olive oil at the end ties it all together with a silky finish.
- Meal Prep MVP: Make a big batch on Sunday, and you’ve got lunch covered all week. It reheats beautifully, keeps its texture, and even tastes better the next day—my kids fight over it in their lunches, no joke.
Step-by-step instructions for amaranth and rice one-pot powerhouse
This nutrient-packed dish comes together in one pot with minimal cleanup.
Toast the Amaranth and Prepare the Base
Start by rinsing the 1 cup amaranth grains thoroughly under cold water until the water runs clear. This removes any bitterness and ensures proper cooking. In a medium saucepan, heat the 2 tablespoons extra-virgin olive oil over medium heat until shimmering but not smoking. Add the rinsed amaranth and toast for 3-4 minutes, stirring constantly, until it releases a nutty aroma and turns a light golden color.
Next, add the 1 cup long-grain white rice and stir to coat evenly with the oil. Toast together for another 2 minutes until the rice becomes fragrant and slightly translucent at the edges. This toasting step develops rich flavors and prevents the grains from becoming mushy later. Keep the heat at medium—too high will burn the amaranth before it toasts properly.
Build the Flavor Foundation
Lower the heat to medium-low and sprinkle in the 1 teaspoon ground cumin and ½ teaspoon turmeric powder, stirring immediately to toast the spices for 30 seconds until fragrant. Add the 3 minced garlic cloves and cook for another 30 seconds until the garlic becomes golden and aromatic—don't let it brown or it'll turn bitter.
Pour in the 2½ cups vegetable broth and bring the mixture to a gentle boil. Once boiling, reduce heat to low and cover the pan with a tight-fitting lid. Let it simmer for 15 minutes without lifting the lid—this allows the grains to absorb the liquid evenly and develop their natural textures. You'll know it's ready when the amaranth and rice are tender but still have a slight bite.
Season and Finish the Cook
After the initial 15 minutes, remove the lid and stir in the ½ teaspoon salt, ¼ teaspoon black pepper, and 1 tablespoon lemon juice. The lemon brightens the earthy flavors while balancing the spices. Return to a gentle simmer for another 10 minutes uncovered, stirring occasionally. This final simmer ensures the grains are fully tender and any excess liquid evaporates slightly for a firmer texture.
Taste and adjust seasoning—this is your chance to make it perfect. If it needs more brightness, add a splash of lemon juice. If it's too mild, sprinkle in a pinch more salt. The dish should be flavorful but not overpowering, with the spices complementing the nutty amaranth and mild rice.
Assemble and Garnish
Transfer the cooked mixture to a serving bowl or individual plates. Drizzle with 1 tablespoon avocado oil for a silky finish and sprinkle with the ¼ cup toasted almonds and ¼ cup chopped fresh cilantro. Zest the whole fresh lime over the top for a vibrant pop of color and acidity that cuts through the richness.
Serve immediately while warm. The contrast of textures—chewy amaranth, fluffy rice, crunchy almonds—and the bright citrus notes make this dish incredibly satisfying. The one-pot method keeps everything cohesive, and the flavors only get better as they meld together. This is comfort food at its most nutritious!
Pro Tips For Making Amaranth Rice
- Toast the Amaranth: DESCRIPTION:
- Rinse the Rice: DESCRIPTION:
- Layer the Broth: DESCRIPTION:
- Finish with Cumin: DESCRIPTION:
Essential equipment for amaranth rice
Medium Saucepan
You’ll need a medium saucepan with a tight-fitting lid—3-4 quarts capacity works perfectly for this recipe. I prefer stainless steel (like my All-Clad tri-ply) because it heats evenly and prevents hot spots that can burn the amaranth. If you only have nonstick, use it carefully—the amaranth can stick if you don’t toast it properly. A heavy-bottomed pan is ideal for maintaining consistent heat during the simmering phase. 🌡️
Fine-Mesh Strainer
A fine-mesh strainer (like the OXO Good Grips) is essential for rinsing the amaranth thoroughly. This removes any dust or debris that could make the dish bitter. I rinse the grains under cold running water for about 30 seconds, shaking them gently in the strainer. A colander works in a pinch, but the finer mesh ensures cleaner grains. This step is non-negotiable—unrinsed amaranth can turn slimy when cooked.
Wooden Spoon
Use a wooden spoon (I love my Oxo Good Grips) for toasting the amaranth and stirring the rice. Wood prevents scratching your pan and won’t react with acidic ingredients like metal might. A silicon spatula is a good alternative if you prefer flexibility. Stir constantly during the toasting phase to ensure even browning—this is where the nutty flavor develops. Avoid metal utensils, which can scratch nonstick pans and leave a metallic taste.
Measuring Spoons
Precision matters with spices! Use stainless steel measuring spoons (like Weston Products) for the cumin, turmeric, and black pepper. A ½ teaspoon of turmeric might seem small, but too much can turn your dish yellow and bitter. I keep my spices in amber glass jars (from Penzeys Spices) to preserve freshness. For the lemon juice, a small measuring cup ensures accuracy—this brightens the dish, so don’t skimp. 🍋
Tight-Fitting Lid
A tight-fitting lid is critical for trapping steam and cooking the grains evenly. If your pan doesn’t have one, a separate lid (like a glass or stainless steel cover) works, but make sure it seals well. I press down firmly on the lid during the 15-minute simmer to prevent steam from escaping. This ensures the grains absorb the broth perfectly without drying out. A loose lid = uneven cooking = mushy texture.
Optional: Immersion Blender
For a creamy texture, blend the cooked mixture directly in the pot using an immersion blender (like Ninja) for 10-15 seconds. This creates a luscious base for soups or bowls. Skip this if you prefer distinct grains. If blending, let the mixture cool slightly first—hot liquids can damage the blender motor. I only use this for special occasions when I want a restaurant-style finish. 💫
Nutrition facts
Frequently asked questions
Why toast the amaranth before cooking?
Toasting unlocks the amaranth's nutty flavor and prevents a mushy texture. The 3-4 minute dry toasting in oil caramelizes the grains, creating depth that raw amaranth can't match. This step is crucial—skipping it results in bland, sticky grains that clump together.
Can I substitute amaranth with another grain?
Yes! For a similar texture, use quinoa (1:1 ratio) or buckwheat. If you want a milder flavor, try farro or wild rice, but cooking times may vary. The key is maintaining the toasted base—adjust spice levels to complement your chosen grain.
How do I fix undercooked amaranth?
Add 2-3 tablespoons of hot vegetable broth, cover, and simmer for 5-10 minutes more. Stir occasionally to prevent sticking. If it's still firm, add another splash of broth. The amaranth should be tender but still hold its shape—like al dente pasta.
Is this recipe gluten-free?
Yes! Both amaranth and rice are naturally gluten-free. Just ensure your vegetable broth is certified gluten-free and check spice labels for cross-contamination warnings. This dish is also nut-free if you omit the toasted almonds—simply add seeds like pumpkin or sunflower instead.
Can I make this ahead for meal prep?
Cook and store in an airtight container for 5 days in the fridge. For freezing, portion into single servings and freeze for up to 3 months. Reheat with a splash of broth to restore moisture. The flavors actually deepen overnight—perfect for busy mornings!