
Main Courses
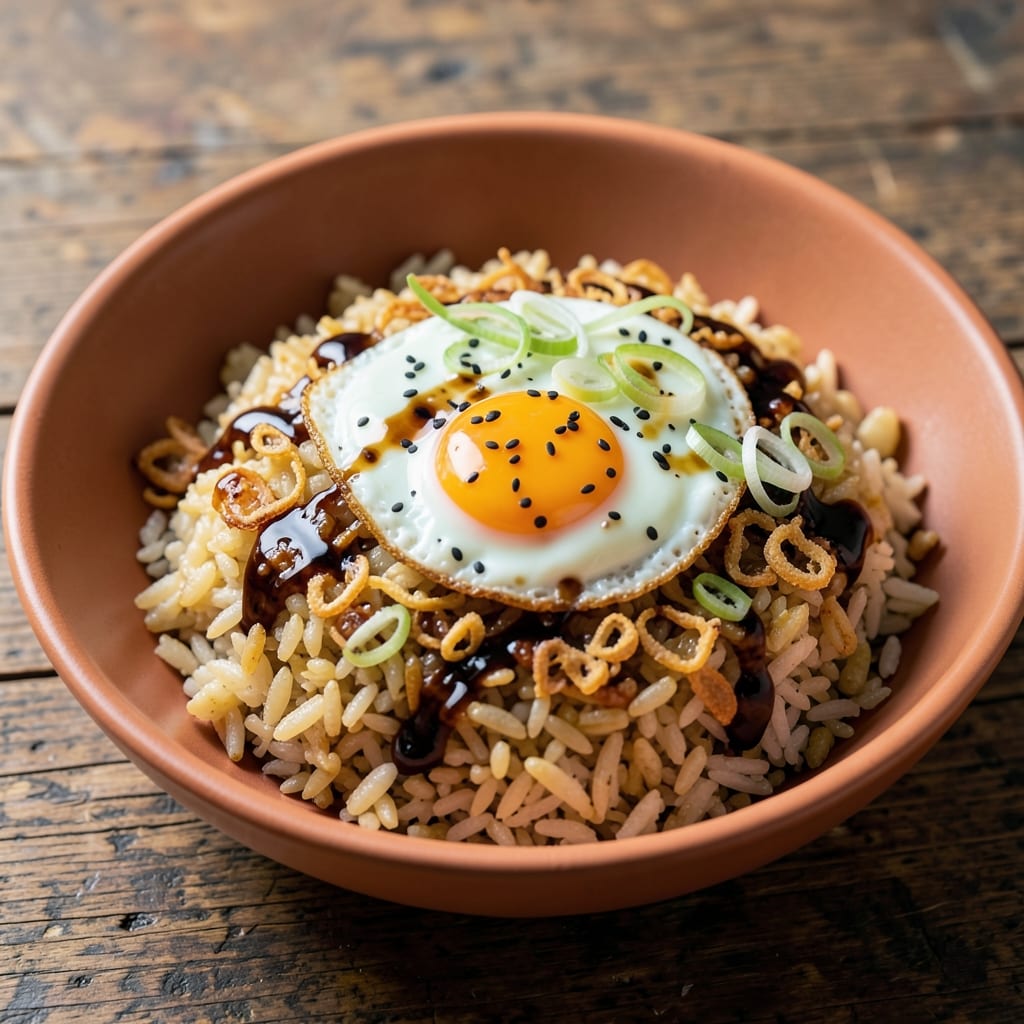
This Arashi fried rice recipe delivers the perfect balance of crispy egg bites, toasted rice, and fragrant scallions—every bite is packed with texture and flavor. 🔥 The secret lies in high-heat stir-frying and using day-old rice for that ideal chewy yet firm texture, a technique that transforms simple ingredients into a restaurant-worthy dish. I’ve perfected this version to ensure the eggs stay crispy around the edges while remaining tender inside, with scallions adding a fresh, oniony punch that cuts through the richness.
The beauty of this recipe is its adaptability—whether you prefer chicken, pork, or shrimp, the method remains the same. The key steps involve properly toasting the rice in oil before adding the protein and vegetables, which builds deep, savory flavors. A simple soy sauce and sesame oil base ties everything together, creating a dish that’s both comforting and satisfying. No fancy ingredients or complicated techniques are needed, just a hot skillet and a little patience.
What you’ll end up with is a plate of golden, crispy fried rice where each bite delivers a mix of textures: the satisfying crunch of toasted rice, the tender yet crispy edges of the eggs, and the bright, fresh snap of scallions. The aroma alone—smoky from the stir-fry, with hints of garlic and sesame—will have everyone at the table asking for seconds. This is the kind of dish that feels like a home-cooked meal but tastes like it came from a bustling Tokyo street stall.
Best served immediately, this fried rice pairs perfectly with a side of miso soup or a simple green salad to balance the richness. The recipe scales easily, making it ideal for feeding a crowd or meal prepping for the week. Let’s get started—your taste buds will thank you.
Ingredients for arashi fried rice
Four cups of day-old rice kickstarts this crispy, aromatic fried rice with perfect texture contrast.
| Ingredient | Amount | Notes |
|---|---|---|
| Day-Old Cooked White Rice 🍚 | 4 cups | Cold or room temperature preferred |
| Large Eggs 🥚 | 4 whole | Room temperature for even cooking |
| Scallions 🧅 | ¾ cup | Thinly sliced, green parts included |
| Vegetable Oil 🫒 | ½ cup | High smoke point preferred |
| Soy Sauce 🍶 | 3 tbsp | Light or all-purpose variety |
| Sesame Oil 🫒 | 1 tbsp | Toasted sesame oil for aroma |
| Garlic Cloves 🧄 | 4 cloves | Minced for even distribution |
| Salt 🧂 | 1 tsp | Adjust to taste |
| Black Pepper 🌶️ | ½ tsp | Freshly ground preferred |
| Optional Protein 🍗 | 1 cup | Diced chicken, shrimp, or pork |
| Sesame Seeds 🌾 | 1 tbsp | Toasted for garnish |
The rice is non-negotiable—day-old works best for that ideal chewy texture. Cook extra rice the night before and store in the fridge. For the eggs, room temperature is key—they’ll cook more evenly. Scallions are your freshness anchor here, so grab the green parts too for that bright punch. Trader Joe’s has the best pre-sliced scallions if you’re short on time. Garlic? Freshly minced makes all the difference—pre-minced from a jar lacks punch. For the oil, vegetable or canola works perfectly, but avoid olive oil—it burns at high heat.
No soy sauce? Coconut aminos or tamari are solid swaps, though tamari has a deeper umami. Short on sesame oil? Toasted sesame seeds plus a pinch of soy sauce mimics the aroma. The optional protein can be anything—shrimp for seafood lovers, chicken for classic fried rice, or pork for a richer taste. If you’re using shrimp, pat it dry first to avoid a soggy dish. The sesame seeds? Toast them in a dry pan for 30 seconds before adding—they’ll release their nutty aroma instantly. And yes, you can skip the protein entirely if you’re keeping it vegetarian.
This dish is best served immediately, but if you must prep ahead, keep components separate—rice, eggs, and veggies in separate containers. Reheat in a hot pan for 2-3 minutes. The eggs stay crispy longest if you cook them last, so add them just before serving. For storage, fridge for 3 days max—the texture changes after that. Freezing? Not recommended—the rice gets mushy. Garnish with those toasted sesame seeds right before eating—they add the final crunch and aroma that makes this dish sing.
Why You'll Love This Recipe
- No Chopping Needed: Honestly, I use the same scallions I buy in a bunch—just slice the whites and save the greens for garnish. The rice? Day-old works best, but even if you forget, a quick microwave zap does the trick.
- Soy-Salty Magic: That first splash of soy sauce? It’s the secret. The eggs get a crispy, savory crust while the rice soaks up just enough salt to make every bite addictive. (Yes, even on a Tuesday night.)
- Leftovers? Better Than Fresh: Between us, my fried rice tastes better the next day. The flavors meld, the rice firms up just right, and reheating it in a pan with a splash of water keeps it from drying out.
- Pocketbook Performer: Five ingredients, zero guilt. Eggs and rice stretch into meals for days, and the oil and soy sauce are cheap staples. My college self would’ve cried happy tears over this.
Step-by-step instructions for Arashi fried rice
Master this Japanese street food technique for perfectly toasted rice and crispy egg bites.
🍳 Step 1: Prepare the Crispy Egg Bites
Heat 0.25 cup of the vegetable oil in a non-stick skillet over medium-high heat until shimmering. Crack all 4 whole large eggs into a bowl, add 0.5 tsp salt and 0.25 tsp black pepper, and whisk vigorously until frothy. Pour eggs into the hot oil and let them cook undisturbed for 2-3 minutes until the bottoms are set but tops remain slightly runny.
Here's the trick: gently press down on the eggs with a spatula during the first minute to create thick, crispy bites. When the edges start to curl and the centers are still soft, flip the entire egg mass and cook for another 1-2 minutes until golden brown. Remove and set aside on a paper towel-lined plate to drain excess oil.
👨🍳 Step 2: Toast the Rice and Build the Base
In the same skillet (no need to clean it—the egg bits add flavor), add the remaining 0.25 cup vegetable oil and heat over medium-high heat. Add the 4 cups day-old cooked white rice, spreading it evenly in the pan. Let it toast for 3-4 minutes without stirring, until the bottom layer becomes golden brown and crispy.
Here's where the magic happens: stir-fry the rice vigorously for 2 minutes to break up any clumps and toast all surfaces evenly. The rice should look dry and slightly crispy around the edges. Push the rice to one side of the pan, then add 2 tbsp soy sauce and 1 tbsp sesame oil to the empty space. Let it sizzle for 30 seconds to infuse the flavors before mixing everything together.
🍳 Step 3: Add Aromatics and Protein
Add the 4 cloves minced garlic and 0.75 cup thinly sliced scallions to the pan, stirring for 1 minute until fragrant. If using the 1 cup optional protein, add it now and cook for 2-3 minutes until heated through and slightly browned. Season with the remaining 1 tbsp soy sauce and adjust salt to taste.
This is the moment that matters: the aromatics should sizzle and release their oils, creating a fragrant base. If the rice starts to look dry, add 1-2 tablespoons of water to steam it slightly and restore moisture. The protein should be cooked through but still retain its texture—don't overcook or it'll turn rubbery.
🥘 Step 4: Combine and Finish
Return the crispy egg bites to the pan and gently fold everything together with a spatula. Cook for another 1-2 minutes until the eggs are heated through and the flavors meld. Taste and adjust seasoning—you might need a bit more soy sauce or sesame oil to balance the flavors. The rice should be hot and slightly crispy in spots, with tender egg bites throughout.
For that authentic Arashi touch, transfer the fried rice to a serving plate and sprinkle with 1 tbsp toasted sesame seeds. Serve immediately while the rice is hot and the egg bites are still crispy. The contrast of textures—crispy rice, tender eggs, and silky aromatics—is what makes this dish so special.
Pro Tips For Making Arashi Fried Rice
- CRACK THE EGGS FIRST: I used to scramble the eggs into the rice right away, but that’s how you end up with a mushy, uneven mess. Instead, scramble them in a separate pan until just set—soft curds, not rubbery—and then chop them into small pieces before folding into the rice. This keeps the texture distinct and prevents the eggs from turning into a gluey paste.
- USE COLD RICE: Day-old rice is non-negotiable, but here’s the real trick: spread it on a tray and refrigerate for 30 minutes before using. Cold rice fries up faster, absorbs less oil, and stays fluffy instead of turning gummy. (Yes, even if you’re impatient like me.)
- SALT THE RICE BEFORE FRYING: Skip the soy sauce at first—season the rice with ½ teaspoon salt per cup while it’s still cold. This balances the flavors later when you add soy sauce, and it prevents the dish from tasting flat or one-note. (Your future self will notice the difference.)
- CHOP SCALLIONS IN HALF: I was skeptical until I tried it—cutting scallions into 1-inch pieces instead of thin slices keeps them from burning before the rice is done. They’ll soften just enough to add flavor without turning bitter. (Does it look weird? Yes. Does it work? Every single time.)
Creative variations of these flavors
Classic Japanese Style
For an authentic Arashi experience, skip the protein and focus on the crispy egg bites and toasted rice. Use 4 cups day-old sushi rice instead of regular white rice for a stickier texture that holds up better during stir-frying. Add 1 tbsp mirin and 1 tsp sugar to the soy sauce mixture for a touch of sweetness that balances the savory flavors. Garnish with pickled ginger and extra scallions for that classic izakaya vibe. 🍱
Spicy Kimchi Twist
Swap the scallions for ½ cup chopped kimchi (with juice) and add 1 tsp gochujang to the soy sauce. The tangy, spicy kimchi adds depth while keeping the dish crispy. For extra heat, stir in ½ tsp red pepper flakes> when combining everything. Top with sesame seeds and extra kimchi> for a Korean-Japanese fusion that’s addictive. 🌶️
Seafood Lover’s Version
Replace the optional protein with 1 cup cooked shrimp> or ½ lb scallops>. Toss the shrimp with 1 tsp soy sauce> and ½ tsp cornstarch> before adding to the pan for extra crispiness. For scallops, sear them separately in 1 tbsp butter> until golden, then fold into the rice at the end. Finish with lemon wedges> to cut through the richness. 🦐
Vegetarian Power Bowl
Load this up with ½ cup chopped bell peppers>, ½ cup snap peas>, and ½ cup shredded carrots> for a vibrant, colorful version. Add 2 tbsp nutritional yeast> to the soy sauce for a cheesy, umami boost. Top with crispy fried shallots> and avocado slices> for a restaurant-worthy vegetarian dish. 🥕
Breakfast Arashi
Make this a hearty breakfast by adding ½ cup diced ham> or crumbled bacon> to the protein mix. Stir in 1 tbsp maple syrup> when combining everything for a sweet-savory balance. Serve with a fried egg on top and hot sauce on the side for a brunch that’s anything but boring. ☕
Protein-Packed Meal Prep
Double the batch and store components separately for easy assembly during the week. Cook 2 cups extra rice>, 8 extra egg bites>, and 2 cups extra protein> (chicken or tofu). Reheat rice and protein in the pan with 1 tbsp oil>, then add fresh egg bites and scallions at the end. Keep the sesame oil and soy sauce in small containers to drizzle fresh. 📅
Nutrition facts
Frequently asked questions
Why does Arashi fried rice need day-old rice?
Day-old rice is crucial because it's drier and firmer, which creates the perfect crispy texture when stir-fried. Freshly cooked rice is too moist and will turn mushy in the pan. The starches have time to redistribute overnight, giving you that satisfying bite. If you're short on time, spread freshly cooked rice on a tray and refrigerate for 1 hour to mimic day-old texture.
Can I make this recipe without eggs?
Yes! The crispy egg bites are iconic but optional. For a vegetarian version, try crispy tofu cubes (pressed and pan-fried) or crumbled tempura bits for texture. The key is maintaining that satisfying crunch—just make sure whatever you substitute has a firm, crispy exterior when added to the rice.
How do I prevent the rice from getting soggy?
Keep the heat high and avoid adding too much liquid. If the rice looks dry, add 1 tablespoon of water at a time instead of dousing it. Also, don't overcrowd the pan—cook in batches if needed. The eggs should go in last to absorb any excess moisture without losing their crispiness.
What's the best protein to use for authentic flavor?
For classic Arashi flavor, try diced chicken thigh (juicier than breast) or pork belly (rich and fatty). Both add depth without overpowering the dish. Shrimp works too, but pat it very dry first to prevent a watery pan. The protein should be cooked just until done—overcooking makes it rubbery.
Can I make this in a wok instead of a skillet?
A wok is perfect for this dish because it allows for high-heat stir-frying that creates those signature crispy edges. Just