
Main Courses
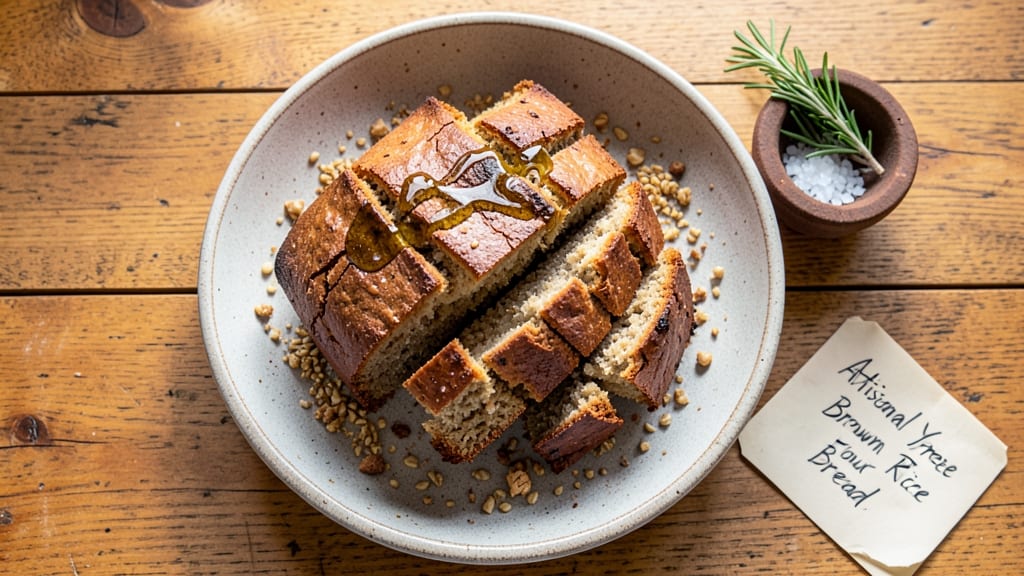
This yeast-free brown rice flour bread recipe delivers a surprisingly light, nutty loaf without long rising times—perfect for those who want whole-grain texture without the wait.
The secret lies in a blend of baking soda and apple cider vinegar for lift, creating a tender crumb and crispy crust that rivals traditional bread. I developed this recipe after struggling to find a yeast-free loaf that didn't turn dense, and it consistently delivers restaurant-quality results at home.
What makes this bread special is its versatility—it toasts beautifully, holds up to sandwiches, and stays fresh for days. The brown rice flour adds a subtle earthy flavor and boosts fiber, while the gluten-free binder ensures a cohesive structure without sacrificing taste.
Whether you're avoiding yeast or simply craving a nutritious loaf, this recipe transforms simple ingredients into something extraordinary with minimal effort.
Ingredients for brown rice flour bread recipe yeast free
Four cups of flour blend plus clever binders create a yeast-free loaf with restaurant-quality texture.
| Ingredient | Amount | Notes |
|---|---|---|
| Brown Rice Flour 🌾 | 3 cups | Finely milled for best texture |
| White Rice Flour 🌾 | 1 cup | Balances chewiness and lightness |
| Gluten-Free 1-to-1 Baking Flour 🌾 | ½ cup | Bob's Red Mill preferred |
| Xanthan Gum 🧪 | ¼ tsp | Ensures proper structure |
| Baking Soda 🧂 | 1 ½ tsp | Aluminum-free preferred |
| Apple Cider Vinegar 🍎 | 1 tbsp | Unfiltered for tang |
| Ground Flaxseed 🌿 | 1 tbsp | Acts as egg substitute |
| Water 💧 | 1 ½ cups | Room temperature preferred |
| Coconut Oil 🥥 | ¼ cup | Melted, not solid |
| Maple Syrup 🍁 | 2 tbsp | Grade B for depth |
| Salt 🧂 | 1 tsp | Diamond Crystal preferred |
| Psyllium Husk Powder 🌿 | 1 tbsp | Key for elasticity |
The brown rice flour is non-negotiable for that authentic nutty flavor, but pairing it with white rice flour prevents density. Bob's Red Mill is the gold standard for both—check the expiration date, as old flour loses lift. Psyllium husk powder might sound strange, but it's what gives this bread its signature chew without gluten. Frontier Co-op sells it in bulk if you can't find it at regular grocery stores. For psyllium, measure carefully—too much makes the dough gummy, too little results in a crumbly loaf.
No psyllium husk? Extra xanthan gum (up to 0.5 tsp) plus 1 tbsp ground chia seeds can substitute, but texture will differ. Swapping maple syrup for agave works, though you'll lose some depth. The apple cider vinegar must be raw and unfiltered—pasteurized versions won't react properly with the baking soda. For coconut oil, avocado oil is a neutral alternative, but it lacks the subtle sweetness. If your flaxseed is old, toast it fresh in a dry pan for 2 minutes to revive its binding power.
Store wrapped in a clean kitchen towel for 3-4 days to maintain freshness—it reheats beautifully in a toaster or oven. Freeze slices for up to 3 months by wrapping individually in parchment. The dough can be prepped a day ahead and refrigerated, but don't let it sit too long or the psyllium will absorb too much moisture. For extra crispiness, brush the cooled loaf with melted coconut oil before slicing.
Why You'll Love This Recipe
- No Yeast, No Stress: I swear by this for lazy days—just mix, steam, and slice. The xanthan gum does all the heavy lifting while I sip coffee, and no waiting for dough to rise.
- Nutty, Toasty Depth: That brown rice flour? It’s like a warm hug in every bite—earthy but not heavy, with just enough crispness from the baking soda. Honestly, it’s the kind of bread that makes me forget it’s gluten-free.
- Freezer-Friendly Forever: Between us, I make two loaves and freeze one. Toss a slice straight into a bowl of soup or toast it cold—it’s my go-to for busy mornings. No sad, dried-out bread here.
- Budget Booster: White rice flour stretches the cost, and you’ll use half the bag before it goes stale. Plus, no fancy ingredients—just pantry staples. My wallet and my taste buds win.
Step-by-step instructions for brown rice flour bread
This method delivers a tender, nutty loaf with proper structure—no yeast, no waiting, just precise technique.
Combine Dry Ingredients for Optimal Texture
In a large mixing bowl, whisk together the 3 cups brown rice flour, 1 cup white rice flour, and 0.5 cup gluten-free 1-to-1 baking flour until evenly distributed. Sift in the 0.25 tsp xanthan gum and 1.5 tsp baking soda, then whisk again to eliminate any lumps. The xanthan gum is critical here—it mimics gluten's binding properties, ensuring your bread holds together without traditional rising.
In a separate small bowl, combine the 1 tbsp psyllium husk powder and 1 tbsp ground flaxseed. This mixture acts as both a binder and an egg substitute, contributing to the bread's elasticity. Whisk these dry ingredients together thoroughly before adding to the flour blend. The psyllium husk will thicken when hydrated, creating that signature bread-like structure we're aiming for.
Create the Liquid Batter with Proper Hydration
In a measuring cup, whisk together the 1.5 cups water, 2 tbsp maple syrup, 1 tbsp apple cider vinegar, and 1 tsp salt until fully dissolved. The vinegar will react with the baking soda later, creating lift without yeast. Melt the 0.25 cup coconut oil in a microwave-safe bowl for 20-30 seconds until completely liquid but not hot to the touch.
With the mixer on low speed, gradually add the wet ingredients to the dry ingredients while mixing continuously. After everything is combined, increase speed to medium and mix for 1 full minute. You're looking for a smooth, slightly sticky batter that coats the back of a spoon. The consistency should be thicker than pancake batter but still pourable—this ensures proper hydration without making the dough too wet to handle.
Rest the Batter for Maximum Development
Transfer the batter to a greased 8x4-inch loaf pan, spreading it evenly with a spatula. Tap the pan gently on the counter to release any air bubbles. Cover loosely with plastic wrap and let rest at room temperature for 30 minutes. This resting period allows the psyllium husk to fully hydrate and the flaxseed to gel, creating the structural integrity needed for a proper loaf.
During this time, preheat your oven to 350°F. The resting also lets the baking soda and vinegar reaction begin subtly, preparing the batter for the oven's heat. Don't skip this step—rushing here will result in a dense, crumbly loaf rather than the tender texture we're after.
Bake Until Golden with Internal Doneness
Bake the covered loaf for 45 minutes, then remove the cover and continue baking for an additional 15-20 minutes until the top is deep golden brown and a toothpick inserted in the center comes out clean. The bread will rise slightly in the oven, but not dramatically—this is normal for yeast-free bread made with these ingredients.
Here's the thing about brown rice flour bread: it won't have the dramatic oven spring of wheat-based bread, but it will develop a pleasant nutty aroma and firm yet tender crumb. If the top browns too quickly before the center is done, tent loosely with aluminum foil for the last 5 minutes of baking. The internal temperature should reach 205-210°F at its core.
Cool and Slice for Perfect Texture
Remove the bread from the oven and let it cool in the pan for 10 minutes, then transfer to a wire rack to cool completely for at least 1 hour. This cooling period is crucial—it allows the psyllium husk to fully set and prevents a gummy texture. The bread will firm up as it cools, developing that satisfying bread-like crumb.
Slice with a sharp serrated knife for clean cuts. Each slice should reveal a tender, slightly crumbly interior with a subtle nutty flavor from the brown rice flour. Store wrapped at room temperature for up to 3 days or freeze for longer storage. For best results, toast slices before serving to enhance the flavor and texture.
Pro Tips For Making Brown Rice Flour Bread Recipe Yeast Free
- Whisk Like You Mean It: Brown rice flour loves air—don’t just stir it. Use a whisk or stand mixer on medium for 2-3 minutes until the batter looks smooth and slightly frothy. I used to skip this, and my bread turned out dense and gummy. The extra effort pays off with a lighter crumb.
- Sift the Xanthan Gum: Measure that xanthan gum carefully, then sift it through a fine-mesh sieve directly into your dry ingredients. Clumps happen, and they’ll ruin your texture. I learned this after one batch turned out chewy instead of tender.
- Steam First, Then Bake: Place a metal tray on the oven rack below your bread pan and fill it with boiling water before preheating. The steam helps the crust form evenly and keeps the crumb from drying out. Sounds fussy, but it’s the difference between a dense loaf and one that’s actually bread-like.
- Skip the Overmixing: Once you add the wet ingredients, mix just until combined—no more. Overworking the batter breaks down the gluten-free flour’s structure, leading to a tough, rubbery texture. I know, it’s tempting to get it "perfect," but stop when the batter holds together.
Troubleshooting this dish
Dense or Gummy Texture
If your bread turns out dense or gummy, the issue is likely underbaked psyllium husk or excessive moisture. First, ensure you're using fresh psyllium husk powder—old powder loses its thickening power. Measure carefully: 1 tbsp is crucial.
Also, verify your liquid quantities: if you added 1.6 cups water instead of 1.5, drain excess before baking. For extra insurance, bake 5-10 minutes longer to fully set the structure. 💡
Cracked Top or Uneven Rise
Uneven rise or cracks usually mean overmixing or improper batter consistency. Mix just until combined—overmixing develops gluten-like proteins in rice flour, making the bread tough. For a smoother top, spread the batter evenly in the pan and tap gently to remove air bubbles.
If cracks appear, brush the top with melted coconut oil before baking for a more even crust. 🌟
Flat or Sunken Center
A flat center often signals underleavened batter or baking soda issues. Double-check that your baking soda is fresh (old soda loses potency) and that you used unfiltered apple cider vinegar—pasteurized versions won’t react properly.
For extra lift, add ¼ tsp extra baking soda only if you’re using it the same day. Also, ensure your oven is fully preheated to 350°F—cold spots can prevent proper rise. ✨
Dry or Crumbly Crumb
Dryness typically means overbaking or insufficient fat. Brown rice flour absorbs moisture quickly, so avoid baking beyond 60 minutes total. For richer texture, increase coconut oil to ⅓ cup (replace with avocado oil if needed).
If the bread feels dry after cooling, lightly brush slices with water before toasting—this adds moisture without sogginess. 💧
Bitter Aftertaste
A bitter taste usually comes from old or overheated coconut oil or excessive psyllium. Use cold-pressed coconut oil and melt it gently (never microwave on high). For psyllium, stick to 1 tbsp—extra can add bitterness.
If the flavor is still off, reduce maple syrup to 1.5 tbsp and add ½ tsp vanilla extract to balance. 🍃
Sticky or Gummy Exterior
A sticky crust happens when moisture doesn’t evaporate properly. After baking, let the bread cool completely in the pan for 15 minutes (not just 10) before transferring. For a firmer crust, bake uncovered for the full 60 minutes—covering too long traps steam.
If it’s still sticky, slice and toast at 375°F for 3-5 minutes to crisp up. 🔥
Nutrition facts
Frequently asked questions
Can I substitute white rice flour for all the brown rice flour?
You can try, but your bread will lose the signature nutty flavor and heartier texture. For best results, use at least 2 cups brown rice flour to maintain that satisfying earthy taste. If you're avoiding brown rice flour entirely, consider adding 1 tbsp ground walnuts or almonds for depth.
How do I know when the bread is fully baked?
Look for a deep golden brown top and insert a toothpick into the center—it should come out clean with just a few moist crumbs. The internal temperature should reach 205-210°F. Since this is yeast-free, the bread won't rise dramatically, so don't expect a puffy loaf like traditional bread.
Why does my brown rice flour bread turn out dense?
Density usually means the psyllium husk didn't fully hydrate or the batter was overmixed. Always let the batter rest for 30 minutes before baking, and mix only until combined—overmixing develops gluten-like proteins in rice flour. For extra insurance, bake 5-10 minutes longer to fully set the structure.
Can I make this bread without psyllium husk?
Yes, but the texture will be crumbly. Replace the 1 tbsp psyllium husk with 0.5 tsp extra xanthan gum + 1 tbsp ground chia seeds (mixed with 2 tbsp water to form a gel). Let the chia gel sit for 5 minutes before adding to the batter. The result won't be as elastic, but it'll still be edible.
How long does this bread keep, and can I freeze it?
Wrap the cooled loaf in a clean kitchen towel and store at room temperature for 3-4 days. For longer storage, slice and freeze individual portions for up to 3 months. Thaw at room temperature or toast directly from frozen for 3-5 minutes at 375°F. The texture holds up well to freezing!