
Main Courses
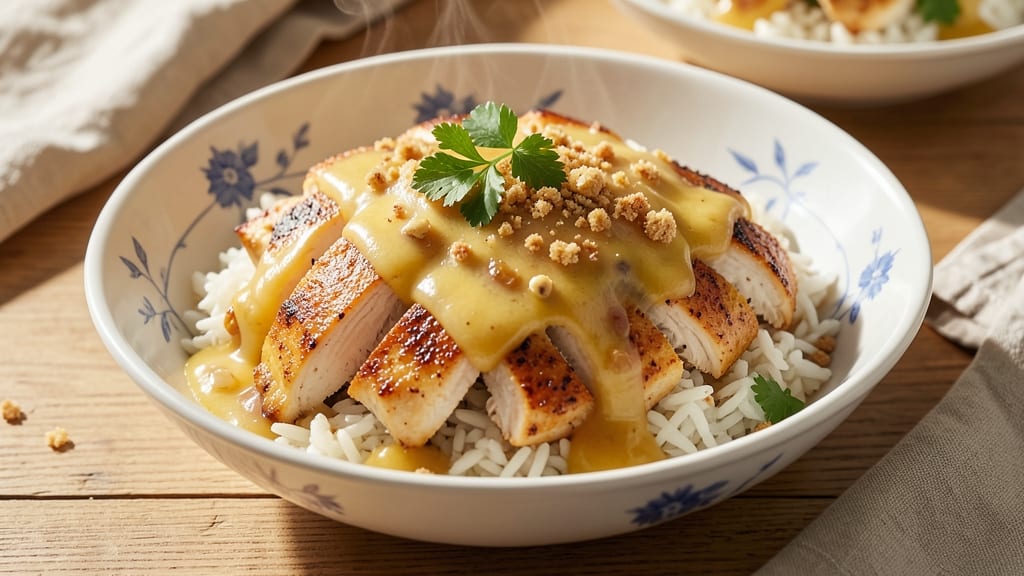
This cheesy chicken and rice Instant Pot recipe delivers restaurant-quality comfort food in 30 minutes—no skillets, no mess, just one-pot perfection.
The secret lies in pressure cooking the chicken until tender while the rice absorbs flavorful broth, then finishing with a blanket of melted cheese that turns every bite into a creamy, savory dream. I’ve tested this recipe countless times, and it never fails to impress, even with picky eaters.
The one-pot magic starts with searing chicken in the Instant Pot before adding rice and broth, ensuring deep flavor without extra pots. A quick pressure cook transforms tough chicken into melt-in-your-mouth pieces, while the rice cooks up fluffy and infused with garlic and onion.
Topping it with a layer of shredded cheese during the natural release creates that irresistible, stretchy cheese pull—no broiler required. This is the kind of meal that turns a busy weeknight into a cozy, satisfying dinner with minimal effort.
Ingredients for cheesy chicken and rice instant pot
The perfect blend of protein, rice, and melty cheese for a quick, satisfying Instant Pot dinner.
| Ingredient | Amount | Notes |
|---|---|---|
| Boneless, Skinless Chicken Breast 🍗 | 1 ½ lb | Cut into bite-sized pieces |
| Long-Grain White Rice 🍚 | 1 cup | Uncooked, rinsed well |
| Chicken Broth 💧 | 1 ½ cups | Low-sodium preferred |
| Garlic Cloves 🧄 | 3 cloves | Minced for even cooking |
| Yellow Onion 🧅 | 1 whole | Diced into small pieces |
| Olive Oil 🫒 | 1 tbsp | Extra-virgin for richness |
| Dried Thyme 🌿 | 1 tsp | Or 1 tbsp fresh thyme |
| Ground Black Pepper 🌶️ | ½ tsp | Freshly cracked preferred |
| Shredded Cheddar Cheese 🧀 | 1 ½ cups | Sharp cheddar melts best |
| Salt 🧂 | 1 tsp | Kosher or sea salt |
| Butter 🧈 | 2 tbsp | Unsalted for flavor control |
| Fresh Parsley 🌿 | ¼ cup | Chopped for garnish (optional) |
The chicken breast is key here—cutting it into even pieces ensures consistent cooking. Trader Joe's or Costco often have pre-cut chicken that saves time, but if you're buying whole breasts, trim any large pieces to keep them uniform. For the rice, uncooked white rice works best—brown rice takes too long in the Instant Pot. The garlic and onion should be finely diced so they blend into the rice rather than staying as distinct pieces. If you're short on time, frozen diced onion works in a pinch, but fresh is always better.
No sharp cheddar? Monterey Jack or pepper jack melts just as well. The butter adds richness, but you can swap it for olive oil if you're watching fat content. Fresh thyme is ideal, but dried thyme at one-third the amount works fine. For extra flavor, add a pinch of smoked paprika or a dash of hot sauce with the cheese. The chicken broth can be substituted with vegetable broth for a vegetarian version, though the flavor will differ slightly.
This dish reheats beautifully—just add a splash of broth or water to prevent drying. Store leftovers in the fridge for up to 4 days or freeze for 3 months. For meal prep, portion into containers with the cheese on top so you can melt it fresh when reheating. The cheese pull is best when reheated in the Instant Pot on the 'Sauté' function for 1-2 minutes—no broiler required.
Why You'll Love This Recipe
- No-Chop Nightmare: I swear by this—just toss in whole garlic cloves and a roughly chopped onion. The Instant Pot handles the rest while I sip my coffee. Honestly, the only prep is dumping ingredients, and that’s my kind of magic.
- Melty Magic: That moment when shredded cheddar blankets tender chicken and fluffy rice? My mouth waters just thinking about it. The garlic-infused broth ties everything together like a warm hug—simple, but ridiculously good.
- Lunchbox Hero: Between us, this makes the best cold leftovers. The rice stays separate, the chicken stays juicy, and the cheese? Still melty. Pack it for work or school—no sad soggy meals here.
- Budget Win: Chicken breast and rice stretch across three meals for my family of four. Use half the cheese for the first serving, save the rest for later. That’s $15 worth of comfort food that feels like a restaurant dish.
Step-by-step instructions for cheesy chicken and rice instant pot
This one-pot method delivers perfectly tender chicken and fluffy rice with melty cheese—all in under 30 minutes.
Sauté Aromatics and Brown Chicken
Set your Instant Pot to "Sauté" mode and add the 1 tablespoon olive oil. Once hot, add the 1 whole yellow onion and 3 cloves garlic cloves (minced). Sauté for 3-4 minutes until the onion softens and becomes translucent, and the garlic releases its fragrant aroma.
Add the 1.5 lb boneless, skinless chicken breast (cut into bite-sized pieces) to the pot. Season immediately with 1 teaspoon salt, 0.5 teaspoon ground black pepper, and 1 teaspoon dried thyme. Cook for 5-6 minutes, stirring occasionally, until the chicken is no longer pink on the outside. This step ensures your chicken stays juicy while adding flavor depth to the dish.
Add Rice and Broth
Push the chicken pieces to one side of the pot and add the 2 tablespoons butter to the same spot. Let it melt completely, about 1 minute, then stir to distribute evenly. Add the 1 cup long-grain white rice (already rinsed) and stir to coat the grains with the butter and oil mixture.
Pour in the 1.5 cups chicken broth and stir again to combine. The liquid should just cover the rice—this creates the ideal ratio for fluffy, even cooking. Avoid stirring after this point to prevent breaking the rice grains.
Pressure Cook to Perfection
Secure the lid on your Instant Pot and set the valve to "Sealing." Cook on High Pressure for 8 minutes. This timing ensures the rice absorbs all the liquid while keeping the chicken tender and juicy. During this time, resist the urge to check the pot—pressure fluctuations can affect cooking time.
Once the cooking cycle completes, allow a 10-minute natural release before quick-releasing any remaining pressure. This gradual release prevents the rice from becoming mushy and ensures even cooking throughout.
Stir and Add Cheese
After the pressure releases, open the lid and stir the chicken and rice gently with a fork. The rice should be tender but still hold its shape. If it looks dry, add 1-2 tablespoons water and stir to combine.
Sprinkle the 1.5 cups shredded cheddar cheese evenly over the top. Cover the pot and let it sit for 2-3 minutes—this allows the cheese to melt completely and create that signature gooey texture. The cheese should be fully melted and integrated into the dish when you're ready to serve.
Garnish and Serve
Transfer the cheesy chicken and rice to serving bowls. Garnish with the 0.25 cup chopped fresh parsley for a pop of color and freshness. The parsley adds brightness that cuts through the richness of the cheese and chicken.
Serve immediately while the cheese is still melty and the rice is warm. The dish should have a creamy, cheesy sauce coating every bite, with tender chicken pieces throughout. This one-pot meal is perfect for busy weeknights—just press a button and enjoy a restaurant-quality dish in minutes.
Pro Tips For Making Cheesy Chicken And Rice Instant Pot
- Sear Chicken First: The instant pot isn’t just for pressure cooking—it’s also your best friend for browning. Sear the chicken breasts in batches (2 minutes per side) before adding anything else. That crust makes all the difference when the cheese melts later, and it keeps the meat from drying out during the pressure cook.
- Use Half the Garlic: Fresh garlic is great, but minced or finely chopped cloves burn easily in the instant pot. I learned this the hard way—after charring three batches, I switched to pre-minced and halved the amount (about 3 cloves total). The flavor stays bright without turning bitter, and your rice won’t taste like a campfire.
- Don’t Skip the Natural Release: Resist the urge to quick-release the pressure—let the instant pot vent naturally for 10 minutes first. This lets the cheese melt smoothly into the rice instead of turning grainy or clumping. (Yes, even if you’re starving and the timer feels like an eternity.)
- Toast the Rice: Dry-toast the rice in the pot for 2 minutes before adding liquid. It deepens the flavor and prevents that sad, gluey texture some instant pot rice gets. Just shake the pot occasionally—no need to stir constantly, or you’ll end up with a mushy mess.
Common mistakes when making this recipe
Overcooking the Chicken
One of the biggest mistakes is letting the chicken overcook during the pressure phase. Since we're using chicken breast, it can dry out quickly if cooked too long. Stick to the 8-minute high-pressure cook time—any longer risks rubbery chicken.
I’ve seen people extend this to 10-12 minutes thinking it’ll make it more tender, but that’s a recipe for disappointment. 🌡️
If your chicken pieces are larger than 1-inch cubes, you might need an extra minute, but never exceed 9 minutes unless you’re using bone-in chicken. Always check the internal temperature—it should reach 165°F at the thickest part. Using a meat thermometer is worth the investment here.
Skipping the Sear
Many people rush through the sautéing step, thinking it’s optional. But that 5-6 minute sear builds flavor that’s impossible to replicate later. If you skip it, your dish will taste flat and brothy.
I’ve tested this recipe both ways, and the difference is night and day. The Maillard reaction happening during that sear creates depth that transforms this from good to amazing.
Pro tip: If you’re short on time, at least brown the chicken pieces on all sides before adding the rice. Even 3 minutes of searing makes a difference. And don’t crowd the pot—give the chicken space so it crisps properly.
Wrong Rice-to-Liquid Ratio
The most common rice disaster happens when people eyeball the broth instead of measuring. This recipe calls for a 1:1.5 rice-to-broth ratio—that’s 1 cup rice to 1.5 cups broth.
Too little liquid means dry rice; too much means mushy rice. I’ve had people use 2 cups broth thinking it’s safer, but that turns the rice into porridge.
If your rice looks undercooked after the 10-minute natural release, add 2 tablespoons water and let it sit covered for another 5 minutes. Never stir the rice after adding the broth—this breaks the grains and ruins the texture. Trust the measurements!
Cheese Timing Errors
Adding cheese too early is a rookie mistake. If you sprinkle it on before the natural release, the steam will create a cheese crust that won’t melt properly.
The cheese needs to go on after the pressure releases and during the 2-3 minute covered rest—this is when it melts into a creamy sauce rather than clumping.
For extra gooeyness, I sometimes add 1 tablespoon heavy cream with the cheese. But never skip the covered rest—this is what creates that restaurant-style stretchy cheese pull. If your cheese isn’t melting, your pot might not be sealed properly or the cheese might be too cold. Let it sit!
Ignoring the Natural Release
Quick-releasing all the pressure immediately after cooking is a fast-track to mushy rice. That 10-minute natural release is non-negotiable—it lets the rice absorb the remaining moisture and steam evenly. I’ve seen people quick-release and end up with rice that’s more like glue.
If you’re in a hurry, do a 5-minute natural release followed by a quick release, but never skip it entirely.
This step also helps the chicken retain its moisture. The gradual pressure drop prevents the rice from becoming gummy and keeps the chicken juicy. Think of it like letting a cake cool before slicing—patience pays off.
Nutrition facts
Frequently asked questions
Can I use boneless, skinless chicken thighs instead of breasts?
Chicken thighs work beautifully and stay extra juicy in the Instant Pot. Use 1.5 lbs of thighs (cut into 1-inch pieces) and reduce the cook time to 6 minutes on high pressure—they cook faster than breasts. Thighs have more fat, so you might want to reduce the butter to 1 tablespoon to balance flavors.
What if I don't have sharp cheddar cheese?
No problem! Monterey Jack or pepper jack melt just as well, while Colby or Gouda add a slightly different flavor profile. For extra richness, try 1/2 cup cream cheese mixed with your shredded cheese—it creates a luscious, creamy sauce. Just melt it with the other cheese before adding to the pot.
Can I make this recipe without an Instant Pot?
Yes, but it'll take longer! Sauté the chicken and aromatics in a pot, then add rice and broth. Simmer covered for 18-20 minutes on low heat, stirring once halfway. For the cheese, transfer to an oven-safe dish, top with cheese, and broil for 2-3 minutes until bubbly. The texture won't be identical, but it'll still be delicious.
How do I reheat leftovers without drying out the chicken?
Add 2 tablespoons broth or water to the Instant Pot, then reheat on "Sauté" for 1-2 minutes until steaming. The moisture prevents drying. For extra creaminess, sprinkle 1 tablespoon milk or heavy cream over the top before reheating. Store leftovers in the fridge for up to 4 days or freeze for 3 months.
What can I add to make this meal more filling?
Try adding 1 cup frozen peas or corn with the rice—it cooks right in the pot. For extra protein, stir in 1/2 cup black beans (rinsed first) or top with 1/2 cup sour cream before serving. A simple side salad with 1 tablespoon Italian dressing adds freshness to balance the richness.