
Main Courses
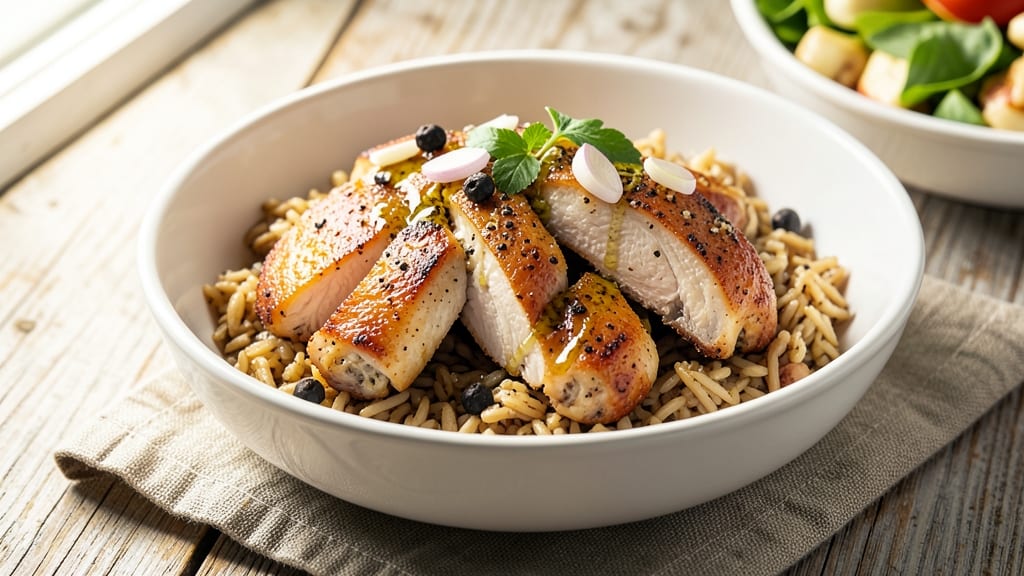
This Instant Pot chicken and brown rice recipe delivers a complete, balanced meal in under 30 minutes—juicy chicken, perfectly cooked brown rice, and aromatic spices all in one pot.
The pressure cooker’s magic transforms tough chicken thighs into tender, flavorful bites while the rice absorbs seasoned broth for restaurant-quality results without the mess.
What makes this recipe stand out is its simplicity: no pre-cooking the rice, no separate pans, and just five core ingredients that come together in your Instant Pot.
The high-pressure setting breaks down the chicken while the rice steams in the same pot, creating a dish that’s both efficient and deeply satisfying. Perfect for weeknight dinners, meal prep, or family gatherings, this one-pot wonder cuts down on cleanup while delivering a hearty, protein-rich meal.
Ingredients for chicken and brown rice instant pot
Five core ingredients transform into a complete protein-rich meal in your Instant Pot.
| Ingredient | Amount | Notes |
|---|---|---|
| Boneless, Skinless Chicken Thighs 🍗 | 1 ½ lb | Cut into even 1-inch pieces |
| Long-Grain Brown Rice 🌾 | 1 cup | Uncooked, rinsed thoroughly |
| Low-Sodium Chicken Broth 💧 | 1 ½ cups | Homemade or high-quality store-bought |
| Extra-Virgin Olive Oil 🫒 | 1 tbsp | For searing chicken |
| Garlic Cloves 🧄 | 4 cloves | Minced for aromatic depth |
| Ground Black Pepper 🌶️ | ½ tsp | Freshly cracked for potency |
| Diamond Crystal Kosher Salt 🧂 | 1 tsp | Adjust to taste after cooking |
| Dried Thyme Leaves 🌿 | 1 tsp | Or 1 tbsp fresh thyme stems removed |
| Bay Leaves 🌿 | 2 whole | Removed before serving |
| Fresh Parsley 🌿 | ¼ cup | Chopped for garnish |
| Lemon Juice 🍋 | 1 tbsp | Freshly squeezed for brightness |
The chicken thighs are non-negotiable here—they stay juicier than breasts during pressure cooking. Look for organic or pasture-raised at Whole Foods if you want premium quality, but standard supermarket thighs work perfectly. Pre-cut pieces save time, but cutting your own ensures even cooking. The brown rice should be rinsed thoroughly to remove excess starch, preventing gummy texture. For extra flavor, toast the rice in the Instant Pot with a pinch of salt before adding liquid. The broth matters too—homemade or Pacific Foods low-sodium is ideal, but any good-quality store brand will suffice.
No fresh thyme? Dried works at one-third the amount, but fresh delivers superior aroma. Substituting chicken broth for water? Add an extra 1 tbsp soy sauce or Worcestershire for depth. The olive oil is purely for searing—don't skimp, but don't overdo it either. For a smoky twist, swap half the olive oil for smoked paprika during the sear. The lemon juice brightens everything, but if you're serving this with a side salad, you can halve it. Bay leaves add subtle complexity—never skip them, but remove before serving. Parsley is optional but recommended for freshness and presentation.
This dish reheats beautifully—simply add 2 tbsp water and pressure cook for 3 minutes. Portion into glass containers with tight lids for meal prep, where it keeps for 4-5 days in the fridge or 3 months frozen. For freezer storage, cool completely before sealing. The flavors actually improve overnight as the rice absorbs more of the seasoned broth. Double the ingredients for a crowd—just increase cooking time by 2 minutes. Always use the natural release setting after pressure cooking to maintain texture.
Why You'll Love This Recipe
- No Chopping Stress: The chicken thighs stay whole—no dicing, no fuss. I just toss in a few cloves of garlic, a splash of olive oil, and let the Instant Pot do the work while I sip my coffee.
- Rich, Deep Flavor: That low-sodium broth and brown rice soak up the garlic and chicken juices until every bite is savory, not salty. Honestly, it’s the kind of meal that makes you slow down and savor it.
- Meal Prep Magic: Cook a big batch on Sunday, and you’ve got lunch or dinner covered for days. The rice stays firm, the chicken stays juicy—no sad, mushy leftovers here.
- Budget-Friendly Powerhouse: Chicken thighs and brown rice stretch into four servings without breaking the bank. Between us, this is my go-to when I need to feed the family well without overspending.
Step-by-step instructions for pressure-cooked chicken and brown rice
Master this one-pot method for perfectly tender chicken and fluffy brown rice every time.
Sear the Chicken for Maximum Flavor
Begin by cutting the 1.5 lb boneless, skinless chicken thighs into even 1-inch pieces. Heat the 1 tablespoon extra-virgin olive oil in your Instant Pot on the "Sauté" function over medium-high heat. Once shimmering, add the chicken in a single layer, leaving space between pieces to prevent steaming.
Sear for 3-4 minutes per side until the chicken develops a deep golden crust. This step is critical—it creates the Maillard reaction that builds rich flavor. You'll notice the chicken releases easily when ready. Transfer the seared chicken to a plate and set aside temporarily.
Sauté Aromatics for Depth of Flavor
In the same Instant Pot, add the 4 cloves minced garlic and cook for 30 seconds until fragrant. Immediately add the 1 teaspoon dried thyme leaves, 2 whole bay leaves, ½ teaspoon ground black pepper, and 1 teaspoon Diamond Crystal kosher salt. Stir constantly for 20 seconds to toast the spices and release their essential oils.
This aromatic base forms the flavor foundation for your dish. The thyme and bay leaves will infuse the broth with earthy notes, while the garlic adds sweetness. Don't let the spices burn—watch carefully as they darken slightly but shouldn't color too deeply.
Combine Ingredients for Pressure Cooking
Add the 1 cup uncooked long-grain brown rice and stir to coat in the aromatic oil. Pour in the 1.5 cups low-sodium chicken broth, then return the seared chicken to the pot. Give everything a gentle stir to distribute the ingredients evenly.
Secure the Instant Pot lid and set the valve to "Sealing." Select the "Pressure Cook" function for 20 minutes on high pressure. The rice needs this longer cook time to achieve perfect tenderness while maintaining its distinct texture.
Finish with Brightness and Resting
Once the cooking cycle completes, allow a natural 10-minute pressure release before carefully releasing any remaining pressure. Remove the lid and stir in the 1 tablespoon fresh lemon juice and ¼ cup chopped fresh parsley. The acidity brightens the dish while the parsley adds freshness.
Let the mixture rest for 5 minutes before serving. This resting period allows the rice to fluff slightly and the chicken to reabsorb any juices. The result should be tender chicken with perfectly cooked brown rice—no dry grains or overcooked meat.
Serve with Confidence
Remove the 2 whole bay leaves before serving. The dish should yield 4 generous servings with each portion containing tender chicken and fluffy brown rice. The lemon juice adds a subtle tang that cuts through the richness of the chicken, while the herbs provide a fresh finish.
For best results, serve immediately while the chicken is still warm. The flavors will continue to meld as it sits, but the texture is best enjoyed right away. This method delivers restaurant-quality results with minimal effort—proof that pressure cooking can create impressive one-pot meals.
Pro Tips For Making Chicken And Brown Rice Instant Pot
- SEAR THIGHS FIRST: DESCRIPTION:
- USE TOO MUCH BROTH: DESCRIPTION:
- MINCE THAT GARLIC: DESCRIPTION:
- PRESSURE-COOK 20 MINUTES: DESCRIPTION:
Best sauces and condiments for chicken and brown rice instant pot
Creamy Garlic Sauce
Transform your dish with a luscious garlic-herb cream sauce that coats every bite. After pressure cooking, remove half the chicken and rice, then blend the remaining broth with ½ cup heavy cream, 2 tbsp butter, 2 minced garlic cloves, and 1 tbsp fresh parsley until smooth.
Return everything to the pot and simmer for 3 minutes on sauté mode. This adds richness while keeping the dish balanced. 💛
Spicy Cajun Kick
For heat lovers, stir in 1 tbsp Cajun seasoning (like Tony Chachere's) during the sauté step with garlic. Add ½ tsp smoked paprika and ¼ tsp cayenne to the rice before pressure cooking.
The smoky-spicy notes pair perfectly with the chicken's tenderness. Serve with cooling elements like yogurt or avocado to balance the heat.
Lemon-Herb Yogurt Drizzle
Brighten the dish with a yogurt sauce made from ½ cup Greek yogurt, 1 tbsp lemon juice, 1 tsp honey, and 1 tbsp chopped dill. Drizzle over individual servings for a tangy contrast.
This works especially well if you skipped lemon juice in the recipe or want to emphasize freshness. Store-bought Fage 2% yogurt works best for its thick texture.
Cheesy Broccoli Topping
Add a veggie boost by mixing 1 cup chopped steamed broccoli with ¼ cup shredded cheddar and 1 tbsp grated Parmesan. Top individual portions before serving and broil for 2-3 minutes until cheese melts.
This adds color, texture, and a cheesy finish that kids and adults love. Use Kraft sharp cheddar for the best melt.
Sweet Chili Glaze
For an Asian-inspired twist, simmer 3 tbsp sweet chili sauce (like Maesri) with 1 tsp soy sauce and 1 tsp sesame oil until slightly thickened.
Drizzle over the finished dish and garnish with sesame seeds and sliced green onions. This adds a sweet-savory balance that complements the savory chicken beautifully. 🌶️
Pesto Swirl
Stir 2 tbsp basil pesto (store-bought or homemade) into the finished dish for a vibrant, herby note. I recommend Trader Joe's basil pesto for its balanced flavor. Add it during the final 5-minute rest so the flavors meld without overpowering.
This works especially well if you're serving with a side salad for a complete Italian-inspired meal.
Nutrition facts
Frequently asked questions
Can I use chicken breasts instead of thighs?
Chicken thighs are ideal for this recipe because they stay juicier during pressure cooking. If you must use breasts, cut them into ½-inch pieces and reduce cooking time to 12 minutes to prevent dryness. The breasts will release more liquid, so you may need to add ½ cup extra broth to ensure the rice cooks properly.
Why does my brown rice turn mushy?
Overcooking or insufficient liquid causes mushy rice. Always use 1.5 cups broth for 1 cup uncooked brown rice—never substitute water. For extra texture, rinse the rice thoroughly before cooking and don't skip the 10-minute natural release. If it's still gummy, try toasting the rice in the pot with oil for 2 minutes before adding liquid next time.
How do I make this dish gluten-free?
Check your chicken broth for gluten—opt for certified gluten-free versions like Pacific Foods. Ensure all spices (like thyme or bay leaves) are pure, and use gluten-free soy sauce if adding any. The original recipe is naturally gluten-free, but always verify ingredient labels. For extra flavor, add 1 tsp nutritional yeast during the sauté step.
Can I prep this ahead of time for meal prep?
Yes! Store in an airtight container for 4-5 days in the fridge or 3 months frozen. Reheat by adding 2 tbsp water and pressure cooking for 3 minutes. The rice may dry out slightly, so sprinkle 1 tsp broth over the top before reheating. For best texture, serve within 2 days of cooking.
What if I don't have an Instant Pot?
Use a multi-cooker or electric pressure cooker with similar settings. For stovetop, brown the chicken in a pot, then add broth, rice, and spices. Simmer covered on low heat for 45 minutes, then let sit 10 minutes off heat. The rice will be slightly firmer but still delicious. A rice cooker won't work—brown rice needs pressure or long simmering to cook fully.