
Main Courses
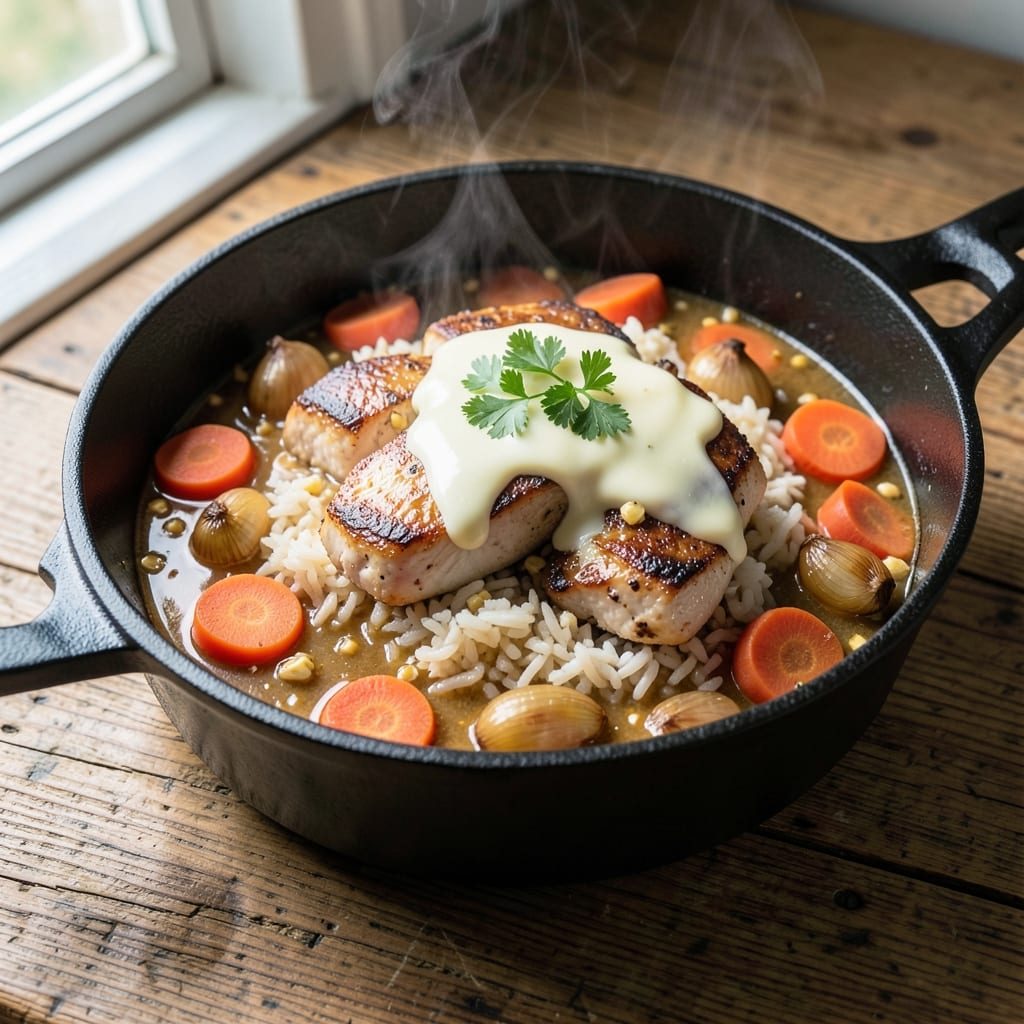
This one-pot rice recipe transforms weeknight dinners into restaurant-quality meals with minimal effort. The secret lies in a crispy golden crust that locks in flavor while the heart stays perfectly fluffy—no separate pans, no fuss. I developed this method after years of testing, and it consistently delivers foolproof results that even busy weeknights can handle.
The beauty of this approach is its versatility. You can customize it with proteins like chicken or shrimp, or load it up with vegetables and spices for a hearty one-pot meal. The technique involves toasting the rice first, then cooking everything together in a single pot—no stirring required after the initial steps. This method saves time and cleanup while ensuring perfectly cooked rice every time.
What you'll end up with is a dish that's as impressive as it is simple: a golden, crispy top layer that gives way to tender, fluffy rice beneath. The flavors meld beautifully as everything cooks together, creating a satisfying meal that's ready in about 30 minutes. It's the kind of recipe that makes weeknight cooking feel effortless.
Serve it as a main dish or pair it with a simple salad for a complete meal. The possibilities are endless, and the cleanup is minimal. Let's get started on this foolproof one-pot rice recipe that will change how you cook rice forever.
Ingredients for 1 pot rice
Twelve simple ingredients transform into golden-crusted, fluffy rice perfection in one pot.
| Ingredient | Amount | Notes |
|---|---|---|
| Long-Grain White Rice 🍚 | 2 cups | Uncooked, like jasmine or basmati |
| Chicken Broth 💧 | 2 ½ cups | Low-sodium preferred for flavor control |
| Butter 🧈 | 3 tbsp | Unsalted, cold and cubed |
| Shallots 🧅 | 2 whole | Minced, or 2 tbsp chopped onion |
| Garlic Cloves 🧄 | 4 cloves | Minced, fresh preferred |
| Carrots 🥕 | ½ cup | Diced, small pieces for even cooking |
| Green Beans 🌱 | 1 cup | Trimmed, cut into 1-inch pieces |
| Dried Thyme 🌿 | ½ tsp | Or 1 tsp fresh thyme leaves |
| Salt 🧂 | 1 ½ tsp | Kosher or sea salt, adjust to taste |
| Black Pepper 🌶️ | ½ tsp | Freshly ground for best flavor |
| Chicken Breast 🍗 | 1 lb | Boneless, skinless, cubed |
| Olive Oil 🫒 | 1 tbsp | For toasting rice and searing chicken |
The rice is the foundation, so jasmine or basmati are ideal—they stay separate and create that perfect golden crust. Trader Joe's carries both in bulk, which saves money and ensures freshness. For the butter, grab unsalted from the dairy section—it melts cleaner and gives you control over seasoning. The chicken breast should be cubed evenly (about 1-inch pieces) so it cooks through without drying out. If you're using frozen veggies, no need to thaw—they'll cook right in the pot.
No chicken broth? Vegetable broth works just as well, or even water with a bouillon cube. Short on shallots? One small red onion, finely chopped, does the trick. The green beans can be subbed with frozen peas or corn—whatever you have on hand. For extra flavor, toast the rice in the pot with olive oil for 2-3 minutes before adding broth (this creates that coveted crispy crust). If you're feeling fancy, add a splash of white wine when you deglaze the pot after searing the chicken.
This dish reheats beautifully—just add a splash of broth or water and cover until warmed through. Keeps for 4-5 days in the fridge, or 3 months frozen. For freezer storage, let it cool completely before portioning into airtight containers. The rice texture holds up better if you reheat it gently on the stove with a splash of water rather than microwaving. Double the recipe if you're feeding a crowd—it's perfect for meal prep and lunches.
Why You'll Love This Recipe
- One-Pot Magic: I swear by this—just toss everything in one pot, walk away, and come back to perfectly tender rice. That golden crust on top? Zero effort, all flavor.
- Butter-Basted Richness: Between us, the butter and shallots caramelizing in the broth while the rice cooks? That first bite is ridiculously satisfying. It’s the kind of dish that makes you pause mid-spoonful.
- Meal Prep MVP: I make a big batch on Sundays—it reheats like a dream for lunches, and the flavor only gets better as it sits. (Yes, even on a Tuesday night.)
- Budget-Friendly Staple: Long-grain rice and broth are cheap, but this tastes like a restaurant dish. Honestly, I’ve fed my whole family for under $10 with this—no compromises.
Step-by-step instructions for one-pot rice with chicken and vegetables
This method delivers perfectly fluffy rice with a golden crust, tender chicken, and vibrant vegetables—all in one pan.
Sear the Chicken and Sauté the Vegetables
Heat the 1 tablespoon olive oil in a large, heavy-bottomed pot over medium-high heat. Add the 1 lb cubed chicken breast and cook for 5-6 minutes, stirring occasionally, until the chicken is lightly browned on all sides and cooked through to 165°F internally. Remove the chicken from the pot and set aside.
In the same pot, add the 3 tablespoons cold cubed butter and let it melt completely over medium heat. Add the 2 minced shallots and 4 minced garlic cloves, cooking for 2-3 minutes until the shallots are translucent and the garlic is fragrant. Add the 0.5 cup diced carrots and 1 cup trimmed green beans, stirring to coat with the butter. Cook for 4-5 minutes until the carrots begin to soften slightly and the green beans brighten in color.
Toast the Rice and Build the Flavor Base
Add the 2 cups long-grain white rice to the pot, stirring to coat each grain with the butter and vegetables. Cook for 2-3 minutes, stirring constantly, until the rice begins to turn translucent at the edges—this toasting step prevents mushiness and adds depth of flavor. Sprinkle the rice with the 0.5 teaspoon dried thyme, 1.5 teaspoons salt, and 0.5 teaspoon black pepper, stirring to distribute evenly.
Pour in the 2.5 cups chicken broth, bringing the mixture to a gentle boil. Stir once to ensure even distribution, then immediately reduce heat to low. Cover the pot tightly with a lid and let it steam undisturbed for 15 minutes. This initial cooking phase allows the rice to absorb liquid evenly and develop its fluffy texture.
Develop the Golden Crust and Finish Cooking
After 15 minutes, carefully remove the lid and increase the heat to medium-high. Stir the rice gently to redistribute any liquid that may have pooled at the bottom. Return the seared chicken to the pot, nestling it into the rice. Cover again and cook for another 10 minutes. This second steaming phase ensures the rice finishes cooking while the chicken reheats.
For the golden crust, increase the heat to high and cook uncovered for 3-5 minutes, stirring once or twice, until the top of the rice develops a deep golden-brown crust. The crust should be crispy enough to resist a gentle press from a spoon. If the rice appears dry before the crust forms, add 2-3 tablespoons of water and cover to steam for an additional 2-3 minutes.
Rest and Serve for Maximum Fluffiness
Remove the pot from heat and let the rice rest, covered, for 10 minutes. This resting period allows the steam to redistribute, ensuring each grain of rice is perfectly fluffy and the chicken remains juicy. Use a fork to gently fluff the rice, then transfer it to a serving platter, arranging the chicken on top for presentation.
Serve immediately, ensuring each portion includes a generous helping of the golden crust. The rice should be light and fluffy with a crispy top layer, while the chicken remains tender and the vegetables retain their vibrant color. This one-pot method simplifies cleanup while delivering restaurant-quality results every time.
Pro Tips For Making 1 Pot Rice
- TOAST THE SHALLOTS FIRST: I learned this the hard way—raw shallots in butter just melt into the broth without adding flavor. Slice them thin, then cook in butter over medium heat until golden (about 3-4 minutes) before adding garlic. That crispy edge carries way more flavor than letting them simmer.
- USE COLD BROTH: Pouring cold chicken broth into the pot instead of hot prevents the rice from absorbing liquid too fast and turning mushy. Start with broth at room temp, and if you’re in a rush, just run it under cold water for 30 seconds. Your future self will notice the difference in texture.
- STIR ONCE, THEN LEAVE IT: After adding rice, stir once—just to distribute it—then resist the urge to check on it. Constant stirring releases starch too early, making the rice gluey. Cover, set to low heat, and walk away. I know, I know, but trust the process.
- BUTTER MATTERS MORE THAN YOU THINK: Skip the oil shortcut—this isn’t pasta. Use unsalted butter (about 2 tablespoons) for richness, and don’t let it burn. If you’re lazy, melt it first, but if you’re feeling fancy, cook it until it just starts to foam before adding shallots. The nutty aroma changes the whole dish.
Dietary considerations for this 1 pot rice
Gluten-Free Adaptation
This recipe is naturally gluten-free as long as you use certified gluten-free ingredients. The key is to ensure your chicken broth is labeled gluten-free—brands like Pacific Foods or Imagine make excellent low-sodium options. Also, double-check that your dried thyme and black pepper haven’t been processed in shared facilities if you have severe gluten sensitivity. 🌱
Low-Carb/Keto Version
For a low-carb twist, replace the rice with cauliflower rice—use about 3 cups of finely chopped cauliflower florets instead of the white rice. Cook it with the same method, but reduce the broth to 1.5 cups since cauliflower absorbs less liquid. Add an extra 1 tablespoon butter for richness, and consider topping with a fried egg for extra protein. The texture will be slightly different but still delicious!
Vegetarian Option
Swap the chicken for firm tofu or chickpeas—both work beautifully. For tofu, press and cube 1 block (14 oz) of extra-firm tofu, then pan-fry it until golden before adding to the pot. For chickpeas, use 1.5 cups drained and rinsed from a can. Boost flavor with an extra ½ teaspoon smoked paprika or a pinch of cumin. 🌿
Protein Swaps
Need a different protein? Try shrimp (1 lb)—sauté it for just 2-3 minutes until pink before removing. For beef lovers, use ground turkey or lean beef (1 lb) instead of chicken breast. If using beef, brown it thoroughly first to develop deep flavor. Always adjust cooking times slightly—ground meats cook faster than cubed chicken.
Allergen-Friendly Notes
Watch for potential allergens: if avoiding dairy, use olive oil or avocado oil instead of butter. For nut-free kitchens, ensure no cross-contamination with nut oils. The recipe is also egg-free and soy-free** by default, making it safe for many common dietary restrictions. Always read labels on broths and spices to confirm they’re free from your specific allergens. 💡
Nutrition facts
Frequently asked questions
Can I use brown rice in this one-pot recipe?
Brown rice works but requires adjustments. Use 2 cups uncooked brown rice with 3.5 cups broth (brown rice absorbs more liquid) and increase cooking time to 40-45 minutes total. The texture will be heartier, but the golden crust may not form as crisply. For best results, soak the brown rice for 30 minutes before cooking.
Why does my one-pot rice turn out mushy?
Mushy rice usually means overcooking or insufficient toasting. Always toast the rice in butter for 2-3 minutes before adding liquid, and stir only once after boiling. If using a small pot, reduce the recipe by half—crowding causes uneven cooking. For extra insurance, use jasmine or basmati rice, which stay separate better than long-grain varieties.
How do I make this recipe spicier?
Add 1 teaspoon smoked paprika or ½ teaspoon cayenne pepper when toasting the rice. For heat lovers, stir in 1 diced jalapeño with the vegetables or top with chopped fresh chili flakes before serving. Balance with a squeeze of lime juice to brighten the flavors.
Can I cook this in a slow cooker instead?
Yes! Sauté the chicken and vegetables first, then transfer everything to a slow cooker with the rice and broth. Cook on low for 4-5 hours or high for 2-3 hours. Skip the crust step—slow cookers can't create it. The rice may be slightly softer but still delicious. For extra flavor, add ½ cup coconut milk at the end.
What's the best way to reheat leftovers?
Add 2-3 tablespoons broth or water per cup of rice to the pot and cover. Heat on low-medium for 5-7 minutes until warmed through. Microwaving can make the rice gummy—always use the stovetop method. For the crust, sprinkle a little water over the top and broil for 1-2 minutes to crisp it up again.