
Side Dishes
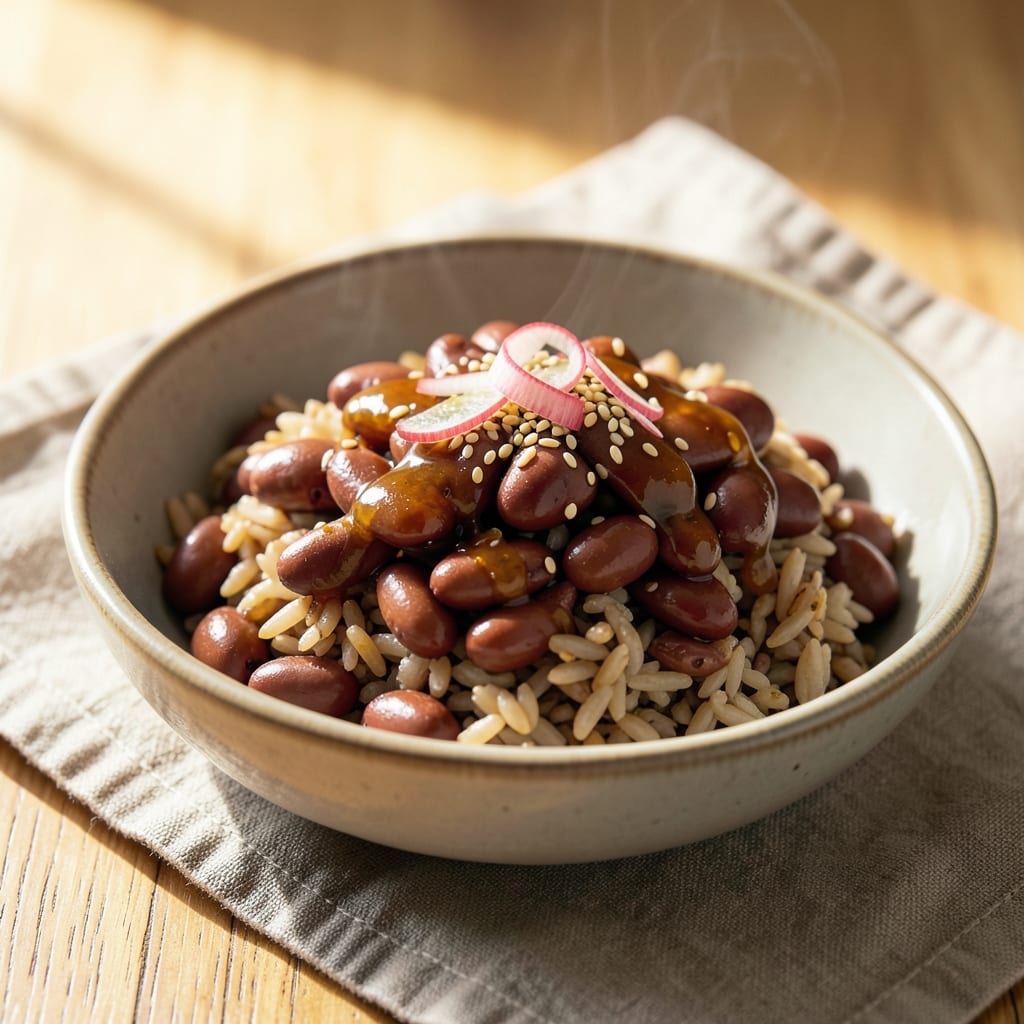
This adzuki beans and brown rice recipe transforms simple ingredients into a sweet-savory umami bowl that balances earthy grains with naturally caramelized beans. The secret lies in slow-cooking the beans until tender while toasting the brown rice for nutty depth—both methods unlock flavors that store-bought versions can't match. What starts as separate components becomes a harmonious dish where each bite delivers chewy rice, creamy beans, and subtle sweetness from the adzuki's natural sugars.
Inspired by traditional Japanese sekihan but adapted for modern tastes, this recipe skips artificial sweeteners by relying on the beans' inherent sweetness and a touch of soy sauce for umami. The brown rice adds fiber-rich texture, while the adzuki beans provide plant-based protein and iron. No special equipment is needed—just a pot, patience, and a willingness to let flavors develop through gentle cooking.
The result is a vegetarian powerhouse that works as a standalone meal or pairs beautifully with grilled fish, miso soup, or a simple salad. The beans soften to a buttery consistency while maintaining their shape, and the rice develops a toasty aroma that fills your kitchen. This dish proves that comfort food doesn't require meat—just thoughtful preparation and quality ingredients.
For extra depth, consider adding a drizzle of sesame oil or a sprinkle of furikake before serving. The recipe scales easily for meal prep, making it perfect for busy weeknights or weekend gatherings. Let's get cooking—your taste buds will thank you.
Ingredients for adzuki beans and brown rice
Earthy brown rice and sweet adzuki beans create this vegetarian umami bowl using just 14 quality ingredients.
| Ingredient | Amount | Notes |
|---|---|---|
| Adzuki Beans (Dried) 🌱 | 1 ½ cups | Rinsed thoroughly before soaking |
| Brown Rice 🍚 | 1 cup | Long-grain preferred, uncooked |
| Water 💧 | 6 cups | Filtered preferred for cooking |
| Low-Sodium Soy Sauce 🥢 | 2 tbsp | For umami depth without excess salt |
| Sesame Oil 🫒 | 1 tbsp | Toasted sesame oil for aroma |
| Fresh Ginger 🧄 | 1 tbsp | Finely grated, peel removed |
| Garlic Cloves 🧄 | 3 cloves | Minced for even distribution |
| Vegetable Oil 🫒 | 1 tbsp | High smoke point for toasting |
| Brown Sugar 🍯 | 1 tbsp | Lightly packed for sweetness |
| Dried Shitake Mushrooms 🍄 | 2 whole | Rehydrated for umami richness |
| Diamond Crystal Kosher Salt 🧂 | ½ tsp | Adjusts final seasoning |
| Black Peppercorns 🌶️ | ¼ tsp | Freshly cracked for texture |
| Toasted Sesame Seeds 🌾 | 1 tbsp | For garnish and crunch |
| Furikake Seasoning 🌶️ | 1 tbsp | Optional for extra flavor |
The adzuki beans are the heart of this dish—look for plump, firm beans without blemishes at stores like Whole Foods or Trader Joe's, where they're often sold in bulk. The brown rice should be organic if possible, as conventional varieties can taste bitter. For the mushrooms, dried shiitake from Asian markets adds unmatched depth when rehydrated. Ginger and garlic should be freshly grated and minced—pre-minced garlic loses flavor quickly. The sesame oil is non-negotiable; Kadoya brand is my go-to for that nutty aroma. Toast your sesame seeds in a dry pan for 30 seconds until fragrant—they'll elevate every bite.
No dried shiitake? Fresh cremini mushrooms work in a pinch, but they lack the earthy complexity. Substitute the soy sauce with coconut aminos for a gluten-free option, though the umami will be slightly different. Running low on brown sugar? Maple syrup at half the amount gives similar sweetness. The furikake is optional but recommended—Japanese furikake from specialty stores contains dried fish, so check for vegetarian versions if needed. For extra protein, add tofu or edamame to the rice after cooking. The ginger can be substituted with 1/4 tsp ground ginger, but fresh is always better.
Store cooked beans and rice separately in airtight containers for 5 days in the fridge, or freeze for 3 months in portion-sized containers. The beans actually improve overnight as their natural sugars caramelize further. For meal prep, cook a double batch and reheat with a splash of water to restore moisture. The sesame oil should be kept in a cool, dark place—once opened, it lasts about 6 months. Garnish with fresh herbs like scallions or cilantro if you're feeling fancy, but the toasted sesame seeds and furikake are the perfect finishing touches.
Why You'll Love This Recipe
- One-Pot Magic: I swear by this—just toss dried adzuki beans, brown rice, and water into a pot, let it simmer, then finish with a splash of soy sauce and sesame oil. No chopping, no fuss, no separate pans clogging my sink.
- Umami Bomb: That low-sodium soy sauce and sesame oil combo? It’s the secret weapon here. The beans soak up the savory depth while the brown rice adds a nutty backbone—simple ingredients, but the flavor? Ridiculously good.
- Meal Prep MVP: Between us, this is my go-to for busy mornings. Cook a big batch on Sunday, and you’ve got lunch for the week—whether it’s cold with a sprinkle of sesame seeds or reheated with a fried egg on top. Zero stress, all satisfaction.
- Budget-Friendly Staple: Dried beans and brown rice won’t break the bank, and they stretch farther than any takeout. I make this for my college-age kid all the time—fills him up, keeps my wallet happy, and he never complains. (Yes, even on a Tuesday night.)
Step-by-step instructions for sweet-savory adzuki and brown rice bowl
Master this Japanese-inspired technique combining tender beans and nutty rice with umami depth.
Prepare the Adzuki Beans and Brown Rice
Begin by rinsing the 1.5 cups adzuki beans (dried) thoroughly under cold water until the water runs clear. This removes surface impurities that can make the beans bitter. Transfer them to a large pot and cover with 6 cups water, then bring to a boil over high heat. Once boiling, reduce to a simmer and cook for 45-60 minutes until the beans are tender but not mushy - they should hold their shape when pressed between fingers.
While the beans simmer, rinse the 1 cup brown rice thoroughly to remove excess starch. In a separate pot, combine the rinsed rice with 4 cups water (use the same pot as the beans if space allows) and bring to a boil. Reduce heat to low, cover tightly, and simmer for 40-45 minutes until the rice is tender and the liquid is absorbed. The rice should have a slight chew - this is perfect for balancing the soft beans.
Rehydrate and Prepare the Shitake Mushrooms
Place the 2 whole dried shitake mushrooms in a bowl and cover with hot water. Let them soak for 20 minutes until softened. Drain and finely chop the rehydrated mushrooms, reserving ¼ cup of the soaking liquid for the sauce. The mushrooms should have a rich, earthy aroma - this is your umami foundation.
In a small bowl, combine the chopped mushrooms, 1 tablespoon finely grated fresh ginger, and 3 minced garlic cloves. Add 1 tablespoon vegetable oil and 1 tablespoon brown sugar, mixing well. This aromatic base will form the flavor core of your dish. Let it sit at room temperature while you finish preparing the other components.
Build the Sweet-Savory Sauce
Heat 1 tablespoon sesame oil in a small saucepan over medium heat. Add the mushroom-ginger-garlic mixture and sauté for 3-4 minutes until fragrant. The oil should shimmer but not smoke - this releases the maximum aroma from the ingredients.
Pour in the 2 tablespoons low-sodium soy sauce and ¼ cup reserved mushroom soaking liquid. Add 0.5 teaspoon diamond crystal kosher salt and 0.25 teaspoon freshly cracked black peppercorns, then simmer for 5 minutes until the sauce thickens slightly and reduces by about one-third. The sauce should coat the back of a spoon with a glossy sheen.
Assemble and Finish the Bowl
Drain the cooked adzuki beans and brown rice, then combine them in a large serving bowl. Pour the warm sauce evenly over the rice and beans, tossing gently to distribute. The beans should absorb the sauce while maintaining their texture - you're aiming for a harmonious blend where each bite delivers both components.
Garnish each serving with 1 tablespoon toasted sesame seeds and a sprinkle of 1 tablespoon furikake seasoning. The sesame seeds add crunch while furikake contributes its signature seaweed and sesame flavor profile. Serve immediately while the rice is still warm and the beans retain their natural creaminess.
Pro Tips For Making Adzuki Beans And Brown Rice
- SOAK BEANS OVERNIGHT: Dried adzuki beans take 2-3 hours to soften properly, but I learned the hard way—skipping the overnight soak (or even just 4 hours) leaves them stubbornly tough. Cover them in water with a pinch of salt, then let them sit until they’re plump as baby fingers the next morning. (Yes, it’s an extra step, but your jaw will thank you later.)
- COOK RICE IN SESAME OIL: Brown rice tastes flat when cooked plain, but adding 1 teaspoon of toasted sesame oil to the cooking water infuses it with nutty depth—no extra effort, just better flavor. Stir it in at the end of cooking, and the rice will absorb the aroma like a sponge. (Pro tip: Toast the oil first in a dry pan for 30 seconds until fragrant.)
- SIMMER BEANS LOW AND SLOW: Adzuki beans scald easily, and rushing them turns them mushy. After boiling for 10 minutes, drop the heat to a bare simmer—just enough to keep tiny bubbles breaking the surface—and cover tightly. Check the water level every 30 minutes; they’re done when they’re tender but still hold their shape, not collapsing like overcooked pasta.
- SAVE THE SOAK WATER: That starchy bean soak water isn’t garbage—it’s liquid gold for broths or rice cooking. Strain it, reduce it by half on the stove, and use it as a base for your brown rice instead of plain water. The extra starch makes the rice creamier, and you’ll waste less. (I keep a jar in the fridge for this exact purpose.)
Creative variations of this recipe
Japanese Sekihan Style
Transform this dish into a traditional Japanese sekihan by adding ½ cup red adzuki beans (if available) mixed with the regular adzuki beans. Cook them together with 1 tbsp mirin and 1 tbsp sugar> during the simmering process. Serve in a lidded donabe (clay pot) for that authentic presentation. The sweetness in sekihan is balanced by the earthy brown rice—perfect for celebrations like New Year's or birthdays. 🌸
Mexican-Inspired Fusion
Give it a Latin twist by swapping the soy sauce for 1 tbsp adobo sauce> (from canned chipotles) and adding ½ tsp ground cumin> to the sauce. Stir in ¼ cup black beans> with the adzuki beans for extra protein. Top with avocado slices> and cilantro> for a vibrant, smoky-sweet bowl. This version works beautifully with grilled corn or tortilla chips on the side. 🌶️
Protein-Packed Vegan Bowl
Boost nutrition by adding 1 cup cooked quinoa> to the brown rice for extra protein. Stir in ½ cup crumbled tofu> (pan-fried with 1 tsp smoked paprika>) and ¼ cup chopped scallions>. For creaminess, mix 2 tbsp tahini> with 1 tbsp lemon juice> and drizzle over the top. This version keeps the sweet-savory balance while making it a complete meal. 💪
Sweet & Spicy Asian Twist
Elevate the dish with a sweet-spicy glaze by mixing 1 tbsp gochujang> (Korean chili paste) with 1 tsp honey> and 1 tsp rice vinegar>. Drizzle this over the assembled bowl and garnish with toasted peanuts> and thinly sliced jalapeños>. The heat cuts through the sweetness while the peanuts add crunch. Serve with a side of pickled vegetables for contrast. 🔥
Breakfast Adaptation
Turn this into a hearty breakfast by cooking the rice with ½ cup coconut milk> instead of water for extra creaminess. Stir in 1 tbsp chia seeds> and top with sliced banana> and a sprinkle of cinnamon>. The natural sweetness of the adzuki beans pairs perfectly with the tropical flavors. Add a fried egg on top for a protein boost. ☀️
Meal Prep Hack
Double the recipe and store components separately for easy assembly. Cook the beans and rice ahead, then reheat with 1 tbsp water per cup> to restore moisture. Keep the sauce in a small jar and reheat separately. Assemble bowls fresh by combining equal parts rice and beans, then adding warm sauce. This keeps the texture perfect for up to 5 days**> in the fridge. 📅
Nutrition facts
Frequently asked questions
Why do I need to soak adzuki beans before cooking?
Soaking reduces cooking time by 30-40 minutes and prevents the beans from becoming mushy. The beans absorb water and soften more evenly, which is especially important for maintaining their natural sweetness. For this recipe, a 4-hour soak in cold water works best—just drain and rinse before cooking.
Can I substitute white rice for brown rice in this recipe?
Yes, but the texture and flavor will differ. White rice cooks faster (25-30 minutes) and has a lighter, less chewy texture. For a closer match, use jasmine rice and reduce the cooking liquid by ½ cup. The brown rice's nutty depth and fiber content are key to balancing the sweet adzuki beans.
What if my adzuki beans turn out too mushy?
Overcooked beans lose their shape and absorb too much liquid. To fix this, drain them immediately after reaching tenderness and rinse with cold water. For the next batch, reduce cooking time by 5-10 minutes and check at 45 minutes. The beans should hold their shape when pressed gently—like a ripe avocado.
How do I make this dish extra sweet without adding sugar?
Boost natural sweetness by simmering the beans with ½ cup apple juice instead of water, or add 1 mashed banana to the sauce. For umami depth, increase the soy sauce to 3 tablespoons—it enhances the beans' inherent sweetness. Roast the beans for 10 minutes at 375°F before cooking to caramelize their sugars.
Can I use canned adzuki beans instead of dried?
Canned beans work in a pinch, but they lack the depth of flavor from dried. If using canned, drain and rinse thoroughly, then simmer in fresh water for 15 minutes to remove excess sodium. For best results, stick with dried beans—they develop a richer, creamier texture and absorb the sauce better. The 4-hour soak is worth it for that authentic taste!