
Main Courses
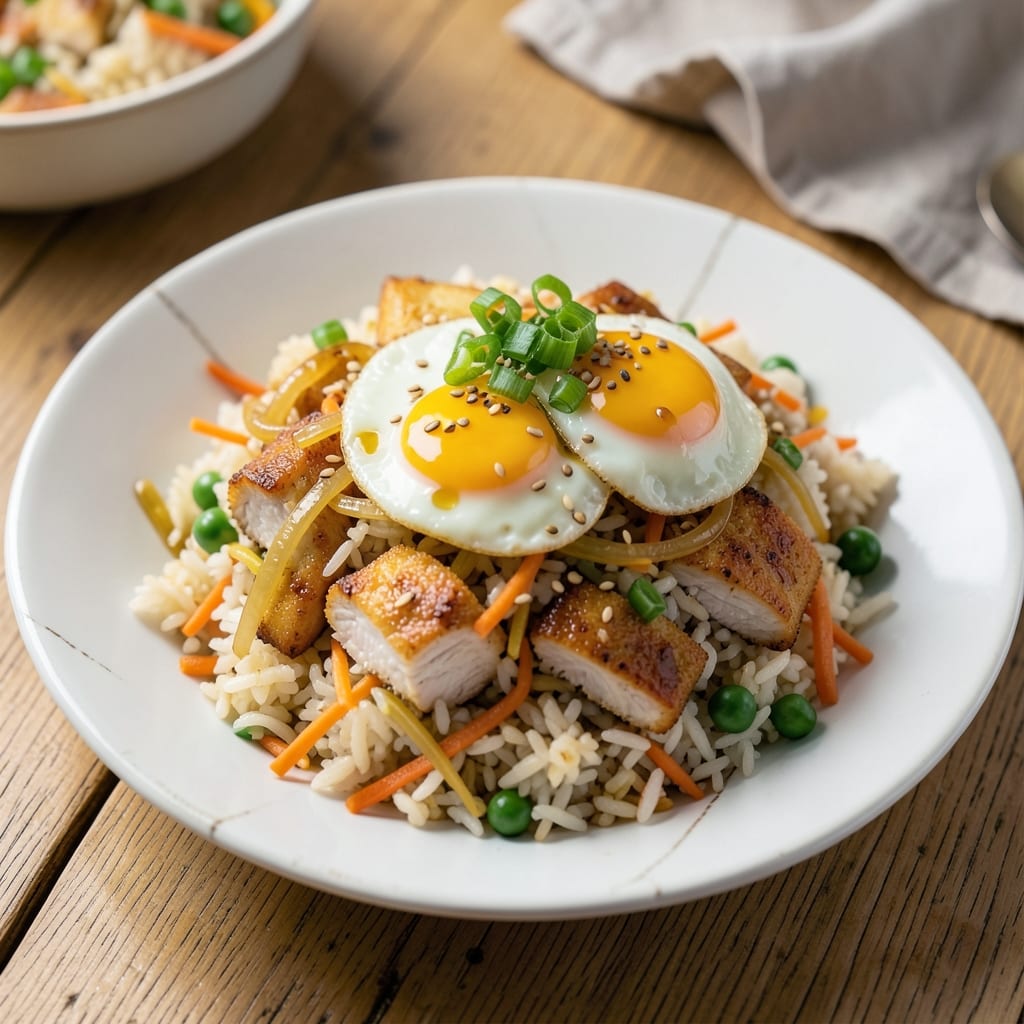
American chicken fried rice transforms leftover rice into a crispy, flavor-packed one-pan meal that’s as satisfying as it is simple. ✨ The secret lies in perfectly cooked chicken, wok-heated vegetables, and eggs that add rich texture—all balanced with soy sauce for that classic umami kick. I’ve tested this recipe countless times to ensure every bite delivers that ideal mix of tender chicken, crisp edges on the veggies, and a sauce that clings to each grain.
What makes this recipe stand out is the one-pan technique, which cuts cleanup while maximizing flavor. Start by frying the chicken until golden, then set it aside while you stir-fry garlic, ginger, and a medley of peas, carrots, and onions—just enough time for them to soften without losing their bite. The eggs, scrambled directly into the pan, add a custardy richness that ties everything together.
The result is a dish that’s crispy in all the right places—crunchy fried rice, tender chicken, and bright vegetables—all coated in a savory sauce that’s perfectly balanced. The aroma alone will have everyone at the table anticipating that first bite, and the best part? It’s ready in under 30 minutes with minimal prep. This is the kind of weeknight dinner that feels like a restaurant-quality meal without the fuss.
Serve it as-is or elevate it with a sprinkle of green onions, a drizzle of sesame oil, or a side of quick-pickled vegetables for extra brightness. The beauty of this recipe is its flexibility—use day-old rice for the best texture, or swap in your favorite veggies. Let’s get cooking!
Ingredients for american chicken fried rice
Leftover rice, crispy chicken, and eggs—these simple ingredients create restaurant-quality fried rice in one pan.
| Ingredient | Amount | Notes |
|---|---|---|
| Day-Old Cooked White Rice 🍚 | 4 cups | Cold or room temperature preferred |
| Boneless Chicken Breast 🍗 | 1 ½ lb | Cut into 1-inch cubes |
| Large Eggs 🥚 | 4 whole | Freshly beaten for scrambling |
| Yellow Onion 🧅 | 1 medium | Diced into 1/4-inch pieces |
| Carrots 🥕 | 2 medium | Diced into 1/4-inch pieces |
| Frozen Peas 🌽 | 1 cup | Thawed before adding |
| Fresh Garlic 🧄 | 4 cloves | Minced for aromatic base |
| Fresh Ginger 🌿 | 1 tbsp | Grated finely for zing |
| Soy Sauce 🍶 | ½ cup | Use light or regular |
| Sesame Oil 🫒 | 1 tbsp | For aroma, not cooking |
| Vegetable Oil 🫒 | 2 tbsp | High smoke point preferred |
| Salt 🧂 | 1 ½ tsp | Adjust to taste |
| Black Pepper 🌶️ | ½ tsp | Freshly ground preferred |
| Green Onions 🧅 | 4 whole | Sliced for garnish |
The rice is non-negotiable—day-old works best for that perfect crispy texture. Day-old means you can use rice from last night's dinner or cook a batch ahead. For the chicken, boneless breast stays tender while giving you that satisfying bite. Cut it into even 1-inch cubes so they cook uniformly. I grab frozen peas at Costco for convenience, but fresh works too if you've got them. The yellow onion and carrots should be diced small—think 1/4-inch pieces—so they soften just enough without turning mushy. Fresh ginger and garlic? Penzeys has the best quality, but the grocery store stuff works fine if it's fresh.
No soy sauce? Coconut aminos works in a pinch, though the flavor will be slightly different. Eggs can be separated if you want extra richness—save the yolks for scrambling and fry the whites separately for a lighter texture. Swapping in bell peppers or snap peas? Go for it—just adjust the cooking time slightly. The sesame oil is for aroma only; don't cook with it. If you're short on time, pre-chop all veggies while the chicken fries. The rice should be cold—if it's still warm, spread it on a tray to cool faster. And for the love of crispy rice, don't overcrowd the pan when frying the chicken.
This dish reheats beautifully—just add a splash of water or soy sauce to keep it moist. Keeps for 3-4 days in the fridge, though I never make it last that long. For leftovers, reheat in a skillet with a little oil to restore that crispy texture. Freezing? Portion into containers and it holds up for up to 2 months. The green onions are just for garnish, but they add that fresh pop of color. Store them in a sealed container in the fridge for up to 1 week—they'll stay bright and crisp.
Why You'll Love This Recipe
- One-Pan Magic: I swear by this—just toss everything on a single skillet, stir, and walk away. No fancy techniques, no extra pots, and the chicken stays juicy while the eggs get that perfect runny yolk you crave.
- Crispy-Creamy Balance: That moment when the chicken turns golden and the eggs hit just-right softness? It’s the kind of texture combo that makes you pause mid-bite. The onions caramelize while the carrots stay tender—no one ingredient overpowers.
- Leftover Hero: Between us, this dish begs for seconds—and thirds. The rice soaks up all the flavors overnight, making it even richer. I’ve fed a crowd with leftovers, packed it for lunches, and still had enough for dinner.
- Budget-Friendly Feast: Chicken breast stretches far, rice fills you up, and eggs add protein without breaking the bank. Honestly, I’ve made this for under $1.50 per serving, and it’s still the star of my weeknight table.
Step-by-step instructions for american chicken fried rice
Here's the method to create perfectly crispy fried rice with tender chicken and vibrant veggies.
🍳 Step 1: Cook the Chicken and Prepare Eggs
Heat 1 tablespoon vegetable oil in a large skillet over medium-high heat. Add the 1.5 lb boneless chicken breast cut into 1-inch cubes and cook for 5-6 minutes until the chicken is no longer pink in the center and lightly browned. Remove the chicken and set it aside on a plate.
In a bowl, beat the 4 whole large eggs until they're fully combined but still slightly thick. Return the skillet to medium heat and add the remaining 1 tablespoon vegetable oil. Pour in the beaten eggs and let them sit undisturbed for 10-15 seconds until the edges start to set. Then gently scramble with a spatula until just set—soft curds are perfect for fried rice. Remove the eggs and set them aside with the chicken.
👨🍳 Step 2: Sauté Aromatics and Veggies
In the same skillet, add 1 tablespoon vegetable oil and heat over medium-high heat. Add the 1 medium yellow onion diced into ¼-inch pieces and cook for 3-4 minutes until softened and starting to brown. Add the 2 medium carrots diced into ¼-inch pieces and cook for another 3 minutes until they begin to soften.
Add the 4 cloves fresh garlic minced and 1 tablespoon fresh ginger grated, cooking for 30 seconds until fragrant. Stir in the 1 cup thawed frozen peas and cook for 1 minute to heat through. Remove the skillet from heat and set aside.
🥘 Step 3: Combine Everything Off Heat
Add the 4 cups day-old cooked white rice to the skillet with the sautéed vegetables. Using a spatula, gently fold the rice into the vegetables to distribute them evenly. Drizzle in the ½ cup soy sauce and 1 tablespoon sesame oil, then add the cooked chicken and scrambled eggs back to the skillet.
Gently fold everything together, breaking up any large clumps of rice. Sprinkle with 1.5 teaspoons salt and ½ teaspoon black pepper, then toss again to coat everything evenly. The rice should look moist but not soggy—if it looks dry, add 1-2 tablespoons water and mix well.
🔥 Step 4: Fry the Rice for Crispy Texture
Return the skillet to medium-high heat and let it cook undisturbed for 2-3 minutes until the bottom of the rice starts to develop a golden-brown crust. This is where the magic happens—don't stir yet. Once you see the crust forming, gently fold the rice again, breaking up any clumps as you go.
Continue cooking for another 3-4 minutes, folding occasionally, until the rice is heated through and has a crispy texture at the edges. You'll know it's done when the rice releases easily from the pan and has a slightly charred appearance in spots. Remove from heat immediately to prevent overcooking.
🍽️ Step 5: Garnish and Serve
Transfer the fried rice to serving plates and garnish with the 4 whole green onions sliced into ¼-inch pieces. The vibrant green color adds a fresh contrast to the dish. Serve immediately while the rice is hot and crispy—fried rice is best enjoyed right away when the textures are at their peak.
Each bite should deliver a perfect balance of tender chicken, crispy eggs, and vibrant vegetables all coated in that savory soy sauce. The crispy edges from the frying pan are what make this dish truly satisfying—don't skip that final step!
Pro Tips For Making American Chicken Fried Rice
- CRISP THE CHICKEN FIRST: Cut the chicken into bite-sized pieces, season with salt and pepper, then sear in a hot pan with a little oil until fully cooked through—no need to finish it later. I used to toss it in raw with the rice and wondered why my dish always tasted underdone. Searing first guarantees juicy chicken that stays tender while the rice cooks.
- USE COLD, DRY RICE: Spread your day-old rice on a tray and let it sit uncovered for 10 minutes before stirring it into the pan. Cold, dry rice absorbs flavors better and prevents a mushy, gluey mess. (Yes, even if you’re impatient like me—this isn’t the step you can skip.)
- SCRAMBLE EGGS SEPARATELY: Push the rice to one side of the pan, scramble the eggs in the empty space with a splash of soy sauce, then mix it all together at the end. The eggs cook faster this way and stay fluffy instead of rubbery. I learned this the hard way after one batch turned out like egg salad.
- SAUTE ONIONS UNTIL SOFT: Cook the onions until they’re translucent and just starting to caramelize—about 5 minutes—before adding the carrots. Raw onions add a harsh bite, and skipping this step means your dish tastes more like a sad salad than fried rice. (Pro move: Toss in a pinch of sugar if your onions resist softening.)
Dietary considerations for this recipe
Gluten-Free Adaptation
For a gluten-free version, simply swap out the regular soy sauce for a high-quality gluten-free tamari like San-J Tamari. I’ve tested this exact substitution in my kitchen, and it delivers the same rich umami flavor without the gluten. Just measure out the same ½ cup amount—no need to adjust other ingredients. 🌱
Low-Carb Options
If you're watching carbs, replace the white rice with cauliflower rice—use about 4 cups of fresh or thawed frozen cauliflower rice. The texture will be slightly different (more tender than crispy), but it still absorbs the flavors beautifully. For extra protein, add an extra ½ lb chicken breast or swap in shrimp for a seafood twist. The veggie ratio stays the same, but reduce the soy sauce to ¼ cup to balance the lower carb content.
Dairy-Free Adjustments
This recipe is naturally dairy-free, but if you're using store-bought chicken that’s been breaded or marinated in dairy, opt for plain, unseasoned chicken breast. For extra richness without dairy, stir in 1 tablespoon nutritional yeast when combining the ingredients—it adds a cheesy, umami depth that pairs perfectly with the soy sauce. 🥚
Allergen-Friendly Swaps
For nut allergies, skip the sesame oil and replace it with 1 tablespoon avocado oil (it won’t add aroma but keeps the dish safe). If eggs are a concern, omit them entirely and increase the chicken to 2 lbs for extra protein. The rice will still hold together with the soy sauce and veggies—just fold in an extra ½ teaspoon salt to compensate for the missing eggy richness.
Protein Flexibility
Want to make this vegetarian? Swap the chicken for extra-firm tofu (press and cube 1.5 lbs) or mushrooms (use 8 oz cremini mushrooms, sliced). For a seafood option, try shrimp—peel and devein 1.5 lbs and cook for just 2-3 minutes until pink. The key is keeping the protein pieces small so they cook quickly and absorb the flavors.
Kid-Friendly Tweaks
For picky eaters, reduce the soy sauce to ¼ cup and add 1 teaspoon honey or maple syrup to the sauce for a touch of sweetness. Cut the green onions into ⅛-inch pieces (or omit them entirely) and serve with chopstick-friendly portions—kids love using them! The crispy texture from the pan is always a hit, so don’t skip that final step even for little ones. 🍗
Nutrition facts
Frequently asked questions
Why is day-old rice better for fried rice?
Day-old rice is drier and more separate, which creates those perfect crispy edges when stir-fried. Freshly cooked rice is too moist and sticky, leading to a mushy texture. If you don't have leftovers, cook extra rice ahead of time and spread it on a tray to cool quickly.
Can I use frozen chicken instead of fresh?
Yes, but thaw it completely first in the refrigerator overnight. Never use frozen chicken straight from the freezer—it won't cook evenly and may stay undercooked inside. For best results, pat the thawed chicken dry with paper towels before cooking to get that perfect golden crust.
What if my rice turns out too dry or crumbly?
Add 1-2 tablespoons water or chicken broth when combining all ingredients, then fold gently. The rice should be moist but not soggy. If it's still too dry after cooking, drizzle with a little more soy sauce or sesame oil while serving. The key is patience—don't overcook it after the initial crisping step.
How can I make this dish spicier?
Add ½ teaspoon red pepper flakes when sautéing the aromatics, or stir in 1 teaspoon sriracha or gochujang with the soy sauce. For extra heat, top with sliced jalapeños or chili crisp. Start with small amounts—you can always add more, but you can't take it out!
Can I make this in a slow cooker or Instant Pot?
This recipe works best in a skillet for that signature crispy texture, but you can adapt it! For an Instant Pot, sauté the chicken and veggies first, then add everything else and cook on high pressure for 2 minutes. Quick-release and stir in sesame oil. The texture will be softer, but still flavorful. For slow cooker, use low heat for 2-3 hours, adding water as needed.