
Main Courses
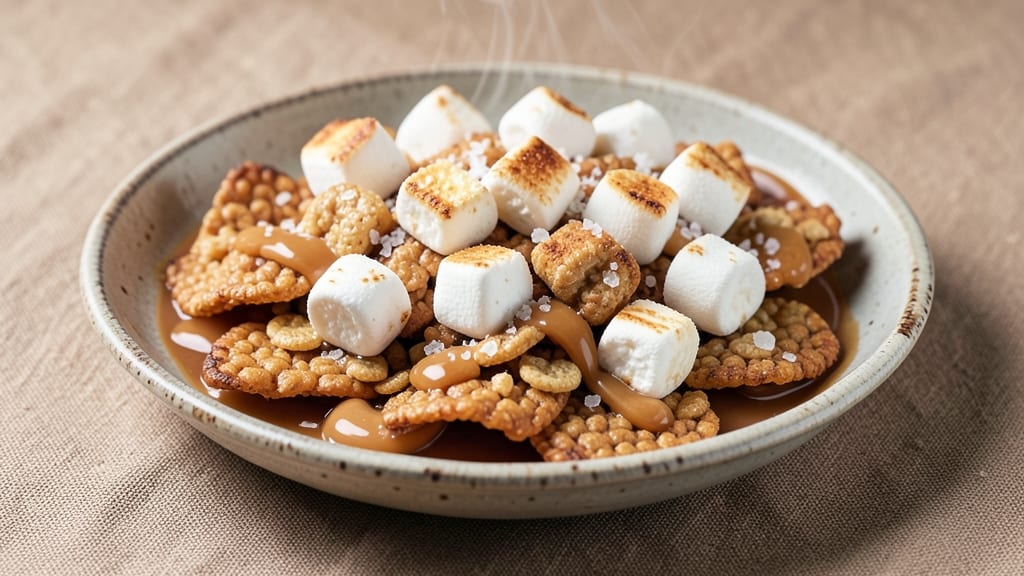
This brown butter rice crispy recipe transforms a childhood classic into a sophisticated dessert with nutty, caramelized depth and golden crisp edges. The secret lies in browning the butter—its rich, toasty flavor elevates every bite, turning ordinary Rice Krispies into something extraordinary.
What starts as a simple mix of marshmallows, cereal, and butter becomes a dessert that feels indulgent yet effortless to make.
By the time you press the mixture into a pan and let it cool, you’ll have a crispy, caramelized treat with layers of texture—crunchy on the outside, soft and gooey inside.
The brown butter adds a sophisticated twist that pairs beautifully with powdered sugar, extra drizzle, or even a sprinkle of sea salt. Perfect for sharing or enjoying solo, this recipe reimagines a nostalgic favorite with a gourmet touch.
Ingredients for brown butter rice crispy
Brown butter and marshmallows create this irresistible, crispy dessert with golden edges.
| Ingredient | Amount | Notes |
|---|---|---|
| Unsalted Butter 🧈 | 1 cup | Browned to nutty perfection |
| Mini Marshmallows 🍫 | 8 oz | Standard size, not jumbo |
| Rice Krispies Cereal 🍚 | 6 cups | Original flavor preferred |
| Granulated Sugar 🍚 | ½ cup | For extra caramelization |
| Vanilla Extract 🌿 | 1 tsp | Pure, high-quality |
| Flaky Sea Salt 🧂 | ½ tsp | For finishing touch |
| Powdered Sugar 🍚 | ¼ cup | For dusting |
| Dark Chocolate Chips 🍫 | ½ cup | Optional for drizzling |
| Heavy Whipping Cream 🥛 | ¼ cup | Optional for drizzle |
The butter is the star—unsalted, high-fat for best browning. Land O'Lakes or Plugrá work perfectly, but avoid salted. Brown it in a light-colored pan so you can see the color change (golden brown, nutty aroma). Keep an eye on it—burnt butter ruins everything. The marshmallows? Kraft or Jet-Puffed are reliable, but check for expiration dates. Freshness matters here. For extra depth, toast the Rice Krispies in the same pan as the butter for 2-3 minutes before mixing.
No brown butter? Melted butter with 1 tsp brown sugar gets you close, but it won't have that same caramelized punch. Swap powdered sugar for confectioners' sugar if you're out—same thing. Running low on vanilla? Almond extract at half the amount adds a nice twist. The chocolate chips can be any kind—semi-sweet, dark, or even white—but Ghirardelli or Nestlé Toll House melt smoothly. For a boozy touch, add 1 tsp bourbon or rum to the butter while browning. (Trust me, it's worth it.)
Store leftovers in an airtight container at room temp for 3-4 days. The texture gets softer over time, so reheat in the oven at 300°F for 5-10 minutes to restore crispiness. For a showstopper, press the mixture into a greased 8x8 pan, chill, then cut into squares. Double the batch—this disappears fast. Freeze extras in portions for up to 2 months. Just let them sit at room temp for 10 minutes before serving.
Why You'll Love This Recipe
- Brown Butter Magic: The nutty, caramelized depth from browning that butter? It’s the secret weapon—no fancy ingredients, just a simple pan and 10 minutes of watching it transform into something rich and irresistible.
- Five-Ingredient Flexibility: Honestly, I’ve made this for movie nights, after-school snacks, and even as a fancy dessert for guests. Swap in chocolate chips for a twist, or add a pinch of salt to balance the sweetness—it adapts without effort.
- Zero-Fuss Leftovers: Between us, this keeps perfectly for days in an airtight container. The marshmallows stay plump, the cereal stays crisp, and I’ve reheated portions in the microwave for lazy mornings—no one ever guesses it’s just pantry staples.
- Budget Night Win: Unsalted butter and cereal? That’s it. No specialty items, no markup—just pure, satisfying indulgence for under five bucks. My college-student friends and I called it “gourmet on a shoestring” (and they weren’t wrong).
Step-by-step instructions for brown butter rice crispy treats
Here's how to transform simple ingredients into golden, nutty, caramelized perfection.
Brown the Butter to Nutty Perfection
Melt the 1 cup unsalted butter in a heavy-bottomed saucepan over medium heat. Watch closely as it begins to foam and bubble—this is when the magic happens. The butter will transform from pale yellow to a rich golden brown, releasing an incredible nutty aroma that fills your kitchen.
As it browns, you'll see small bubbles forming and the butter will take on a golden hue with tiny browned flecks. This process takes about 5-7 minutes, but don't rush it. The moment you see browned flecks and smell that deep, toasty aroma, immediately remove the pan from heat. Let the butter cool slightly—it will continue to cook from residual heat—but don't let it burn. This nutty, caramelized butter is the foundation of our flavor profile.
Combine Wet Ingredients for Maximum Flavor
While the butter cools, whisk together the 0.5 cup granulated sugar, 1 teaspoon vanilla extract, and 0.5 teaspoon flaky sea salt in a large mixing bowl. This mixture should look like wet sand—smooth and slightly sticky. Add the cooled brown butter and stir until fully combined. The butter should be warm but not hot to the touch.
Here's the thing—adding the salt at this stage ensures it's perfectly distributed throughout the mixture. The vanilla extract will infuse beautifully with the nutty brown butter, creating a complex flavor base. If you're using the 0.5 cup dark chocolate chips or 0.25 cup heavy whipping cream for drizzling, set them aside for later. They'll add luxurious texture and richness to your finished treats.
Melt Marshmallows Over Low Heat
Return the brown butter mixture to the saucepan and place it over low heat. Add the 8 ounces mini marshmallows all at once, stirring constantly with a wooden spoon or silicone spatula. The marshmallows will begin to melt almost immediately, creating a thick, glossy mixture that resembles warm caramel.
This is where patience pays off. Keep stirring until all the marshmallows are completely melted and the mixture is smooth and glossy. If you notice any unmelted bits, give it another 30 seconds of gentle heat—just enough to fully incorporate. Remove the pan from heat immediately to prevent overcooking. The mixture should coat the back of a spoon and hold its shape when dropped from a spoon.
Fold in Rice Krispies for Maximum Crunch
Working quickly, add the 6 cups Rice Krispies Cereal to the melted marshmallow mixture. Use a wooden spoon or spatula to gently fold everything together until fully coated. Be careful not to overmix—just until every cereal piece is evenly covered in the caramelized butter mixture. The cereal will absorb the liquid almost immediately, creating a thick, dough-like consistency.
This is your golden opportunity to shape the treats. Line a 9x13-inch baking pan with parchment paper or lightly grease it with butter. Press the mixture firmly and evenly into the pan, using the back of a spoon to create a smooth, even surface. For extra crispy edges, press gently along the sides of the pan to ensure even contact. The mixture should be compact but not packed down tightly—you want that signature Rice Krispy Treat texture.
Cool and Finish with Crispy Perfection
Let the treats cool completely in the pan at room temperature for at least 2 hours. This is where the magic of patience pays off—the longer they cool, the crispier they become. Once fully set, use the parchment paper to lift the treats out of the pan and cut into squares or rectangles with a sharp knife. For extra crispy edges, dip the knife in hot water between cuts.
Here's where you can really elevate your treats. Dust the top with 0.25 cup powdered sugar for a sweet, snowy finish. If you're using the optional 0.5 cup dark chocolate chips or 0.25 cup heavy whipping cream, drizzle them over the top in zigzag patterns. The chocolate adds a rich contrast to the nutty butter, while the whipped cream creates a luxurious, creamy finish. Serve immediately or store in an airtight container for up to 5 days—though they rarely last that long!
Pro Tips For Making Brown Butter Rice Crispy
- Brown Butter First: Melt the butter in a heavy-bottomed pan over medium heat until it turns golden brown and smells nutty—this takes about 5-7 minutes. If you rush it, you’ll miss that rich, toasty depth that makes this recipe taste like a gourmet dessert instead of just sweet cereal.
- Measure Marshmallows Twice: Mini marshmallows pack tightly—use a kitchen scale (about 1 cup = 120g) or spoon them into the bowl in generous scoops, then level off. I learned this the hard way when my first batch turned into a sticky, marshmallow-heavy mess because I eyeballed it.
- Watch the Heat: Once the butter is browned, immediately remove the pan from heat before adding the sugar and vanilla—this stops the butter from burning while you stir. I’ve seen people leave it on too long, and suddenly, you’re dealing with bitter, blackened butter instead of that perfect caramelized flavor.
- Mix in Stages: Add half the Rice Krispies first, stir until fully coated, then add the marshmallows and remaining cereal in batches. This ensures everything gets evenly crisped without clumping—no one wants a bowl of gluey cereal-marshmallow goo. (Yes, I’ve made that too.)
Health benefits of brown butter rice crispy
Rich Butter Benefits
Brown butter adds nutty depth and caramelized richness that transforms ordinary Rice Krispy treats into something extraordinary. The browning process creates nutty, toasty compounds that enhance the marshmallow's sweetness while adding complexity.
A single 1-cup serving of brown butter provides 1,025 calories and 114g of fat, but the flavor impact is worth every calorie—think of it as a gourmet upgrade to a classic dessert. 🧈
Whole-Grain Crunch
The Rice Krispies cereal provides fiber-rich whole grains that add satisfying crunch while contributing 3g of fiber per cup. This helps balance the treat's sweetness and keeps blood sugar levels steadier than refined sugar alone.
For extra nutrition, consider using whole-grain cereal or adding chopped nuts (like pecans or walnuts) for healthy fats and protein. 🌾
Sweet Balance
The granulated sugar and mini marshmallows deliver quick energy, but the vanilla extract and sea salt create a flavor synergy that makes the treat taste more complex than its ingredients suggest.
The salt enhances sweetness perception, while vanilla adds warmth—together, they make the dessert feel luxuriously indulgent without needing extra sugar. 💫
Protein Boost
While not a protein powerhouse, the dark chocolate chips (if used) contribute 2g of protein per 0.5 cup, along with iron and magnesium. For a more substantial protein boost, fold in 1 cup of chopped peanuts or almonds—they add 25g of protein while keeping the treat crunchy.
The heavy whipping cream (if drizzled) adds a touch of protein and fat for extra richness. 🥜
Antioxidant Support
The dark chocolate chips provide flavonoids and antioxidants, particularly if using 70% or higher cocoa content. These compounds support heart health and may improve mood. Even the marshmallows contain trace amounts of antioxidants from their gelatin base.
For maximum benefits, use high-quality, minimally processed ingredients—like organic chocolate or grass-fed butter if available. 💪
Energy & Satisfaction
This treat combines carbs, fats, and a touch of protein, making it a satisfying snack that curbs cravings. The brown butter's fat content helps slow digestion, preventing energy crashes.
For a lighter version, reduce sugar by 25% and add 1 tsp cinnamon—it enhances sweetness perception while adding metabolism-boosting spices. 🌟
Nutrition facts
Frequently asked questions
Why does brown butter make such a difference in these treats?
The browning process creates nutty, caramelized compounds that add depth beyond regular butter. These flavors enhance the marshmallow's sweetness while giving the treats a sophisticated, toasty aroma. It's what transforms a simple snack into something gourmet-worthy!
Can I use regular butter instead of brown butter?
Yes, but you'll miss the rich, toasty flavor. For similar results, melt 1 cup regular butter with 1 tablespoon brown sugar> and 1/2 teaspoon vanilla extract> to mimic the caramelized notes. The texture will be slightly less complex, but still delicious.
How do I fix clumpy marshmallow mixture?
If your marshmallow-butter mix gets lumpy, return it to low heat> and stir gently until smooth. Avoid high heat—it can burn the marshmallows. For stubborn lumps, place the pan in a larger bowl of warm water (double boiler method) to melt them evenly.
Can I make these treats ahead of time?
Prepare the mixture up to 24 hours ahead> and refrigerate in an airtight container. When ready to serve, press into a pan and let cool as directed. For extra crispiness, reheat at 300°F for 5-10 minutes> before cutting. They keep well for 5 days> at room temperature.
What's the best way to cut crispy edges?
Dip your knife in hot water> between cuts to prevent sticking. For perfect squares, press firmly through the pan. If the edges crumble, chill the treats for 10 extra minutes> in the freezer before cutting. A sharp, thin-bladed knife works best for clean lines.