
Main Courses
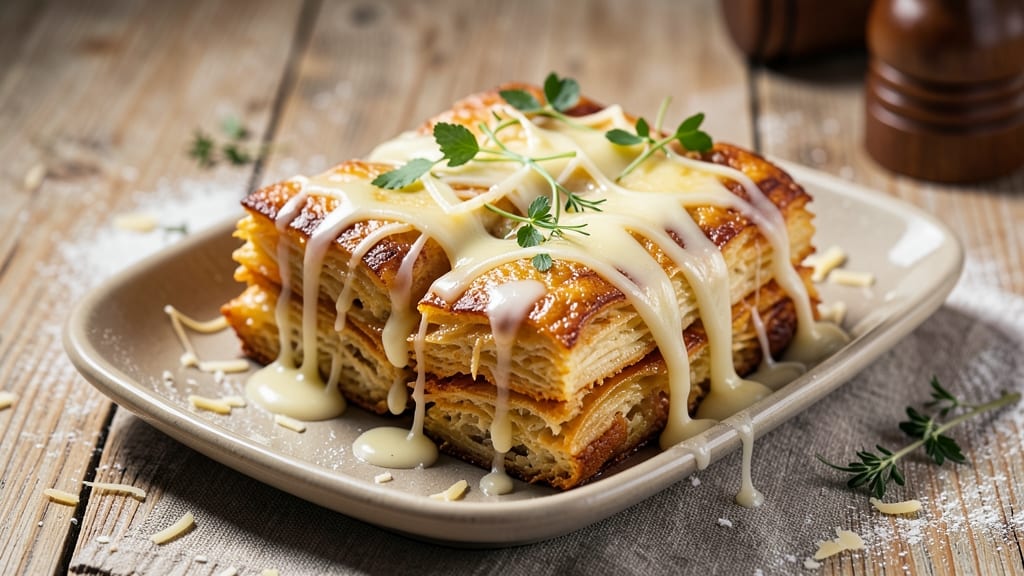
This cheesy Korean rice cake recipe delivers the perfect balance of crispy golden crust and gooey melted cheese inside—just like the ones you'd find at a Korean street food stall. 🌟 The secret lies in the dough's texture and the right cooking technique, which transforms simple ingredients into something irresistibly crunchy on the outside while keeping the center tender and cheesy.
With just a handful of ingredients—including rice flour, mozzarella, and a pinch of baking powder—you'll create fluffy, cheesy cakes that puff up beautifully when cooked.
The key is shaping them properly and cooking them in a hot pan until they develop that signature crispy exterior while the cheese melts into a creamy, stretchy center. This recipe is foolproof, whether you're making them for a snack or serving as a side dish.
Ingredients for cheesy korean rice cake
Simple ingredients transform into crispy, cheesy Korean rice cakes with golden crusts and melty centers.
| Ingredient | Amount | Notes |
|---|---|---|
| Rice Flour 🌾 | 1 ½ cups | Glutinous or regular, sifted |
| All-Purpose Flour 🌾 | ½ cup | For structure and binding |
| Shredded Mozzarella Cheese 🧀 | 1 ½ cups | Freshly shredded, low-moisture |
| Large Eggs 🥚 | 2 whole | Room temperature for best mixing |
| Milk 🥛 | ½ cup | Whole milk for creaminess |
| Baking Powder 🧂 | 1 tsp | For fluffy texture |
| Salt 🧂 | ½ tsp | Kosher or sea salt |
| Black Pepper 🌶️ | ¼ tsp | Freshly ground for flavor |
| Vegetable Oil 🫒 | 2 tbsp | For greasing pan |
| Sesame Seeds 🌰 | 2 tbsp | Optional for topping |
| Butter 🧈 | 2 tbsp | Unsalted, melted for brushing |
The rice flour is non-negotiable here—it's what creates that signature crispy exterior. Bob's Red Mill or King Arthur brands work perfectly, but if you're in an Asian market, grab glutinous rice flour for extra chewiness. The mozzarella should be freshly shredded (pre-shredded gets clumpy), and I always use a mix of low-moisture and regular mozzarella for the best melt. For the sesame seeds, Trader Joe's sells toasted ones that add a perfect crunch—no need to toast them yourself. Eggs should be room temperature for smooth mixing, and if you're in a hurry, just let them sit in warm water for 5 minutes.
No rice flour? Substitute with 1 cup all-purpose flour plus 1 tbsp cornstarch—it won't be identical, but it'll work in a pinch. Running low on mozzarella? Gruyère or sharp cheddar melts beautifully too, though the flavor will differ. The baking powder is crucial for that puffy texture—don't skip it or use baking soda instead. For the oil, any neutral oil works, but vegetable or canola are the most common. If you're feeling adventurous, add a pinch of garlic powder or onion powder to the dough for extra depth. And if you're making these for a crowd, double the recipe—they disappear fast!
The dough keeps for 2 days in the fridge, covered tightly, but it's best used fresh. Once shaped, don't refrigerate the cakes—they'll lose their crispiness. Cook immediately for that perfect golden crust. Leftover cooked cakes? Store them in an airtight container at room temperature for 3 days, or freeze for 1 month. To reheat, pop them in a 350°F oven for 5 minutes until crispy again. These reheat beautifully, so they're perfect for meal prep—just shape and store the dough, then cook as needed.
Why You'll Love This Recipe
- Here’s what sold me: that crispy exterior with a gooey mozzarella center. The rice flour gives it a light, almost cake-like texture, but the cheese? It stretches like a perfect hug in every bite. (Yes, even on a Tuesday night.)
- I’ll be real: this recipe uses pantry basics. Rice flour, all-purpose flour, eggs, milk, and cheese? You’re already stocked. Plus, they freeze like a dream, so I make a big batch and pull them out whenever I need a quick, filling snack. Zero waste, all win.
Step-by-step instructions for cheesy Korean rice cakes
Here's how to achieve that perfect crispy top and melty cheese center every time.
👨🍳 Step 1: Mix the Batter for Light and Airy Texture
In a large mixing bowl, whisk together the 1.5 cups rice flour and 0.5 cup all-purpose flour. This combination gives you the perfect balance of chewiness and structure. In a separate bowl, beat the 2 whole large eggs until frothy, then whisk in the 0.5 cup milk, 1 tsp baking powder, 0.5 tsp salt, and 0.25 tsp black pepper. Pour the wet ingredients into the dry ingredients and mix gently until just combined—you want to avoid overmixing, which can make the cakes dense.
Here's the thing—don't worry if the batter looks slightly lumpy. The rice flour creates a unique texture that shouldn't be overworked. Gradually fold in the 1.5 cups shredded mozzarella cheese until evenly distributed. The cheese should be freshly shredded and low-moisture to prevent soggy cakes. Let the batter rest for 5 minutes at room temperature while you prepare your baking pan.
🍳 Step 2: Prepare the Pan and Bake for Even Cooking
Preheat your oven to 375°F. Lightly grease a 12-cup muffin tin with 2 tbsp vegetable oil, making sure to coat each cup thoroughly. This prevents sticking and ensures crispy edges. Divide the batter evenly among the muffin cups, filling each about ¾ full. The batter should mound slightly above the cup edges—this helps create that signature crispy top.
I press down gently on the batter in each cup with a spoon to create a smooth, even surface. This prevents uneven baking and ensures the cheese melts uniformly. Bake for 18-20 minutes until the edges are golden brown and the tops look slightly puffed. Don't open the oven during baking—this can cause the cakes to collapse or develop a tough skin.
🔥 Step 3: Create the Crispy Top with Melted Butter
Once the cakes are baked, remove them from the oven and immediately brush each one with 1 tbsp melted butter (reserve the remaining 1 tbsp for later). This step is crucial for that restaurant-quality crispy top. Return the cakes to the oven and bake for an additional 2-3 minutes until the butter has caramelized slightly and the tops are deep golden brown. Watch carefully—they go from perfect to overdone quickly.
Here's where it gets fun—sprinkle 1 tbsp sesame seeds evenly over all the cakes while they're still hot. The seeds will toast quickly and add a nutty crunch that contrasts beautifully with the melty cheese. Let the cakes cool in the pan for 5 minutes before transferring to a wire rack. This resting period helps the cheese set slightly for easier handling.
🍽️ Step 4: Serve Warm for Maximum Enjoyment
These cheesy Korean rice cakes are best served warm, straight from the oven. The contrast between the crispy exterior and gooey cheese center is what makes them so irresistible. I like to serve them with a side of spicy gochujang sauce or a simple soy-vinegar dip for dipping. The cakes should hold their shape when picked up but still be soft enough to pull apart easily with your hands.
If you're making them ahead, store in an airtight container at room temperature for up to 2 days. To reheat, warm in a 350°F oven for 5-7 minutes until crispy again. The secret to perfect texture lies in the timing—don't skip that final butter brushing or the crispy top will suffer. Each bite should deliver that satisfying crunch followed by molten cheese—worth every minute of effort!
Pro Tips For Making Cheesy Korean Rice Cake
- Use Cold Milk: I learned this the hard way—adding warm or room-temperature milk to the batter makes the rice flour gummy. Grab that milk straight from the fridge, especially if you’re using whole milk, and mix it in last. The cold fat keeps the texture light and prevents a gluey mess.
- Press Cheese Firmly: Skip the lazy pressing, and actually pack that shredded mozzarella into the batter before shaping. Too much air means uneven melting, and you’ll end up with pockets of goo instead of a smooth, stretchy bite. Use your fingers or a spoon to press it in like you’re kneading dough.
- Pan Over Medium Heat: High heat sears the outside before the inside cooks, leaving you with a crispy shell and a raw center. Medium heat lets the rice cakes cook through evenly without burning. Yes, it takes a few extra minutes, but your first batch won’t end up a sad, undercooked pancake.
- Rest the Batter: Sounds weird, but it works: let the batter sit for 10 minutes after mixing. The rice flour needs time to hydrate fully, and this prevents a dense, crumbly texture. I know, I know—you’re eager to cook—but trust the process. Your future self will thank you.
Flavor customization for cheesy korean rice cake
Spicy Kick
Add 1 tbsp gochujang or ½ tsp cayenne pepper to the batter for a fiery twist. I like to mix it with the wet ingredients for even distribution—just be mindful that gochujang adds moisture, so you might need to reduce the milk slightly to ¼ cup.
For a milder heat, sprinkle 1 tsp Korean red pepper flakes on top after baking. 🌶️
Sweet Glaze
Brush the baked cakes with a mixture of 1 tbsp honey and 1 tsp soy sauce before adding sesame seeds. This caramelized glaze adds a subtle sweetness that balances the cheesy richness.
For extra decadence, drizzle with white chocolate sauce after cooling. The contrast of sweet and salty is pure magic.
Umami Boost
Incorporate 1 tbsp fish sauce or 2 tbsp soy sauce into the wet ingredients for a deeper savory flavor. I also add 1 tsp grated Parmesan cheese to the mozzarella for an extra umami punch.
For a vegetarian option, use ½ tsp nutritional yeast instead of fish sauce. The umami enhances the cheese's meltiness beautifully.
Herb Infusion
Stir in 2 tbsp chopped fresh cilantro or 1 tbsp dried thyme into the batter for a fresh herbal note. I’ve also experimented with 1 tsp garlic powder and ½ tsp onion powder for a savory depth.
Fresh herbs should be finely chopped to avoid texture issues, while dried herbs can be mixed directly into the dry ingredients.
Cheese Variations
Swap out mozzarella for sharp cheddar or Gruyère for a tangier flavor. For a creamy option, try cream cheese mixed with mozzarella—just reduce the milk to ¼ cup to prevent a runny batter.
I’ve also used Gorgonzola for a bold, blue cheese twist, but it’s an acquired taste. The cheese choice dramatically changes the flavor profile!
Crunchy Toppings
Experiment with toppings beyond sesame seeds. Try crushed potato chips for a salty crunch, toasted coconut flakes for a tropical vibe, or crumbled bacon bits for a smoky kick.
I like to sprinkle toppings after the final butter brush, just before returning the cakes to the oven for that extra crunch. 💫
Nutrition facts
Frequently asked questions
Can I make these without rice flour?
You can substitute with 1 cup all-purpose flour plus 1 tbsp cornstarch, but the texture won't be identical. Rice flour creates that signature crispy exterior and chewy bite that's hard to replicate. For the closest version, use glutinous rice flour if available—it adds extra chewiness. The cakes will still be delicious but may lack the traditional texture.
Why did my rice cakes turn out dense instead of crispy?
Overmixing the batter or skipping the 5-minute rest before baking are common culprits. Also ensure your mozzarella is low-moisture and freshly shredded—pre-shredded cheese contains anti-caking agents that make cakes soggy. Finally, check your baking powder is fresh and use medium-high heat in the oven for even cooking.
How do I store leftover cheesy rice cakes?
Store cooked cakes in an airtight container at room temperature for up to 3 days. For longer storage, freeze them for 1 month. To reheat, warm in a 350°F oven for 5-7 minutes until crispy again. Never microwave—they'll lose their crunch. The butter brushing step is key for restoring crispiness after reheating.
Can I make these without baking powder?
Technically yes, but your cakes will be flatter and denser. Baking powder creates the signature puffiness that makes these so satisfying. As a substitute, use ½ tsp baking soda plus 1 tsp vinegar mixed into the wet ingredients. For best results, keep the batter resting time at 5 minutes and bake at 375°F for 22-25 minutes to compensate for the lack of lift.
What's the best way to serve these?
Serve warm with a spicy gochujang dip or soy-vinegar sauce for dipping. They pair perfectly with kimchi or a simple green salad. For a dessert twist, drizzle with honey-soy glaze and sprinkle with crushed peanuts. The contrast of textures and flavors makes these versatile for any meal!