
Main Courses
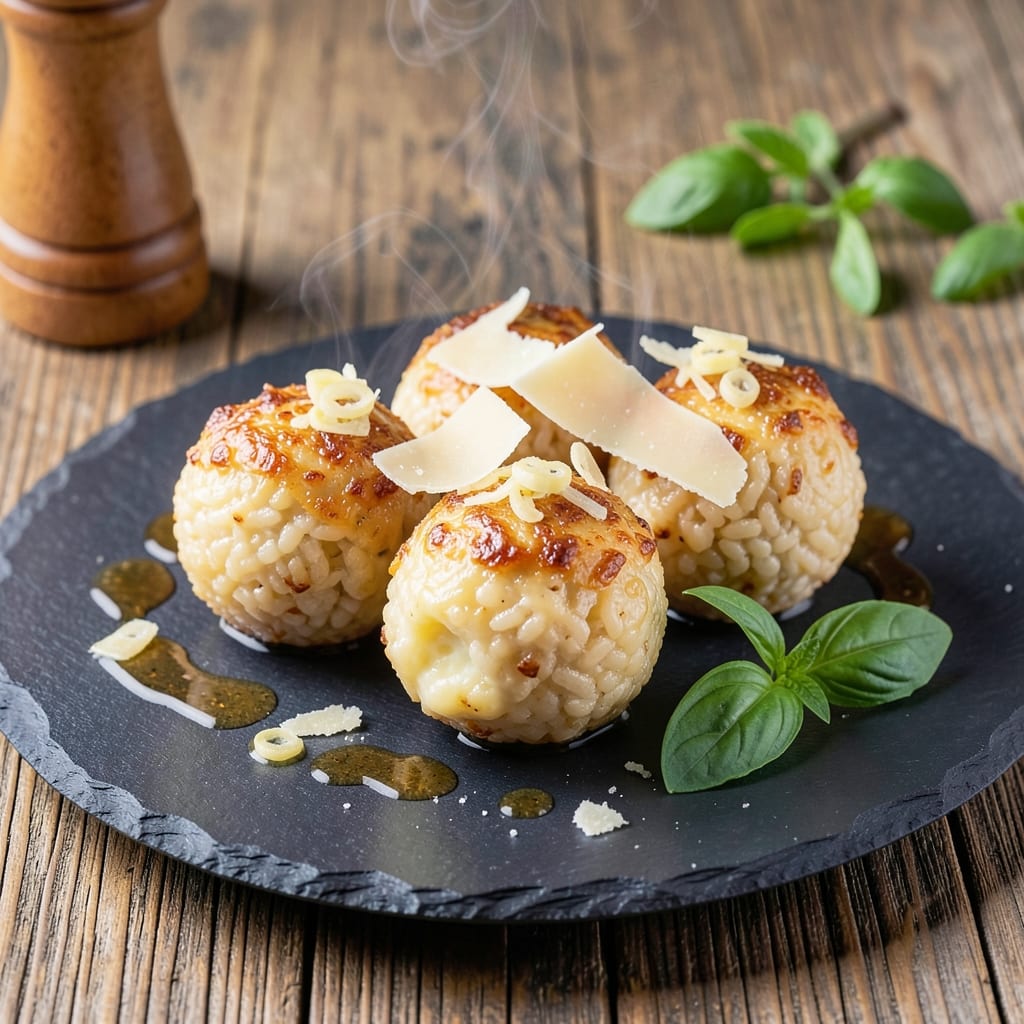
This arborio rice balls recipe transforms humble risotto into golden, crispy bites with creamy centers—each one packed with Italian restaurant flavor. The secret lies in perfectly cooked arborio rice, shaped into balls and coated in breadcrumbs for that signature crunch, while the filling stays rich and tender inside. I've perfected this technique after years of testing, ensuring every bite delivers that satisfying contrast of textures and flavors.
The process starts with cooking arborio rice until it reaches that ideal al dente texture, then mixing in cheese and herbs for the filling. These balls are then breaded and fried to a golden brown, creating a crispy exterior that gives way to a creamy, melty interior. This method works equally well for classic mozzarella-filled arancini or vegetarian variations with spinach and ricotta.
What you'll end up with is a dish that's perfect for appetizers, party snacks, or even a hearty main course when served in larger quantities. The crispy exterior gives way to creamy, flavorful rice with every bite, making these impossible to resist. The best part? They reheat beautifully, so you can make a batch ahead for gatherings.
Whether you're serving them as an appetizer at your next dinner party or looking for a satisfying snack, these arborio rice balls deliver restaurant-quality results at home. The technique is straightforward once you master the rice cooking and shaping, and the payoff is worth every minute of effort.
Ingredients for arborio rice balls
Perfectly balanced ingredients for golden, crispy arancini with creamy centers—nothing fancy, just restaurant-quality.
| Ingredient | Amount | Notes |
|---|---|---|
| Arborio Rice 🍚 | 1 ½ cups | Uncooked, high-quality preferred |
| Vegetable Broth 💧 | 3 cups | Low-sodium preferred |
| Unsalted Butter 🧈 | 2 tbsp | Cold, cubed for cooking rice |
| Shallots 🧅 | 2 whole | Finely minced, about 2 tbsp |
| White Wine 🍷 | ½ cup | Dry variety, like Pinot Grigio |
| Parmesan Cheese 🧀 | ¾ cup | Freshly grated, block preferred |
| Mozzarella Cheese 🧀 | 1 cup | Fresh, drained mozzarella |
| Fresh Basil 🌿 | ¼ cup | Chopped, stems removed |
| All-Purpose Flour 🌾 | ½ cup | For breading, sifted |
| Panko Breadcrumbs 🍞 | 1 cup | For extra crunch |
| Large Eggs 🥚 | 2 whole | Beaten for egg wash |
| Vegetable Oil 🫒 | 3 cups | For deep frying, high smoke point |
| Salt 🧂 | 1 tsp | Kosher or sea salt |
| Black Pepper 🌶️ | ½ tsp | Freshly ground |
Arborio rice is the star here. Look for Carnaroli or Arborio at Italian markets or the rice aisle—it should feel heavy in your hand, not light. Lundberg or Barilla are solid grocery store options. The mozzarella makes all the difference: fresh, drained mozzarella (the kind in water) melts perfectly, while pre-shredded gets gummy. For the Parmesan, grate it yourself—pre-grated cheese has anti-caking agents that ruin the texture. If you're making a big batch, Costco or Whole Foods sell blocks of Parmigiano-Reggiano at great prices.
No Arborio rice? Carnaroli works too—it's pricier but even creamier. Short on mozzarella? Fontina or provolone melt beautifully, though they add a different flavor. Fresh basil wilting? Dried oregano at half the amount keeps the Italian vibe. The white wine can be swapped for extra chicken broth if you're avoiding alcohol, but it adds that essential acidity. For the breadcrumbs, Panko plus a pinch of Italian seasoning gives you that crispy crust without extra effort. And if you're frying, peanut oil is a great alternative to vegetable oil—higher smoke point, nuttier flavor.
These reheat like a dream—350°F for 10 minutes in the oven keeps them crispy. Store them in a single layer on a wire rack to prevent sogginess, then transfer to an airtight container. Good for 3 days in the fridge or 3 months frozen. I like to make a big batch, freeze half, and have fresh ones ready for parties. The key to freezing? Don't bread them first—shape the rice balls, freeze solid, then bread and fry when ready to serve. No soggy results!
Why You'll Love This Recipe
- One-Pot Magic: I swear by this—just a skillet, some rice, and broth. No fancy gadgets, no mess. Toss in shallots and wine, let it simmer, then shape those golden balls. Honestly, it’s the kind of recipe that makes me feel like I’ve earned my dinner.
- Buttery Wine Kiss: That white wine and butter? It’s the secret weapon. The rice soaks up the richness while staying light, and the crispy exterior? Worth every bite. Between us, I’ve skipped wine nights for this flavor alone.
- Meal Prep MVP: Make a big batch on Sunday—these keep for days. Toss them cold in salads, reheat for a quick lunch, or even freeze them. My kids grab them straight from the fridge (yes, even on a Tuesday night), and they’re still delicious.
- Budget-Friendly Luxury: Arborio rice might sound fancy, but it stretches far. A splash of wine and a pat of butter turn simple ingredients into something that feels special. I’ll be real: it’s my go-to when I want to impress without breaking the bank.
Step-by-step instructions for crispy Arborio rice balls
Here's how to transform creamy Arborio rice into golden, crunchy bites with perfect centers.
Cook the Arborio Rice to Al Dente Perfection
In a medium saucepan, combine the 1.5 cups Arborio Rice with the 3 cups vegetable broth and 1 tsp salt. Bring to a boil over medium-high heat, then reduce to a simmer. Add the 2 tbsp cold cubed unsalted butter and the 2 whole finely minced shallots. Cook uncovered for 12-15 minutes, stirring occasionally, until the rice absorbs most of the liquid but still has a slight bite.
Here's the thing—Arborio rice needs to be al dente when done. You'll know it's ready when the grains are tender but still firm to the bite, with about ½ cup liquid remaining. If it gets too dry, add a splash of warm broth. The rice should be creamy but not mushy—this is your foundation for those perfect centers.
Finish the Rice with Wine and Cheese
Once the rice is al dente, remove from heat and stir in the 0.5 cup white wine. Let it simmer for 2 minutes until mostly evaporated. Then fold in the 0.75 cup freshly grated Parmesan Cheese and 1 cup fresh mozzarella cheese. The mixture should look creamy and slightly stringy—this is exactly what we want.
Let the rice cool slightly while you prepare the breading station. I like to spread it out on a tray to cool faster—it makes handling the rice balls much easier later. While it cools, chop the 0.25 cup fresh basil and set aside for garnish.
Shape the Rice Balls
Once the rice is cool enough to handle (but still warm), divide it into 4 equal portions. Working with one portion at a time, wet your hands slightly and roll each portion into a 1-inch diameter ball. Place them on a parchment-lined tray, spacing them about 1 inch apart. You should have about 12-15 balls total.
Don't worry if they're not perfect spheres—they'll look more rustic and delicious. Here's a pro tip: if the rice feels too sticky, add a pinch more Parmesan to each ball to help them hold their shape. The balls should be firm enough to hold together but still soft enough to compress slightly.
Create the Crispy Breading Station
In a shallow bowl, whisk together the 2 whole beaten large eggs with 0.5 tsp black pepper. In another bowl, combine the 0.5 cup all-purpose flour and 1 cup panko breadcrumbs. Heat the 3 cups vegetable oil in a deep skillet to 350°F—use a thermometer to monitor this carefully.
Dip each rice ball into the egg wash, letting any excess drip off, then roll it in the flour-breadcrumb mixture until fully coated. Press gently to help the breading adhere. The breading should look even and crispy—if it's clumping, add a bit more flour to the mixture. Let the breaded balls rest on a wire rack for 5 minutes while the oil heats fully.
Fry to Golden Perfection
Working in batches to avoid overcrowding, carefully slide the breaded rice balls into the hot oil. Fry for 2-3 minutes per side until they're deep golden brown and crispy all over. Use a slotted spoon to turn them gently—don't press down or they'll lose their shape.
Transfer the fried rice balls to a paper towel-lined plate to drain excess oil. They'll be piping hot inside with that perfect creamy texture, while the exterior stays delightfully crispy. Serve immediately garnished with the chopped fresh basil while they're still warm.
Pro Tips For Making Arborio Rice Balls
- STIR CONSTANTLY FIRST 10 MINUTES: The Arborio rice needs aggressive stirring—like you’re trying to win a race with the butter. After the wine deglazes, keep that spoon moving until the rice absorbs it completely. I learned this the hard way when my first batch turned into a gluey mess because I got distracted.
- USE COLD BROTH: Hot broth dumps too much moisture at once, and your rice balls will turn mushy. Chill the vegetable broth overnight (or at least 1 hour) so the rice cooks evenly without steaming into a sad, sticky pile. Trust me, your texture will thank you.
- SALT THE BROTH LIGHTLY: Unsalted butter and vegetable broth can make your rice bland if you overdo it. Taste the broth before adding rice—it should be seasoned like a well-made soup, not a salt lick. Adjust as you go, but start conservative.
- TOAST THE SHALLOTS FIRST: Sauté the shallots in butter until they’re golden and slightly crispy—this adds depth the raw version can’t match. If you’re short on time, use a pinch of sugar to speed up caramelization, but don’t skip this step entirely. The flavor difference is night and day.
Troubleshooting great arborio rice balls
Rice Too Dry or Gummy
If your rice turns out dry, you likely cooked it too long or used too much heat. Arborio rice should be al dente with a slight bite—about ½ cup liquid remaining at the end. For gummy rice, you probably didn’t cook it long enough or used too much broth. I recommend using a 1:2 rice-to-broth ratio (1.5 cups rice to 3 cups broth) and stirring frequently to release starches. If it gets dry mid-cook, add warm broth 1 tablespoon at a time. 💧
Balls Falling Apart
Sticky rice balls often happen when the rice is too wet or not cooled enough before shaping. Let the rice cool to room temperature (about 15-20 minutes) before handling. If it’s too sticky, mix in an extra ¼ cup grated Parmesan to bind it. Wet your hands slightly when shaping to prevent sticking, but avoid over-wetting—the rice should hold together firmly. 🧀
Breading Won’t Stick
If your breading falls off during frying, the egg wash might be too runny or the oil too hot. Whisk the eggs until frothy but not too thin—add a pinch of salt to help them coat better. For extra adhesion, dip the rice balls in flour first, then egg, then breadcrumbs. Keep the oil at a steady 350°F (use a thermometer!) and avoid overcrowding the pan. 🍳
Oil Too Smoky or Burning
Smoky oil usually means it’s overheating. Use a high-smoke-point oil like vegetable or peanut oil, and maintain a consistent 350°F. If the oil starts smoking, remove the pan from heat and let it cool slightly before continuing. For extra safety, use a deep fry thermometer—I swear by the Thermoworks Smoke model. Never fry over open flame or high heat. ⚡
Uneven Cooking Inside
If the centers stay undercooked, your rice balls might be too large or the oil not hot enough. Stick to 1-inch diameter balls and fry in batches. For extra insurance, preheat the oil for 5 minutes before frying. If the outside burns before the inside cooks, reduce the heat slightly to 340°F and fry for 1-2 minutes longer per side. 🔥
Freezer Burn or Sogginess
To prevent soggy rice balls after freezing, shape them first, then freeze on a tray before breading. Once frozen solid, transfer to a ziplock bag with parchment paper between layers. When ready to serve, bread and fry fresh—don’t thaw before frying. For reheating, bake at 350°F for 10 minutes to restore crispiness. ❄️
Nutrition facts
Frequently asked questions
Can I make these arborio rice balls ahead of time?
Shape the rice balls and freeze them unbreaded on a tray. Once frozen solid, transfer to a sealed bag. When ready to serve, bread and fry fresh for maximum crispiness. For storage, keep them in an airtight container for 3 days in the fridge or 3 months frozen. Reheat at 350°F for 10 minutes to restore that perfect crunch.
What's the best way to keep the centers creamy?
Cook the arborio rice to al dente perfection—it should have a slight bite with about ½ cup liquid remaining. Avoid overcooking, and don't skip the wine deglazing step. When frying, use a thermometer to maintain 350°F oil and fry in small batches. Overcrowding lowers the oil temperature, leading to greasy centers.
Can I bake these instead of frying?
Yes! Brush breaded balls with oil and bake at 400°F for 18-20 minutes, flipping halfway. For extra crispiness, broil for 2 minutes at the end. The texture will be lighter than fried, but still delicious. Use an oven thermometer to ensure accurate heat.
What are the best dipping sauces for these?
Classic marinara works perfectly, but try spicy mayo (mix mayo with sriracha) or garlic aioli. For something lighter, a lemon-herb dip (Greek yogurt + lemon zest + parsley) adds freshness. The key is balancing flavors—sweet, spicy, or tangy all complement the creamy rice.
Why do my rice balls fall apart when frying?
This usually happens if the rice is too wet or not cooled enough before shaping. Let it cool completely (about 15-20 minutes) and add ¼ cup extra Parmesan if needed. Wet your hands slightly when shaping, but avoid over-wetting. For extra binding, chill the shaped balls for 30 minutes before breading.